
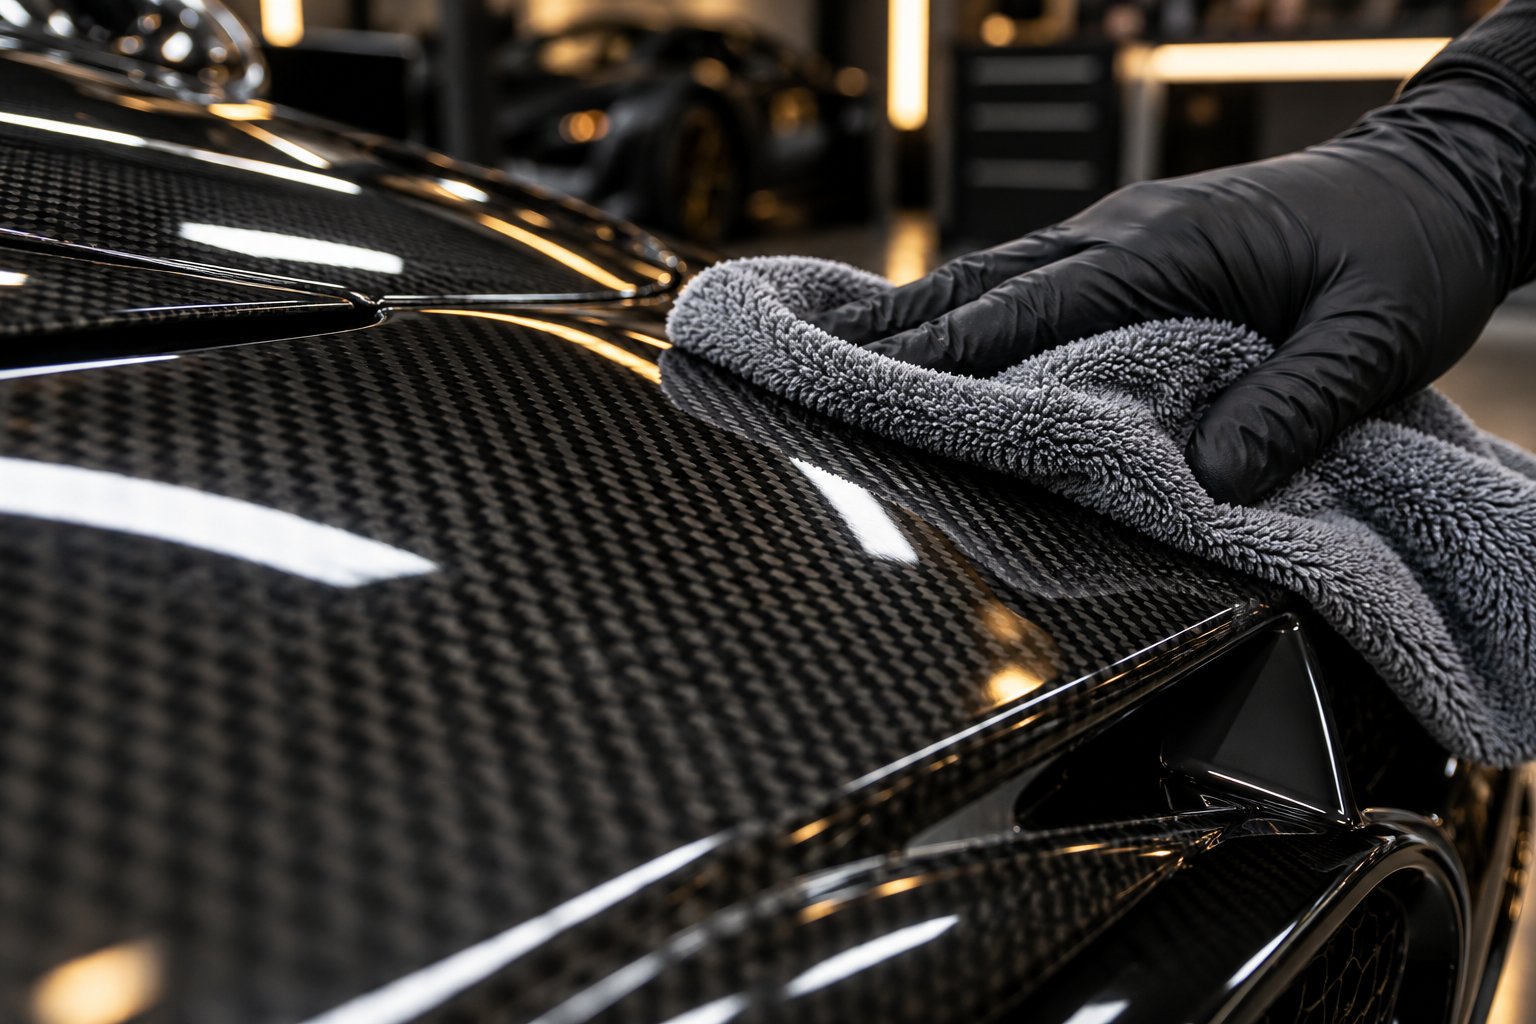
Identify Your Carbon Fiber Finish Before You Touch It
Imagine grabbing a bottle of carbon fiber polish, applying it to your brand-new spoiler, and watching the satin texture turn into a blotchy, uneven mess. That scenario plays out more often than you'd think - and it happens because most people skip the single most critical step in learning how to clean carbon fiber: identifying the finish type first.
Not all carbon fiber surfaces are created equal. The finish applied to the weave determines which products are safe, how much pressure you can use, and whether polishing carbon fiber is even an option. Get this wrong, and the damage is permanent. Get it right, and every step that follows becomes straightforward.
Clear-Coated vs. Matte vs. Raw Carbon Fiber
Four primary finish types cover the vast majority of carbon fiber parts you'll encounter on vehicles, motorcycles, and accessories. Each one looks and feels distinctly different when you know what to check for:
- Clear-Coated (Glossy): The most common finish on automotive panels like hoods, spoilers, and mirror caps. It reflects light sharply and feels glassy smooth to the touch. You'll see the carbon weave beneath a visible layer of transparent coating, giving it deep visual depth.
- Matte / Satin: Features a flat, non-reflective sheen without the mirror-like gloss. Running your fingers across it, you'll notice a slightly softer feel compared to glossy clear coat. This finish is popular on interior trim and select aftermarket body components.
- Raw (Uncoated Weave): Shows the exposed carbon fiber texture directly. It feels slightly rough or textured under your fingertips, and light scatters across the surface rather than reflecting cleanly. Raw pieces lack a protective resin topcoat, leaving the weave vulnerable to chemical exposure.
- Gel-Coated: Appears uniformly smooth - almost plastic-like - without the visible weave depth you see on clear-coated parts. Gel coat is thicker and more opaque, commonly found on marine and industrial carbon fiber components.
A quick two-second test makes identification easy. Hold the part under a bright light source. If you see a crisp reflection of the light, you're dealing with clear coat. A soft, diffused glow points to matte. Visible weave texture you can feel with a fingernail means raw carbon fiber. And a thick, uniform surface hiding the weave pattern beneath it signals gel coat.
Why Finish Type Dictates Every Cleaning Decision
Here's where the stakes become real. Applying an abrasive carbon fiber polish to a matte finish permanently destroys the satin texture, replacing it with uneven glossy patches that can't be reversed without a complete refinish. Using acetone or harsh solvents on raw carbon fiber dissolves the epoxy resin matrix holding the weave together, compromising both appearance and structural integrity. Even something as simple as how to polish carbon fiber changes dramatically based on the surface - clear-coated pieces respond well to ultra-fine compounds, while matte and raw finishes should never see a polishing pad at all.
Product selection, hand pressure, towel type, drying method - every single variable shifts depending on which of the four finishes you're working with. Quality carbon fiber parts, like those finished with certified UV-resistant automotive clear coat, respond predictably to proper care. But even premium finishes suffer when treated with the wrong approach.
Throughout this guide, you'll see specific callouts wherever techniques diverge by finish type. Think of this identification step as your roadmap - every cleaning decision you make from here depends on it. And the very first decision starts with knowing exactly which tools and products belong in your arsenal.
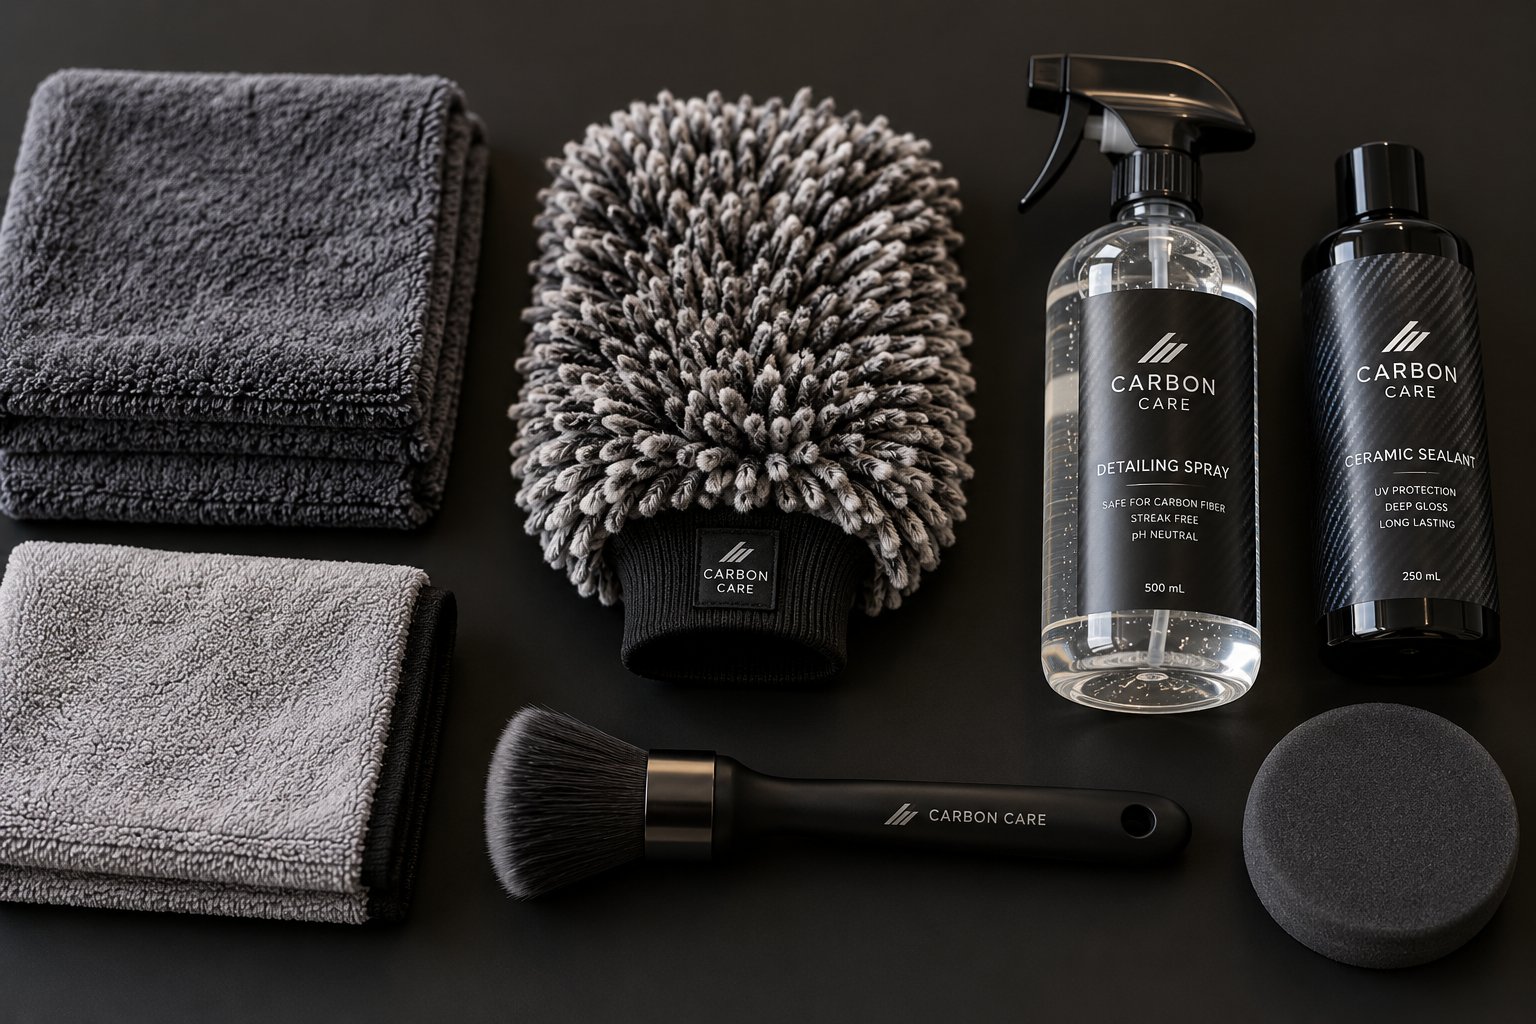
Step 1 – Gather the Right Cleaning Tools and Supplies
You've identified your finish type. That knowledge is only useful if the products sitting on your shelf are actually safe for carbon fiber. The wrong towel, the wrong soap, or a polish with hidden abrasives can undo everything in a single wipe - and most general-purpose automotive products fall squarely into that danger zone.
Building a proper carbon fiber cleaner toolkit isn't about buying the most expensive products on the shelf. It's about understanding exactly why each item earns its place in your kit and which finish types it applies to. Every tool listed below serves a specific purpose: protecting the resin layer, preserving the clear coat, and keeping that distinctive weave looking razor-sharp.
Essential Cleaning Supplies for Every Finish Type
Think of your toolkit in four functional categories - cleaning, polishing, protection, and drying. Each category contains items selected specifically because they won't compromise the softer resins and thinner coatings found on carbon fiber surfaces.
| Category | Item | Purpose | Applicable Finish Types |
|---|---|---|---|
| Cleaning | pH-neutral automotive soap | Safely lifts dirt and oils without attacking epoxy resin or clear coat | All finish types |
| Cleaning | Dedicated carbon fiber cleaner spray | Dissolves contaminants formulated specifically for composite surfaces | All finish types |
| Cleaning | Foam or microfiber wash mitt | Provides gentle contact that traps particles away from the surface | All finish types |
| Cleaning | Soft-bristle detailing brushes | Reaches into textured weave patterns and recessed panel edges | Raw, matte, and textured gel-coated surfaces |
| Cleaning | Spray bottles for dilution | Controls product concentration to prevent over-application | All finish types |
| Cleaning | Isopropyl alcohol (low concentration) | Spot-cleans adhesive residue and stubborn marks when diluted | Clear-coated and gel-coated only |
| Polishing | Ultra-fine carbon fiber-safe polish | Removes light haze and swirl marks without cutting through soft clear coat | Clear-coated only |
| Polishing | Soft foam polishing pads | Distributes polish evenly with minimal heat generation | Clear-coated only |
| Protection | UV-protective sealant or ceramic coating | Shields resin from ultraviolet degradation, oxidation, and environmental damage | All finish types (use matte-specific formulas for matte finishes) |
| Drying | High-GSM microfiber drying towels (300+ GSM) | Absorbs water without dragging contaminants across the surface | All finish types |
| Drying | Clean, dry microfiber buffing cloths | Removes polish and sealant residue streak-free | All finish types |
A few details deserve extra attention. When choosing microfiber towels, the GSM rating matters significantly. GSM stands for grams per square meter - higher numbers mean denser, softer fibers that are less likely to inflict micro-scratches. For carbon fiber work, towels rated at 300 GSM or above offer the safest contact, while ultra-plush options in the 600-1200 GSM range are ideal for drying and buffing tasks. Silk-banded or edgeless towels eliminate the risk of edge-induced scratching entirely, which is especially important on glossy clear-coated panels where every contact point leaves evidence.
For wash mitts, microfiber or natural lambswool options work well. Avoid synthetic sponges - their flat surfaces trap grit against the panel instead of pulling debris into the mitt's fibers. A quality foam mitt with deep pile lifts particles safely away from the finish during every pass.
What to Look for in Carbon Fiber-Safe Products
Here's the critical detail most car owners miss: carbon fiber clear coats are softer and thinner than standard automotive paint clear coats. What works perfectly on your car's metal body panels can be far too aggressive for composite surfaces. This distinction makes product selection genuinely important rather than just a suggestion.
When evaluating any product before it touches your carbon fiber, check for these four criteria:
- pH neutrality: Acidic or alkaline cleaners attack the epoxy resin that bonds carbon fibers together. A pH-neutral soap cleans effectively without chemically degrading the composite structure underneath.
- Zero abrasive particles: Many all-purpose automotive cleaners and household sprays contain micro-abrasives designed for tougher surfaces. On carbon fiber, these particles act like fine sandpaper, grinding through soft clear coats and leaving permanent haze. If you plan to polish carbon fiber, only ultra-fine finishing compounds are safe - and only on clear-coated surfaces.
- Solvent-free formulas: Acetone, MEK, and other aggressive solvents dissolve the epoxy resin matrix holding the carbon weave together. Even products marketed for automotive use can contain solvents that are safe on metal paint but destructive on composites. Read ingredient lists carefully.
- No silicone-based additives: Silicone dressings - common in tire shines and interior detailing sprays - leave a greasy film on carbon fiber that attracts dust and interferes with sealant adhesion. If you're applying UV protection later, silicone contamination prevents proper bonding.
Standard household cleaners like glass sprays, multi-surface wipes, and kitchen degreasers are especially dangerous. They often combine ammonia, alcohol at high concentrations, and abrasive agents in a single formula - a triple threat to carbon fiber's resin layer and finish. Carbon thread wipes designed for industrial composite cleaning are purpose-built alternatives, though even these vary in formulation. Always verify compatibility with your specific finish type.
A practical rule of thumb: if the product label doesn't specifically mention safe use on composites, clear coats, or delicate automotive surfaces, keep it away from your carbon fiber. The upfront cost of buying the right carbon fiber cleaner and dedicated supplies is negligible compared to the cost of refinishing a damaged panel. With your toolkit assembled and every product vetted for safety, the actual cleaning process can begin - starting with the step most people skip entirely: removing loose debris before any liquid ever touches the surface.
Step 2 – Remove Loose Debris and Inspect the Surface
Here's a scenario that plays out constantly: someone grabs a microfiber cloth, sprays on some cleaner, and starts wiping their carbon fiber hood - only to discover fine scratches etched across the surface afterward. The cleaner didn't cause the damage. The invisible layer of dust, grit, and carbon fiber dust sitting on the panel did. Every loose particle trapped between the cloth and the surface acts like fine-grit sandpaper, grinding micro-scratches into the clear coat or finish with each pass. How do you clean carbon fiber without inflicting this kind of damage? You remove every loose contaminant before anything else touches the surface.
This pre-cleaning phase is the most skipped step in carbon fiber care - and it's the one responsible for more preventable damage than any other. A few minutes of deliberate debris removal protects the finish far more effectively than any expensive product applied over dirty surfaces.
Blow Off and Brush Away Loose Particles First
Start with compressed air. A can of compressed air or a small electric blower dislodges dust, sand, and fine particulate from the weave pattern, panel edges, and recessed areas where debris loves to collect. Hold the nozzle at least six to eight inches from the surface and angle it at roughly 30 to 45 degrees - never blast straight down into the weave, as excessive force at close range can drive particles deeper into textured surfaces or chip fragile edges on raw carbon fiber.
Work in one direction consistently. Imagine sweeping crumbs off a table - you push everything toward the edge and off. The same principle applies here. Move the airstream from the center of the panel outward, pushing debris off the surface entirely rather than just redistributing it to another spot. For flat panels like hoods and trunk lids, work from top to bottom. For vertical surfaces like side skirts, sweep from top to bottom as well, letting gravity assist.
For textured or recessed carbon fiber surfaces - think exposed weave patterns, vented panels, or trim pieces with complex geometry - switch to a soft-bristle detailing brush after the initial air blast. The bristles reach into the tiny grooves of the weave pattern where compressed air alone can't fully dislodge embedded particles. Use the same principle: light, single-direction strokes that lift and sweep debris away. Avoid pressing down hard or scrubbing back and forth, which just grinds trapped grit into the finish.
Once you've cleared the loose particulate with air and brush, make a final pass with a clean, dry microfiber cloth. Use straight, overlapping strokes that follow the direction of the carbon weave - never circular motions. Circular wiping traps particles under the cloth and drags them in arcs across the surface, creating the classic swirl marks that haunt glossy clear-coated panels. Straight-line passes give each particle one path off the surface instead of grinding it repeatedly into the finish.
Pre-Cleaning Assessment for Stains and Damage
With the surface free of loose debris, you're looking at the actual condition of your carbon fiber for the first time. This is the moment to inspect - carefully and under good lighting. Move the panel under a bright, direct light source, or bring a detailing light close to the surface at a low angle. Low-angle lighting reveals imperfections that overhead lighting hides completely, exposing issues you'd otherwise seal beneath a wash or sealant.
Scan the entire surface systematically and look for these specific conditions:
- Yellowing from UV exposure: A warm amber or yellow tint in the resin beneath the clear coat, signaling that ultraviolet radiation has begun degrading the epoxy matrix. As UV degradation research confirms, this process - called photo-oxidation - breaks the polymer's molecular chains and can become irreversible once it penetrates deep into the resin.
- White haze indicating oxidation: A faint cloudiness or milky appearance that dulls the depth of the carbon weave. Surface-level oxidation may respond to carbon polishing and resealing, but widespread haze can indicate the clear coat itself is failing.
- Sticky residue spots: Adhesive remnants from badges, tape, or protective film that require targeted removal with specific products rather than general washing.
- Tar or bug splatter: Dark, hardened spots that have bonded to the surface and won't lift with soap and water alone. These need dedicated removal agents covered in a later step.
- Water spot etching: Mineral deposits from dried water droplets that have chemically etched into the clear coat, leaving visible rings or white marks. Mild cases clean up with acidic spot removers, but deep etching may require professional correction.
- Chips or cracks in the clear coat: Small areas where the protective coating has chipped away, exposing the resin or weave beneath. These breach points allow moisture, UV rays, and contaminants direct access to the vulnerable composite structure.
- Exposed or fraying weave: Visible fiber strands lifting from the surface, indicating damage that goes beyond cosmetic concerns and into structural territory.
Why does this inspection matter right now, before washing? Because each issue on that list requires a different treatment approach. Yellowing and oxidation call for polishing and UV protection steps. Tar and bug splatter need specialized contaminant removal. Chips and exposed weave signal that professional refinishing may be necessary. Identifying everything at this stage creates a clear action plan - you'll know exactly which of the upcoming steps apply to your specific situation and which ones you can skip.
A surface that passes inspection with nothing more than light dust? That's the ideal scenario, and a straightforward wash is all you need. A surface showing yellowing, embedded contaminants, or clear coat damage? You've just saved yourself from making those problems worse by washing blindly over them. Either way, the panel is now free of loose grit, fully assessed, and genuinely ready for safe contact with soap and water.
Step 3 – Wash Carbon Fiber Gently and Safely
Your surface is debris-free and fully inspected. Here's where most people relax - and that's exactly when damage happens. The actual wash is the highest-contact phase of the entire process, meaning every variable matters: water temperature, hand pressure, wash direction, bucket setup, and even how you move the mitt across the panel. Get any one of these wrong, and you're grinding contaminants into the very finish you're trying to protect.
The good news? A methodical approach makes safe washing almost foolproof. The technique below adapts the professional-grade two-bucket wash method specifically for carbon fiber's softer clear coats and more vulnerable resin layers - giving you the scratch-free results that detailers achieve without any guesswork.
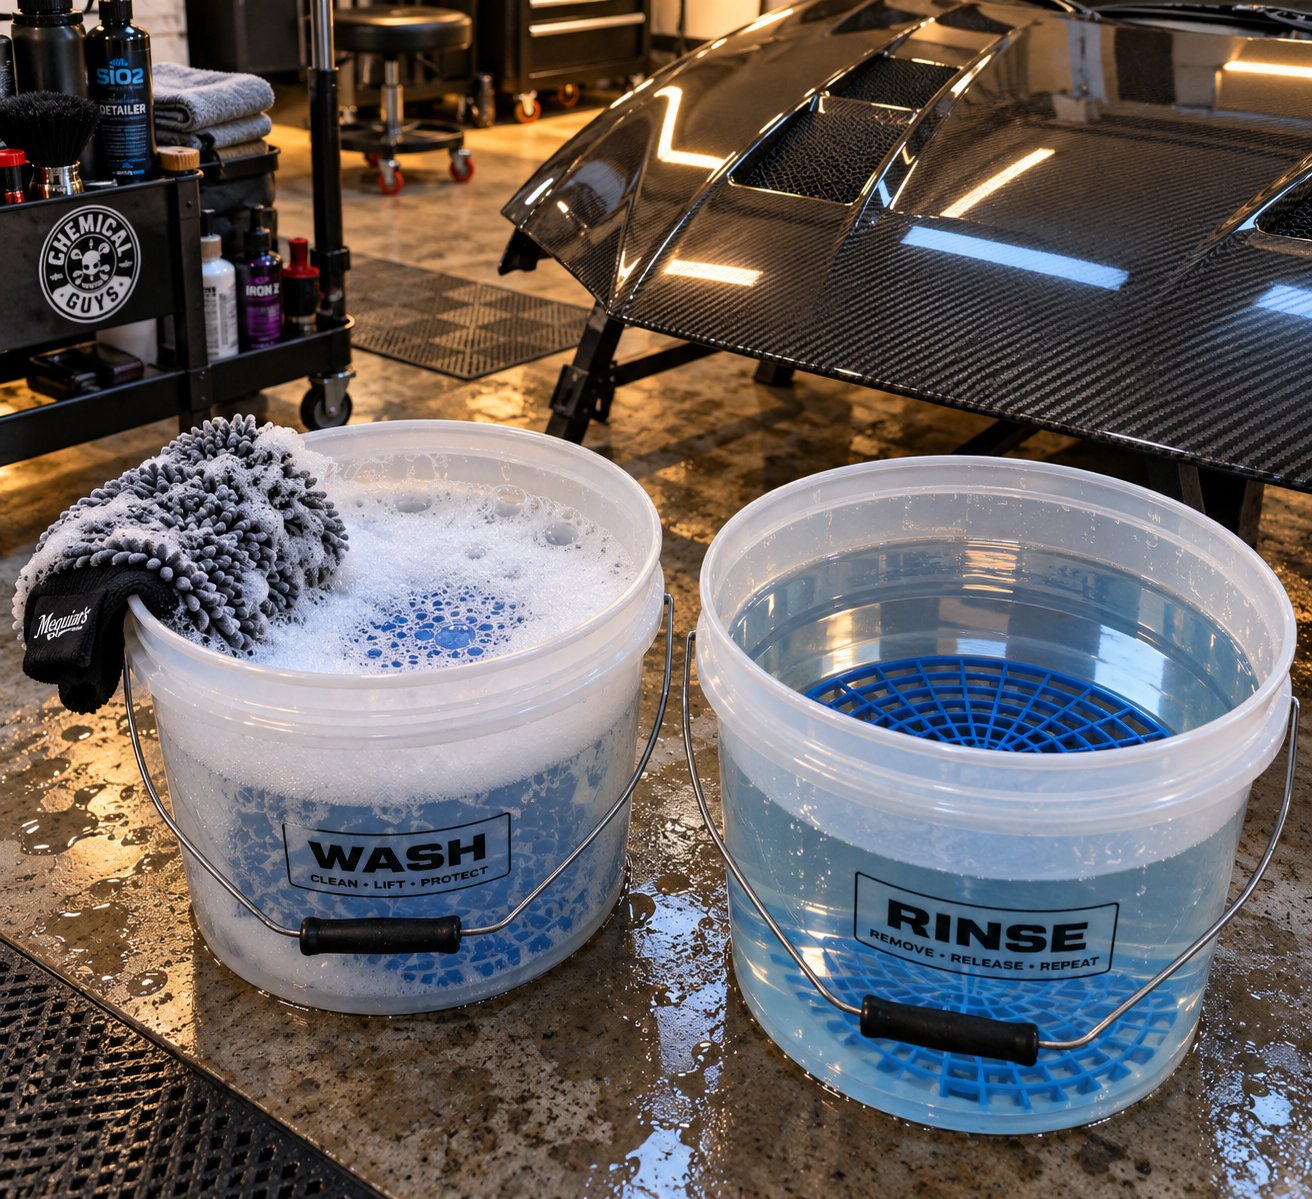
The Two-Bucket Method Adapted for Carbon Fiber
Picture this: you drag your wash mitt across a dusty carbon fiber panel, dip the mitt into a single bucket of soapy water, and go back for another pass. All the grit you just picked up is now floating in your wash bucket, clinging back onto the mitt, and heading right back onto the surface. That cycle is responsible for over 95% of the swirl marks car owners battle, and carbon fiber's softer clear coat shows every single one of them.
The two-bucket system breaks that cycle completely. Here's how to set it up for carbon fiber:
- Bucket one - rinse: Fill with clean, lukewarm water only. Drop a grit guard into the bottom. This bucket's sole job is receiving your dirty mitt after each pass, letting debris fall below the grit guard where it can't reattach to the mitt fibers.
- Bucket two - wash: Fill with lukewarm water and add one to three ounces of pH-neutral automotive soap. Place a second grit guard in this bucket as well. This is your clean soap supply - the mitt enters here only after it's been rinsed.
Water temperature deserves specific attention. Lukewarm water - roughly 70 to 90 degrees Fahrenheit - dissolves soap effectively and lifts contaminants without risk. Hot water is a genuine threat to carbon fiber. Excessive heat softens clear coat, making it more susceptible to scratching during the wash itself. It can also affect the epoxy resin on raw or thinly coated pieces. If the water feels uncomfortably warm on your wrist, it's too hot for carbon fiber.
With both buckets ready, follow this sequence for each section of the panel:
- Pre-rinse the surface: Wet the carbon fiber thoroughly with low-pressure water from a hose. If using a pressure washer, keep it at a minimum distance of two feet from the surface and dial the PSI down to 1,200 or below. High-pressure spray at close range can chip clear coat edges, force water under panel seams, and even damage exposed weave on raw carbon fiber.
- Load the mitt: Submerge your microfiber or foam wash mitt into the soap bucket and let it absorb a generous amount of sudsy water. The soap provides lubrication between the mitt and the surface - more soap means less friction.
- Wash with the weave: Place the mitt on the surface and move it in straight, overlapping lines that follow the direction of the carbon fiber weave pattern. Never use circular motions. Circular wiping traps grit under the mitt and drags it in arcs, creating swirl patterns that are especially visible on glossy clear-coated panels. Straight-line passes give debris a single exit path off the surface.
- Use light hand pressure only: Let the weight of the mitt and the soap do the work. Pressing down forces trapped particles into the finish. Carbon fiber panels, especially thin aftermarket pieces, can also flex under pressure - and flexing a wet, soapy surface with grit present is a recipe for deep scratches.
- Rinse the mitt: After each pass across a section, drop the mitt into the rinse bucket first. Rub it gently against the grit guard to dislodge trapped particles, then wring the mitt out over the ground - away from both buckets and the car. This purges the majority of contaminants before the mitt touches clean soap water again.
- Reload and repeat: Place the clean, wrung-out mitt back into the soap bucket, let it soak up fresh suds, and move to the next section. Continue until the entire surface is washed.
One often-overlooked detail from professional carbon fiber detailing guidance: wash your carbon fiber components first, before the rest of the vehicle. These parts - splitters, spoilers, mirror caps, side skirts - sit in high-debris zones and collect the heaviest contamination. Washing them while your mitt and bucket water are at their cleanest reduces the risk of cross-contamination from dirtier panels.
Also, avoid washing in direct sunlight. Carbon fiber absorbs heat rapidly, and a hot surface causes soap to dry before you can rinse it off. Dried soap leaves mineral-rich residue and streaks that bond to the clear coat, creating the exact water spots and film you're trying to prevent. Wash in shade, in a garage, or during cooler hours of the day.
Carbon fiber clear coats are softer than standard automotive paint clear coats, so every contact point - your mitt, your towel, your pressure - must be softer and lighter than what most car owners are used to.
Safe Drying Technique to Prevent Swirl Marks
You've just spent careful minutes washing without introducing a single scratch. Dragging a towel across the wet surface in long, aggressive strokes can undo all of that work in seconds. Drying is the second-highest-risk contact phase, and it demands the same deliberate approach as the wash itself.
The safest method for clear-coated and glossy carbon fiber is the pat-dry and blot technique. Lay a clean, high-GSM microfiber drying towel (350 GSM or above) flat against a section of the wet surface. Press down gently and lift straight up - no dragging, no wiping. The towel absorbs water on contact without moving across the finish. Reposition and repeat, working section by section until the surface is dry. For larger panels, you can use a very gentle single-direction pull, but only with a freshly clean, plush towel and zero downward pressure beyond the towel's own weight.
Carbon cleaning cloths and drying towels pick up any remaining microscopic particles during this step, so using a dirty or previously used towel introduces the exact grit you just spent two buckets eliminating. Always use a fresh, dedicated towel for drying carbon fiber - never the same one you used on painted metal panels or wheels.
What about air drying? For raw carbon fiber, it's actually the preferred approach. No contact means no risk - and raw weave doesn't show water spots the way glossy finishes do. A handheld blower or compressed air also works brilliantly for blowing water out of tight seams, weave textures, and panel edges where towels can't reach. For clear-coated and gloss finishes, though, air drying alone invites water spots. Mineral deposits in tap water dry into visible rings on reflective surfaces, leaving marks that require a separate correction step. The blot method avoids this entirely.
Avoid terry cloths, chamois, and paper towels entirely. Terry cloth fibers are stiff enough to micro-scratch soft clear coats. Chamois can trap and drag grit. Paper towels are abrasive by nature. Carbon cleaning cloths made from premium microfiber are the only drying material that belongs on a carbon fiber surface.
With the panel washed and dried without a single new mark, you're looking at a clean baseline. Any remaining blemishes - tar spots, adhesive residue, water spot etching, or yellowing - are now fully visible and isolated from general dirt. These stubborn contaminants need targeted removal techniques that go well beyond soap and water.
Step 4 – Remove Stubborn Stains and Contaminants
A clean baseline reveals the truth. The wash lifted general grime, road film, and surface-level dust - but those dark tar splatters near the rocker panels, the baked-on bug remains across the front splitter, and the chalky water spot rings etched into the hood? They didn't budge. These contaminants bond chemically or mechanically to the surface, and no amount of pH-neutral soap will break that bond. Each one requires a targeted approach matched to its specific chemistry - and using the wrong removal method on carbon fiber risks damage far worse than the stain itself.
This is where most cleaning guides fall short. They lump every contaminant into a single "spot clean" step and move on. In reality, the technique that safely dissolves road tar will destroy raw carbon fiber if applied carelessly, and the product that lifts water spots can etch deeper damage into a compromised clear coat. Finishing carbon fiber care properly means treating each contaminant on its own terms.
Removing Bug Splatter, Road Tar, and Adhesive Residue
Bug splatter and road tar share an annoying trait: they harden over time and form a tenacious chemical bond with whatever surface they land on. On carbon fiber, that bond is especially problematic because the two most instinctive removal methods - scraping with a blade and dissolving with a strong solvent - are both catastrophic. A razor blade or plastic scraper concentrates force on a tiny contact point, easily gouging through the softer clear coat and into the weave. Aggressive solvents like acetone, MEK (methyl ethyl ketone), or even high-concentration paint thinner dissolve the epoxy resin matrix that holds the carbon fibers together. On raw carbon fiber, solvent exposure can cause visible whitening, softening, and structural weakening within seconds.
The safe alternative is a soak-and-lift technique using a dedicated bug and tar remover formulated to be solvent-free or explicitly carbon fiber safe. Here's the process:
- Apply the product generously to the contaminated area. Spray it directly onto the bug splatter or tar deposit, ensuring full coverage. For vertical surfaces, use a product with gel consistency so it clings rather than running off.
- Let it dwell. This is the step people rush - and rushing is what leads to scrubbing, which leads to scratches. Follow the manufacturer's recommended dwell time, typically 30 seconds to two minutes. The chemical agents in the remover need time to penetrate and dissolve the organic compounds in the contaminant. You'll often see the tar or bug residue start to loosen and darken as the product works.
- Lift with a microfiber cloth. Fold a clean microfiber towel into quarters, place it over the treated area, and gently blot or wipe in a single direction. Don't scrub back and forth. If the contaminant doesn't lift completely on the first pass, reapply product and dwell again rather than increasing pressure. Multiple gentle passes always beat one aggressive one.
- Rinse the area with clean water to remove any remaining product residue, then pat dry.
Adhesive residue from stickers, badges, or protective film requires a slightly different approach. A low-concentration isopropyl alcohol solution - no higher than 20% diluted in distilled water - works effectively when applied correctly. The key rule: apply the solution to the microfiber cloth, never directly to the carbon fiber surface. Pouring alcohol directly onto a panel allows it to seep into panel edges, seams, and any micro-cracks in the clear coat, potentially reaching and softening the resin beneath. Dampen the cloth, then dab the adhesive residue gently. Let the alcohol break down the adhesive's grip for 10 to 15 seconds, then lift away with a clean section of the cloth. Repeat as needed, rotating to a fresh towel section each time to avoid redepositing dissolved adhesive.
Tackling Water Spots, Oxidation, and Yellowing
Water spots on clear-coated carbon fiber are mineral deposits - calcium, magnesium, and silica left behind when water droplets evaporate on the surface. Mild water spots sit on top of the clear coat and respond well to a simple remedy: a solution of one part white vinegar to three parts distilled water applied with a soft microfiber cloth. The mild acidity dissolves the mineral deposits without attacking the clear coat. Spray the solution onto the cloth, wipe the spotted area gently, and follow immediately with a clean water rinse to neutralize the acid. For heavier mineral buildup or spots that resist the vinegar method, a dedicated automotive water spot remover designed for clear-coated surfaces provides stronger dissolving action while remaining pH-controlled.
Oxidation presents as a white haze or cloudiness that dulls the visual depth of the carbon weave beneath the clear coat. Surface-level oxidation on clear-coated pieces often responds to the polishing step covered in the next section - an ultra-fine polish removes the oxidized layer and restores clarity. However, if the haze persists after polishing, the oxidation has likely penetrated deeper into the clear coat or reached the resin itself, indicating professional refinishing may be the only real solution.
Yellowing is the most serious condition on this list. When carbon fiber develops a warm amber or yellow tint, it signals UV-driven resin degradation - a process called photo-oxidation where ultraviolet radiation breaks down the epoxy's molecular chains beneath the clear coat. Mild yellowing confined to small areas may improve with careful CBF polishing followed by a high-quality UV-protective sealant. Severe or widespread yellowing, though, means the resin matrix has degraded beyond what surface treatments can reverse. At that point, the panel typically needs professional stripping and re-clear-coating, or replacement entirely.
Embedded brake dust deserves special mention, particularly on carbon fiber wheels, front splitter edges, and fender trim that sit in the direct path of brake rotor discharge. Brake dust isn't ordinary dirt - it's microscopic iron particles generated by friction between brake pads and rotors, and those particles bond metallically to whatever surface they land on. Regular soap can't break metallic bonds. The solution is a pH-neutral iron fallout remover - a product containing iron-reactive chemistry that dissolves the embedded particles chemically. You'll recognize the reaction by the characteristic purple or red bleeding as the product breaks down iron deposits. Spray it on, let it dwell until the color change occurs, and rinse thoroughly. Avoid acid-based wheel cleaners entirely on carbon fiber - they attack the resin layer aggressively and can cause irreversible etching and discoloration, even on clear-coated surfaces.
To help you match each contaminant to its correct treatment quickly, here's a consolidated reference:
| Contaminant | Recommended Product Type | Technique | Risk If Done Incorrectly |
|---|---|---|---|
| Bug splatter | Solvent-free bug remover | Spray, dwell 30-120 seconds, blot and lift with microfiber | Scraping gouges clear coat; solvents dissolve resin |
| Road tar | Carbon fiber-safe tar remover | Apply, dwell per label, single-direction wipe, rinse | Aggressive solvents weaken epoxy; scrubbing causes deep scratches |
| Adhesive residue | Isopropyl alcohol (max 20% dilution) | Apply to cloth only, dab gently, lift and rotate cloth | Direct application seeps into seams; high concentration softens resin |
| Water spots (mild) | Vinegar-water solution (1:3) or dedicated spot remover | Apply to cloth, wipe spotted area, rinse immediately | Leaving acid on surface too long etches clear coat |
| Oxidation (white haze) | Ultra-fine polish (clear-coated only) | Light hand polish in small sections, wipe residue clean | Over-polishing burns through soft clear coat to weave |
| Yellowing (UV damage) | Polish + UV sealant (mild cases only) | Polish lightly, seal immediately; severe cases need professional work | Polishing severe yellowing removes remaining clear coat protection |
| Embedded brake dust | pH-neutral iron fallout remover | Spray on, wait for purple/red color change, rinse thoroughly | Acid-based cleaners etch resin and discolor the weave permanently |
| Tree sap | Dedicated sap remover or diluted IPA on cloth | Soak area, let product soften sap, lift gently with microfiber | Picking at hardened sap chips clear coat; solvents damage resin |
A practical principle runs through every row of that table: patience outperforms force every single time. Letting a product dwell and dissolve the contaminant chemically protects the surface far better than any amount of elbow grease. Carbon fiber dust and microscopic debris trapped beneath a stubborn deposit will grind into the finish the moment you apply pressure, creating damage worse than the original stain.
One final note before moving forward. If your pre-wash inspection revealed oxidation, haze, or minor surface imperfections alongside these contaminants, the stain removal steps above should always come first. Polishing over embedded brake dust or residual tar grinds those contaminants into the clear coat under the polishing pad - turning a cosmetic issue into a permanent defect. Clean carbon fiber thoroughly, confirm the surface is contaminant-free under bright inspection lighting, and only then consider whether the finish needs the clarity restoration that polishing provides.
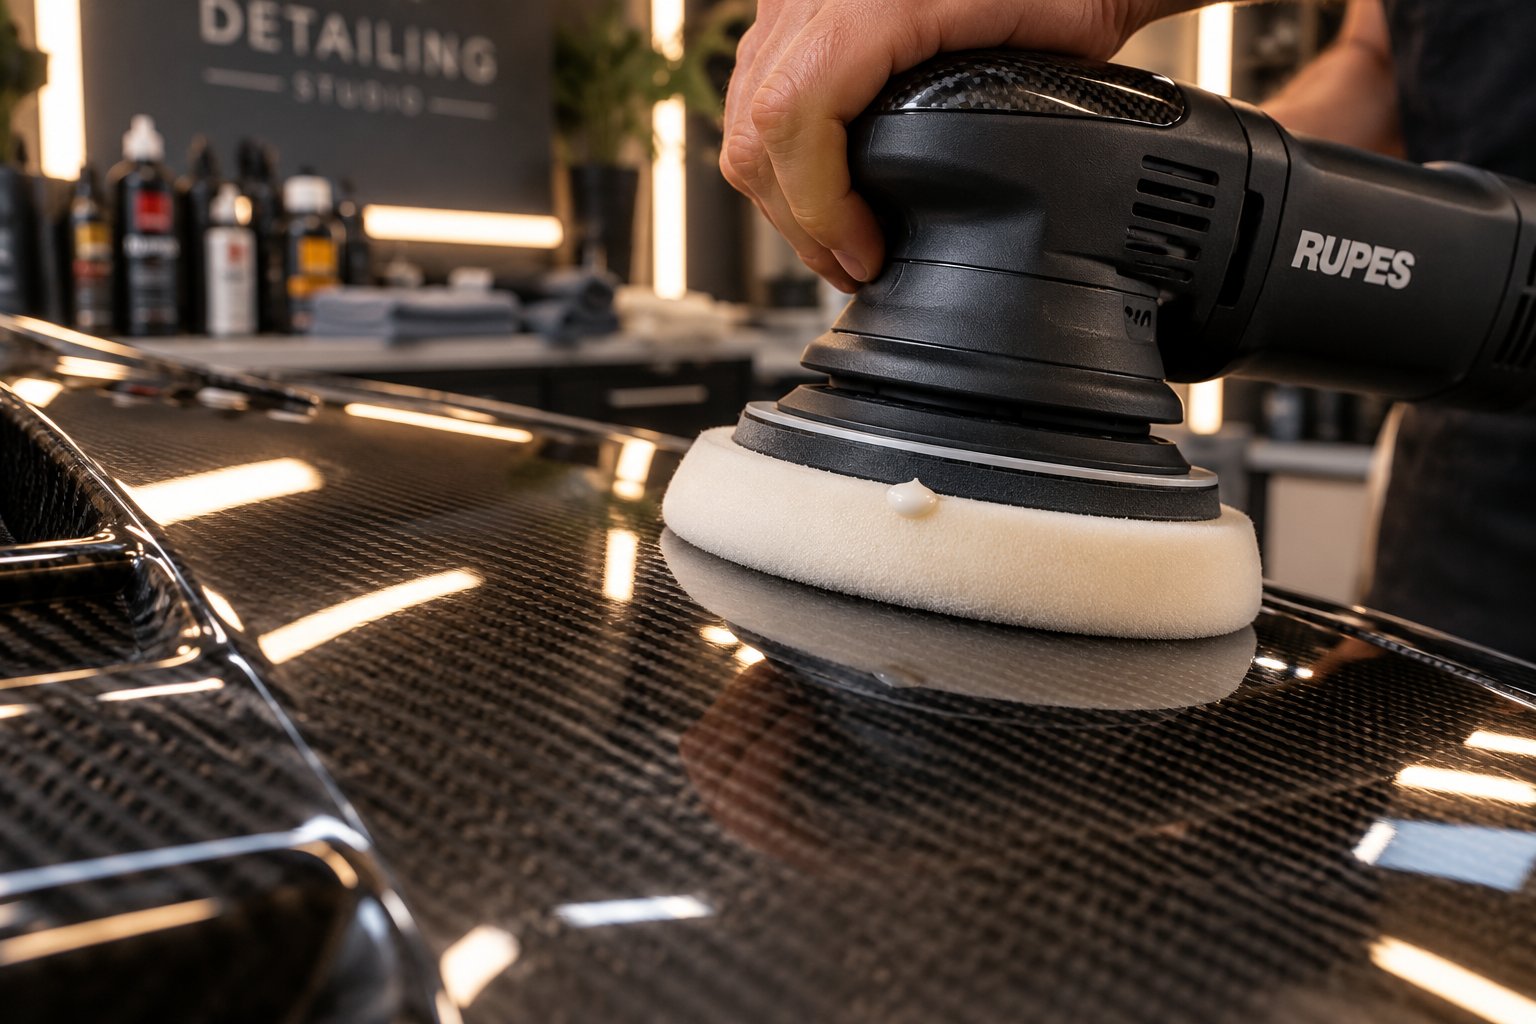
Step 5 – Polish Carbon Fiber to Restore Depth and Clarity
Your surface is clean. Contaminants are gone. Under bright inspection light, though, you still notice it - a faint haze dulling the weave's depth, fine carbon fiber swirl marks catching the light at certain angles, or a slight cloudiness where oxidation has crept in. These imperfections live inside the clear coat itself, and no amount of washing or spot-cleaning will remove them. Polishing is the only way to restore that deep, liquid-glass clarity that makes carbon fiber look alive.
But here's the critical distinction that separates a successful polish from an irreversible mistake: polishing is strictly for clear-coated carbon fiber. Matte finishes, satin finishes, and raw carbon fiber should never see a polishing compound. Polish is a controlled abrasive - it works by removing an ultra-thin layer of material to level out imperfections. On a matte surface, that removal destroys the flat texture and creates uneven glossy patches that can't be reversed without a full refinish. On raw carbon fiber, there's no clear coat to polish - you'd be grinding directly into the resin matrix and exposed weave. If your finish identification from earlier in this guide told you matte or raw, skip this step entirely and move straight to protection.
For clear-coated and gel-coated carbon fiber, though, a careful polish transforms the surface. It removes the fine scratches, light haze, and surface-level oxidation that accumulated between cleaning sessions, restoring the optical depth that lets you see every strand of the weave beneath a mirror-smooth finish. The key is understanding that carbon fiber's clear coat plays by different rules than standard automotive paint - and adjusting your technique accordingly.
Hand Polishing vs. Machine Polishing Carbon Fiber
If you've never polished carbon fiber before, start by hand. Learning how to polish carbon fiber by hand gives you direct tactile feedback - you can feel the surface temperature, gauge how much pressure you're applying, and stop immediately if something doesn't feel right. It's slower than machine polishing, but the margin for error is significantly wider.
Here's the hand polishing process, step by step:
- Choose an ultra-fine polish. The best polish for carbon fiber is a finishing-grade compound with the lowest abrasive cut available. Carbon fiber gelcoat and clear coat are softer than standard automotive clear coat, meaning aggressive cutting compounds remove material too quickly and risk burning through to the weave. A finishing glaze or ultra-fine polish provides enough correction for swirl marks and light haze without that risk.
- Apply to a foam applicator pad. Place two to three pea-sized drops of polish onto a soft foam hand applicator. Don't apply polish directly to the carbon fiber surface - it pools unevenly and creates spots of concentrated abrasion.
- Work in small sections. Focus on an area roughly 12 inches by 12 inches at a time. Apply the pad to the surface and move in straight, overlapping passes - not circles. Follow the direction of the carbon weave whenever possible. Use light, consistent pressure and let the polish do the work.
- Wipe residue with a clean microfiber cloth. After working the polish until it becomes translucent or nearly disappears, gently remove the remaining film with a fresh, high-GSM microfiber towel. Inspect the section under direct light. If haze or swirl marks remain, repeat the process on that section before moving on.
Machine polishing delivers faster, more uniform results - but it introduces heat, speed, and mechanical force that demand respect on carbon fiber surfaces. If you choose to machine polish, one rule is absolute: use a dual-action (DA) polisher only, never a rotary. A rotary polisher spins in a single, continuous direction, concentrating heat and abrasion in one pattern. A DA polisher oscillates randomly, distributing the work across the surface and preventing heat buildup in any single spot. This distinction matters enormously because carbon fiber doesn't dissipate heat the way metal body panels do. Heat accumulates faster, stays longer, and softens the gelcoat more quickly - creating a scenario where even a few extra seconds in one spot can burn through the clear coat permanently.
For machine polishing carbon fiber safely, follow these parameters:
- Speed setting: Keep the DA polisher below 3,000 OPM (orbits per minute). Many detailers working on carbon fiber stay in the 1,500 to 2,500 OPM range. Speed generates heat, and heat is the enemy of soft clear coats.
- Pad selection: Use a soft foam finishing pad only. Microfiber cutting pads and wool pads are too aggressive for carbon fiber's delicate surface layer.
- Pressure: Let the weight of the machine provide the pressure. Adding downward force increases heat generation and abrasion rate - exactly what you don't want on a surface that burns through faster than standard paint.
- Keep the polisher moving: Never hold the machine in one spot. Continuous, slow, overlapping passes prevent localized heat buildup. Work horizontally across the section, then vertically, maintaining steady movement throughout.
- Monitor surface temperature: Periodically touch the surface with the back of your hand. If it feels warm, stop and let it cool before continuing. Carbon fiber panels - especially thin aftermarket spoilers, diffusers, and mirror caps - heat up surprisingly fast.
Whether you polish by hand or machine, the goal is subtle refinement rather than aggressive correction. Carbon fiber scratch removal through polishing works only for imperfections that live within the clear coat layer itself. Think of it as erasing pencil marks on paper - you're gently leveling the surface to eliminate fine disruptions in the finish. You're not sanding down to bare material.
When Not to Polish and When to Seek Professional Help
Polishing has a ceiling. Recognizing where that ceiling sits protects you from turning a fixable cosmetic issue into a panel that needs full replacement. The simplest diagnostic test takes two seconds: run your fingernail perpendicular across the scratch.
If you can catch a fingernail in the scratch, polishing alone will not fix it.
A fingernail catching means the scratch has penetrated beyond what ultra-fine polish can level out. Attempting to polish a deep scratch forces you to remove more and more clear coat material trying to reach the bottom of the defect - and on carbon fiber's thinner, softer clear coat, you'll burn through to the weave long before you reach that depth. The result is exposed carbon fiber that can't simply be re-sprayed like automotive paint. As composite repair specialists note, once the weave is exposed, frayed, or compromised, the damage crosses from cosmetic into structural territory.
Beyond individual deep scratches, several conditions signal that DIY polishing has reached its limit and professional refinishing is the responsible next step:
- Visible weave damage: If you can see individual fiber strands lifting, fraying, or broken at the surface, the clear coat and resin layers are breached. Polishing over exposed weave grinds compound into the fibers and worsens the damage.
- Large areas of yellowing: Widespread amber discoloration indicates deep UV degradation of the resin matrix beneath the clear coat. Polishing may temporarily improve the appearance of a small yellowed spot, but it can't reverse molecular-level resin breakdown across an entire panel.
- Cracking clear coat: Fine cracks or crazing patterns in the clear coat mean the protective layer is failing structurally. Polishing a cracked clear coat can remove the remaining intact material around the cracks, accelerating the failure rather than correcting it.
- Soft or tacky spots in the resin: If any area of the surface feels soft, sticky, or pliable under finger pressure, the underlying resin has degraded - possibly from chemical exposure, excessive heat, or advanced UV damage. Polishing a compromised resin layer can cause delamination.
- Peeling edges: Clear coat lifting or peeling away from the edges of the carbon fiber panel indicates adhesion failure. No amount of surface polishing addresses a bond that's separating between layers.
Encountering any of these conditions doesn't mean the part is ruined. Professional composite repair shops have access to controlled re-clear-coating environments, UV-stable surfacing resins, and precision techniques that can restore panels exhibiting these symptoms. The critical point is recognizing the boundary between what careful DIY polishing achieves and what requires specialized equipment and expertise.
A successfully polished panel looks dramatically different from where it started - the weave pattern regains its three-dimensional depth, light reflects cleanly without scattered haze, and minor swirl marks vanish entirely. That restored clarity, though, is freshly exposed clear coat sitting unprotected against every environmental threat that caused the damage in the first place. UV radiation, chemical fallout, moisture, and airborne contaminants now have direct access to a surface you just spent careful effort perfecting. Locking in that finish with lasting protection isn't optional - it's the step that determines whether your polishing results survive days or years.
Step 6 – Shield the Surface with Long-Lasting Protection
That freshly polished carbon fiber looks incredible right now. Deep weave definition, mirror-smooth reflections, zero haze. Enjoy it - because without a protective layer, UV radiation, chemical fallout, bird droppings, and moisture begin degrading that finish immediately. Polishing removed the old, damaged surface material and exposed fresh clear coat. That fresh layer is also the most vulnerable it will ever be, sitting completely unshielded against the same environmental forces that caused the damage you just corrected.
Protection isn't a bonus step. It's the entire reason the cleaning and polishing phases matter. A perfectly polished panel without a protective barrier yellows, hazes, and oxidizes faster than one that was never polished at all - because you've removed the weathered outer layer that was at least partially absorbing the punishment. Choosing the right carbon fiber wax or sealant and applying it correctly is what separates surfaces that look showroom-fresh for years from those that degrade within a single season.
Three main protection categories exist for carbon fiber surfaces: traditional carnauba wax, synthetic paint sealant, and ceramic coating. Each offers a different balance of durability, UV defense, application difficulty, and cost. The right choice depends on your finish type, your environment, and how much ongoing maintenance you're willing to commit to.
Wax vs. Sealant vs. Ceramic Coating for Carbon Fiber
Every car enthusiast has a strong opinion about which protection method reigns supreme. The reality? Each one has genuine strengths and honest limitations when applied to carbon fiber specifically. Here's how they compare across the factors that matter most:
| Protection Type | Durability | UV Protection Level | Ease of Application | Best Suited Finish Types | Limitations |
|---|---|---|---|---|---|
| Carnauba Wax | 2 to 6 weeks | Low - minimal UV filtering | Easy - hand application, beginner-friendly | Clear-coated (glossy) | Short lifespan requires frequent reapplication; limited chemical resistance; melts in high heat; not suitable for matte finishes |
| Synthetic Paint Sealant | 3 to 6 months | Moderate - contains UV inhibitors in most formulas | Easy to moderate - spray or wipe-on application | Clear-coated, gel-coated; matte-specific formulas available | Less warm depth than wax on glossy surfaces; UV protection degrades over time; still requires periodic reapplication |
| Ceramic Coating | 1 to 3+ years | High - strong UV blocking and chemical resistance | Difficult - requires precise surface prep, controlled environment, and curing time | Clear-coated, gel-coated, raw (with compatible formulas); matte-specific versions available | Higher upfront cost; application errors are difficult to correct; improper prep traps defects under the coating permanently |
Carnauba wax delivers that warm, wet-look gloss that enthusiasts love on glossy clear-coated carbon fiber. It enhances the visual depth of the weave beautifully - and it's the easiest product to apply and remove. The trade-off is durability. A few weeks of sun exposure, rain, and road spray strip the wax layer away, leaving the clear coat unprotected again. For carbon fiber panels on a weekend car that lives in a garage, wax works fine with regular reapplication. For a daily driver or any surface exposed to consistent sunlight, wax alone provides inadequate carbon fiber UV protection and leaves the resin vulnerable between applications.
Synthetic paint sealants represent the middle ground most carbon fiber owners should seriously consider. They bond chemically to the clear coat rather than simply sitting on top of it like wax, creating a harder, longer-lasting shield that resists washing, rain, and environmental contamination for months at a time. Most quality sealants include UV-inhibiting compounds that actively filter ultraviolet radiation before it reaches the resin layer. Application is straightforward - many modern sealants spray on and wipe off in minutes. For matte and satin carbon fiber finishes, matte-specific sealants protect the surface without adding unwanted gloss. This matters significantly, because standard glossy sealants and waxes applied to matte carbon fiber alter the finish permanently, adding shine where none should exist.
A carbon fiber ceramic coating sits at the top of the protection hierarchy. Ceramic coatings form an extremely hard, semi-permanent glass-like layer that bonds directly to the surface at a molecular level. The result is exceptional hydrophobic behavior (water beads and rolls off effortlessly), strong chemical resistance against bird droppings, tree sap, and industrial fallout, and - most critically for carbon fiber - the highest level of UV defense available in a consumer-applied product. A properly applied ceramic coating lasts a year or longer, with professional-grade formulations maintaining protection for two to three years before requiring reapplication.
The catch? Application demands precision. The surface must be absolutely clean, decontaminated, and free of any polish residue, oils, or previous wax layers. Any imperfection sealed beneath the ceramic coating stays there permanently - you can't polish through a cured ceramic layer without removing the entire coating first. Temperature and humidity during application affect curing, and uneven application creates high spots that haze and streak. For carbon fiber owners comfortable with detailed prep work, or those willing to invest in professional application, a ceramic coating delivers unmatched long-term protection. For everyone else, a high-quality synthetic sealant provides 80% of the benefit with a fraction of the application difficulty.
UV Protection Is Non-Negotiable for Carbon Fiber
Regardless of which protection method you choose, one selection criterion should outweigh all others: UV-blocking capability. Ultraviolet radiation isn't just an aesthetic threat to carbon fiber - it's a structural one.
Here's what happens beneath the surface. The carbon fibers themselves are essentially impervious to UV light. As ProTech Composites explains, pure carbon fiber crystals are UV-stable by nature. The vulnerability lies entirely in the epoxy resin that binds those fibers together. UV radiation - particularly UVA and UVB wavelengths - penetrates the clear coat and attacks the polymer chains within the epoxy matrix. Over time, those chains break down in a process called photodegradation. The visible result is yellowing, fading, and cloudiness. The invisible result is far worse: the resin loses its dimensional stability, weakening the bond that holds the entire composite structure together. With prolonged exposure, this degradation leads to cracking, crumbling, and eventually delamination - where the resin separates from the fiber layers entirely.
Think of UV protection as sunscreen for your carbon fiber. The fibers are the skeleton; the resin is the skin holding everything in place. Without consistent UV shielding, that skin breaks down regardless of how carefully you clean and polish the surface.
This principle applies to every protection product you evaluate. When comparing two sealants, choose the one with stronger UV inhibitors - even if the other offers slightly better gloss or easier application. When deciding between wax and ceramic coating, factor in that a carbon fiber ceramic coating provides continuous UV defense for a year or more, while wax leaves the surface exposed within weeks. The long-term cost of resin degradation - professional refinishing or outright panel replacement - dwarfs the upfront cost of proper UV protection.
Product selection is only part of the equation, though. How you protect carbon fiber from UV extends beyond coatings and into daily habits:
- Park in shade whenever possible. Direct sunlight delivers the highest concentration of UV radiation. A shaded parking spot reduces UV exposure by 50% or more compared to open sunlight, significantly extending the lifespan of both the protection layer and the resin beneath it.
- Use car covers for extended outdoor parking. A UV-blocking car cover shields exterior carbon fiber panels during multi-day outdoor exposure. Choose a cover with a verified UPF (Ultraviolet Protection Factor) rating rather than a generic fabric cover that blocks visible light but transmits UV wavelengths.
- Reapply protection on schedule. Every protection product degrades over time. Wax wears off in weeks. Sealant effectiveness fades over months. Even ceramic coatings gradually lose their UV-blocking potency. Mark your reapplication dates on a calendar and treat them as non-negotiable maintenance, not optional touch-ups.
- Inspect for early UV damage regularly. Catching the first signs of yellowing or haziness early - before deep resin degradation sets in - means the damage can still be corrected with a polish and fresh sealant rather than requiring professional intervention.
Two finish types deserve specific attention when it comes to protection product compatibility. Matte and satin carbon fiber finishes require matte-specific sealants formulated to protect without altering the surface sheen. Standard waxes, glossy sealants, and most consumer ceramic coatings add reflectivity that permanently changes the matte appearance. Always verify that a product is explicitly labeled for matte surfaces before applying it.
Raw carbon fiber - exposed weave without a traditional automotive clear coat - benefits most from marine-grade UV sealants designed for bare composite surfaces. These products penetrate the outermost resin layer and bond directly with the epoxy, providing UV filtration at the point of greatest vulnerability. Marine-grade formulations are engineered for the relentless UV exposure that boats, aircraft components, and outdoor composite structures endure, making them ideal for uncoated carbon fiber that lacks the additional buffer of a clear coat layer.
With the surface now cleaned, polished, and sealed against environmental threats, exterior carbon fiber panels are fully protected. Interior carbon fiber trim, however, faces an entirely different set of challenges - fingerprint oils, cleaning product overspray, heat cycling, and UV exposure through glass - that demand their own distinct care approach.
Step 7 – Clean and Care for Interior Carbon Fiber Trim
Interior carbon fiber trim lives in a completely different world than the exterior panels you just learned to wash, polish, and seal. That dashboard accent, center console overlay, steering wheel trim ring, door panel insert, and shifter surround never face road tar, bug splatter, or direct rain. What they do face, every single day, is arguably worse for long-term appearance: the oils from your skin.
Every time you grip the steering wheel, rest your hand on the console, or tap the dashboard, your fingers deposit a thin film of natural oils onto the surface. Multiply that by hundreds of touches per week, and you get a persistent, invisible buildup that dulls the weave's visual depth and attracts dust like a magnet. Interior carbon fiber care demands a lighter touch and different products than exterior work - and the threats are subtle enough that most owners don't realize damage is accumulating until the trim looks permanently hazy.
Beyond fingerprint oils, interior carbon fiber faces a roster of challenges that exterior panels rarely encounter:
- Cleaning product overspray: Interior detailing sessions send mist from vinyl cleaners, glass sprays, and dashboard dressings drifting onto nearby carbon fiber trim. These products often contain silicones, ammonia, or solvents that leave residue and attack the clear coat.
- UV exposure through glass: Windshields and side windows filter some UV wavelengths but transmit others - particularly UVA rays, which penetrate deeper into resin than UVB. A dashboard carbon fiber accent sitting under a windshield receives consistent UV bombardment during every drive.
- Heat cycling: Cabin temperatures swing dramatically. A parked car in summer sun can reach 150 degrees Fahrenheit or higher inside, then cool to ambient overnight. These repeated thermal cycles expand and contract the clear coat and resin at slightly different rates, gradually weakening the bond between layers and accelerating micro-cracking over time.
- Dust accumulation in the weave texture: Interior dust particles settle into the subtle ridges of carbon fiber's surface pattern, embedding themselves in ways that flat wipes miss. Textured or semi-exposed weave trims collect even more debris in their grooves.
These combined factors mean cleaning carbon fiber trim inside the cabin isn't just a scaled-down version of your exterior routine. It's a distinct process with its own rules.
Cleaning Dashboard, Console, and Door Trim Carbon Fiber
Imagine spraying cleaner directly onto your center console's carbon fiber panel. The liquid runs into the seam between the trim piece and the surrounding dash material, seeps behind the panel, and sits against adhesive or bare mounting surfaces where you can't reach it. Over time, that trapped moisture loosens the trim's bond and creates the perfect environment for cloudy residue to form beneath the edges. This scenario - entirely preventable - is why the first rule of carbon fiber dashboard cleaning is simple: never spray product directly onto the trim.
Here's the interior cleaning process that protects both the finish and the installation:
- Dust first with a soft detailing brush or dry microfiber cloth. Use a natural-bristle brush with gentle, sweeping strokes to lift dust from the weave texture and panel edges. For flat, smooth trim pieces, a clean microfiber cloth with light, straight-line passes picks up surface dust effectively. This step prevents grinding particles into the finish during the cleaning wipe that follows.
- Spray interior-safe carbon fiber cleaner onto your microfiber cloth. Two to three light spritzes dampen the cloth without saturating it. You want the cloth barely moist - enough to dissolve fingerprint oils and lift light grime, not enough to drip or migrate into panel gaps. A pH-neutral formula free of silicones, ammonia, and solvents is non-negotiable here. Many products marketed as "interior cleaners" fail this test, so check the label every time.
- Wipe gently in straight, overlapping passes. Follow the visible direction of the carbon weave if your trim has an exposed or semi-visible pattern. Light pressure only - the goal is lifting contaminants, not scrubbing them deeper. Rotate your cloth to a fresh section after each panel to avoid redepositing oils.
- Buff with a dry microfiber cloth. A clean, dry towel removes any remaining moisture or cleaner residue and restores the surface's natural sheen. For glossy clear-coated interior trim, this final buff brings back the depth and clarity you're maintaining.
Stubborn fingerprint buildup that doesn't respond to a standard cleaner calls for an even simpler solution: a microfiber cloth lightly dampened with distilled water. Distilled water contains zero minerals, so it leaves no residue or water spots behind. Dampen the cloth, wring it thoroughly so it's barely moist, and wipe the affected area. Follow with a dry cloth. For the vast majority of interior fingerprint accumulation, distilled water alone resolves the problem without introducing any chemical to the surface.
One product category deserves a specific warning: interior vinyl and plastic dressings. These are the spray-on products designed to make plastic dashboards and door panels look shiny and "renewed." On carbon fiber, they're a disaster. Vinyl dressings leave a greasy, semi-sticky film that traps every dust particle that lands on the surface. The result is a grimy, clouded appearance that actually requires more aggressive cleaning to remove than the original fingerprints would have. As automotive carbon fiber care guides consistently emphasize, the best way to clean carbon fiber interior trim is with mild, non-abrasive cleaners only - and dressings designed for vinyl or plastic don't belong anywhere near it.
For Tesla owners and drivers of other vehicles with extensive interior carbon fiber trim, this routine takes about five minutes per cleaning session. A quick dusting and wipe-down every week or two prevents oil and dust from building up to the point where they become difficult to remove. Consistency matters far more than intensity - gentle, regular interior carbon fiber care keeps the trim looking factory-fresh without ever needing aggressive intervention.
Investing in Quality Carbon Fiber Accessories Worth Maintaining
Here's a reality that no cleaning technique can overcome: poorly manufactured carbon fiber trim degrades faster than proper maintenance can slow down. If the trim piece itself has a thin, low-quality clear coat, a printed carbon fiber pattern instead of real woven material, or resin that wasn't properly UV-stabilized during manufacturing, even the most careful cleaning routine only delays the inevitable yellowing, peeling, and hazing.
Quality matters at the material level. Authentic carbon fiber accessories built with real woven carbon sheets, proper epoxy infusion, and a UV-resistant clear coat respond predictably to everything covered in this guide. They polish well, they accept sealants and ceramic coatings with strong adhesion, and they maintain their visual depth through years of regular cleaning. Low-cost imitations with hydro-dipped patterns or thin cosmetic resin layers skip these structural fundamentals - and no amount of premium cleaner compensates for materials that weren't built to last.
Tesla owners face this decision more directly than most, because the aftermarket for Tesla interior and exterior carbon fiber accessories is enormous - and the quality range is just as wide. Authentic carbon fiber pieces with proper UV-resistant clear coats from reputable manufacturers are the ones that reward careful maintenance year after year. They're the pieces where weekly dusting, proper cleaning technique, and periodic sealant application actually make a visible, lasting difference.
CUTIM's Tesla Carbon Fiber Accessories are a strong example of what to look for when choosing pieces worth the care effort. Their lineup covers both interior and exterior applications - dashboard overlays, center console covers, mirror caps, spoilers, and more - using authentic carbon fiber weave with premium clear coat finishes and lightweight construction. These are the material qualities that directly benefit from the maintenance approach outlined throughout this guide: genuine weave that shows real depth when cleaned properly, a clear coat thick enough to polish and protect without burning through, and UV-stable resin that resists yellowing under the care routine described in earlier steps.
The principle is straightforward. Invest in carbon fiber accessories built with real materials and proper finishing, and the cleaning routine you've learned here protects that investment for the long haul. Cut corners on the parts themselves, and you'll find yourself replacing trim pieces regardless of how meticulously you maintained them. For Tesla owners who value both the aesthetic and the performance benefits of genuine carbon fiber, pairing quality components with proper care creates results that hold up through daily driving, temperature swings, UV exposure, and the inevitable fingerprints that come with actually enjoying your vehicle's interior.
Keeping interior and exterior carbon fiber looking its best isn't a one-time project, though. Environmental threats shift with every season, driving conditions change throughout the year, and protection products degrade on predictable timelines. A structured maintenance schedule - one that accounts for seasonal hazards, specific driving scenarios, and reapplication intervals - turns these individual care steps into a sustainable, long-term system.

Step 8 – Build a Seasonal Maintenance Routine
Every cleaning step, polishing technique, and protection layer covered in this guide works brilliantly - once. The real question is what happens next month, next season, and next year. Carbon fiber that receives meticulous care in March and then gets ignored through a scorching summer and a salt-heavy winter won't look meticulous by the following spring. Yellowing creeps in. Sealant layers break down. Contaminants bond deeper. The difference between carbon fiber that looks showroom-fresh for five years and carbon fiber that degrades visibly within two isn't skill or product quality - it's consistency.
A carbon fiber maintenance schedule built around seasonal threats and real-world driving scenarios transforms isolated cleaning sessions into a sustainable system. You already know how to maintain carbon fiber properly. The final piece is knowing when each action matters most - and what specific environmental hazards demand your attention throughout the year.
Seasonal Carbon Fiber Care Calendar
Each season brings a distinct combination of threats to carbon fiber surfaces. Pollen and tree sap dominate spring. UV intensity peaks in summer. Organic debris and tannin stains define autumn. Road salt and freezing temperatures punish everything in winter. Matching your care routine to these seasonal shifts prevents damage before it starts rather than scrambling to correct it after the fact.
| Season | Primary Threats | Recommended Actions | Frequency |
|---|---|---|---|
| Spring | Pollen buildup, tree sap deposits, residual winter salt, temperature fluctuations | Full wash and thorough inspection for winter damage; remove any sap deposits using the soak-and-lift method; check sealant integrity and reapply if protection feels thin; inspect clear coat edges for chips caused by winter grit | Full detail once; wash every 1-2 weeks; spot-clean sap immediately upon discovery |
| Summer | Peak UV radiation, extreme cabin heat, bug splatter, bird droppings, increased road debris | Reapply wax or sealant at the start of the season for maximum UV defense; wash more frequently to remove bug and bird contamination before it bonds; park in shade or use a UV-rated cover; clean interior trim more often due to increased fingerprint oils from heat and humidity | Wash weekly for daily drivers; reapply wax every 3-4 weeks or sealant every 3-4 months; interior wipe-down weekly |
| Autumn | Fallen leaf tannin stains, tree debris, moisture from rain and fog, dropping temperatures | Remove fallen leaves promptly - tannins leach into clear coat and stain the surface; full wash and inspection before winter prep; apply a fresh layer of sealant or ceramic coating as your pre-winter shield; check panel edges and mounting points for moisture intrusion | Wash every 1-2 weeks; remove leaf debris immediately; pre-winter protection application once |
| Winter | Road salt, brine spray, sand and grit, freeze-thaw cycling, reduced daylight limiting inspection visibility | Wash frequently to remove salt and brine before they attack the clear coat and resin; apply extra sealant before the season begins if not already done in autumn; inspect for chips in the clear coat where salt can penetrate; avoid pressure washing frozen surfaces - let the car warm naturally first | Wash every 1-2 weeks minimum; post-storm rinse within 24-48 hours; full inspection monthly |
A few seasonal details deserve extra emphasis. Summer UV exposure is the single largest long-term threat to carbon fiber, and it's the easiest to underestimate because the damage is invisible until it's advanced. Carbon fiber care specialists stress that parking in direct sunlight and letting water dry on the surface during hot months accelerates clear coat deterioration and water spot etching simultaneously. If your vehicle sits outside during summer, a UV-blocking car cover during extended parking isn't overcautious - it's essential protection for the resin beneath every panel.
Carbon fiber winter care catches many owners off guard, too. Road salt is aggressively corrosive, and while carbon fiber itself doesn't rust, the salt solution attacks the epoxy resin and eats into clear coat micro-scratches and chips exposed by winter driving conditions. Salt left on the surface for days rather than hours causes measurably more damage. KOCF's maintenance guidelines recommend washing carbon fiber pieces after any exposure to salted roads - a habit that pays off enormously over the course of a full winter season.
Situation-Based Cleaning After Track Days, Road Trips, and Storage
Seasons aren't the only variable. Specific driving situations create concentrated contamination events that demand prompt attention - waiting for your next scheduled wash date lets contaminants bond deeper and become exponentially harder to remove safely.
After a track day: Your carbon fiber components just endured the most aggressive contamination environment outside of off-road driving. Brake dust - superheated iron particles from sustained hard braking - coats front-facing surfaces like splitters, fender trim, and hood vents. Rubber debris from tire marbles peppers lower body panels. Heat cycling from repeated high-speed runs and cool-down periods stresses clear coat adhesion. Wash the vehicle as soon as practically possible after returning from the track. Use a pH-neutral iron fallout remover on areas directly exposed to brake dust before your standard two-bucket wash. Inspect the clear coat on forward-facing components for stone chips that may have occurred during the session - these chips become entry points for moisture and contaminants if left unsealed.
After long road trips: Hours of highway driving plaster bug splatter across every forward-facing carbon fiber surface. Road tar accumulates along lower panels and wheel arches. The longer these contaminants sit, the stronger their bond becomes - bug proteins and tar compounds begin chemically fusing with the clear coat within 24 to 48 hours in warm weather. Address them promptly using the soak-and-lift technique from Step 4. A quick wash within a day of returning home prevents contaminants from hardening into problems that require aggressive removal later.
After winter storage or long-term garage time: Pulling a vehicle out of multi-month storage doesn't mean the carbon fiber is clean just because it wasn't driven. Dust accumulates steadily on stored vehicles, and that dust layer contains abrasive particles that scratch the finish if you wipe it off dry. Moisture trapped under a car cover or in an uncontrolled garage environment can promote mold growth on rubber seals adjacent to carbon fiber panels, and that mold can transfer onto the trim surface. Storage care experts note that properly finished carbon fiber is resilient during storage, but emerging from storage still warrants a careful dust removal, full inspection under bright light, a gentle wash, and a fresh application of your chosen protection product before the vehicle returns to regular driving.
To keep all of this manageable rather than overwhelming, here's a monthly checklist you can reference quickly without revisiting the full guide each time:
- Dust removal: Blow off or brush away loose particles from all carbon fiber surfaces, interior and exterior, at least once per week - more often in dusty environments or during pollen season.
- Visual inspection: Check for new chips, yellowing, haze, or contaminant buildup under good lighting once per month. Catching issues early keeps them in the DIY-fixable range.
- Spot cleaning: Address bird droppings, bug splatter, sap, or any new contaminant within 24 to 48 hours of discovery. Prompt removal prevents bonding and chemical etching.
- Protection status check: Test your sealant or wax layer monthly by spraying water on the surface. If water still beads tightly and rolls off, your protection is intact. If it sheets flat or leaves wet patches, it's time to reapply.
- Interior wipe-down: Clean interior carbon fiber trim with a lightly dampened microfiber cloth every one to two weeks to prevent fingerprint oil accumulation from reaching the stubborn-buildup stage.
This checklist takes five to ten minutes per session for spot checks and fifteen to thirty minutes for a monthly wash and inspection. That modest time commitment is the entire difference between long term carbon fiber care that preserves your investment and neglect that forces expensive refinishing or replacement down the road.
Carbon fiber rewards the owners who treat it with consistent, gentle attention. Every step in this guide - from identifying your finish type through seasonal maintenance - builds on the same principle: proactive care prevents damage that reactive repairs can't always fix. UV degradation, resin breakdown, clear coat failure, and surface contamination are all progressive problems. They start small and stay manageable with regular maintenance. They become expensive and sometimes irreversible when ignored.
If you're upgrading your Tesla with quality carbon fiber accessories from CUTIM, every technique in this guide applies directly to keeping those new pieces looking factory-fresh through years of daily driving, seasonal changes, and the inevitable fingerprints that come with actually enjoying your vehicle. Authentic carbon fiber built with real weave, proper resin, and UV-resistant clear coat is designed to respond to this level of care - and that's exactly what makes it worth the investment. Pair quality components with a disciplined maintenance routine, and your carbon fiber won't just survive the seasons. It'll look better than the day you installed it.
Frequently Asked Questions About Cleaning Carbon Fiber
1. Can you use regular car wash soap on carbon fiber?
Standard automotive soaps are often too harsh for carbon fiber because its clear coat is softer and thinner than typical car paint. Always choose a pH-neutral, solvent-free soap with no abrasive particles. Acidic or alkaline formulas attack the epoxy resin binding the fibers, while hidden micro-abrasives grind through the delicate finish. Check the label for explicit composite or delicate-surface compatibility before any product touches the surface.
2. How do you remove scratches from carbon fiber?
Light swirl marks and fine haze on clear-coated carbon fiber respond well to an ultra-fine finishing polish applied by hand with a foam pad or with a dual-action polisher set below 3,000 OPM. Work in small sections using straight, overlapping passes and light pressure. However, if your fingernail catches in the scratch, the damage has penetrated beyond what polishing can correct, and professional composite refinishing is the safer route to avoid burning through the clear coat to the weave.
3. Does carbon fiber need UV protection?
UV protection is essential, not optional. While the carbon fibers themselves are UV-stable, the epoxy resin holding them together degrades under ultraviolet exposure through a process called photodegradation. This causes yellowing, cloudiness, and eventually structural weakening and delamination. Applying a UV-blocking sealant or ceramic coating, parking in shade, using a UPF-rated car cover, and reapplying protection on schedule all work together to prevent irreversible resin breakdown.
4. What is the best way to clean carbon fiber interior trim?
Interior carbon fiber trim collects fingerprint oils, dust, and cleaning product overspray rather than road grime. Dust the surface first with a soft detailing brush, then spray a pH-neutral, silicone-free interior cleaner onto a microfiber cloth — never directly onto the trim to prevent seepage into panel gaps. Wipe gently in straight passes and buff dry. For stubborn fingerprints, a cloth lightly dampened with distilled water works without leaving residue. Avoid vinyl dressings entirely, as they leave a greasy film that traps dust.
5. How often should you clean and maintain carbon fiber parts?
A weekly dust removal and biweekly wash keeps exterior carbon fiber in top condition for daily drivers. Interior trim benefits from a light wipe-down every one to two weeks. Monthly, inspect all surfaces under bright light for chips, yellowing, or haze, and test your sealant by checking whether water still beads on the surface. Reapply wax every three to six weeks, sealant every three to six months, or refresh ceramic coatings annually. Seasonal adjustments — like more frequent winter washes to remove road salt — prevent cumulative damage year-round.