
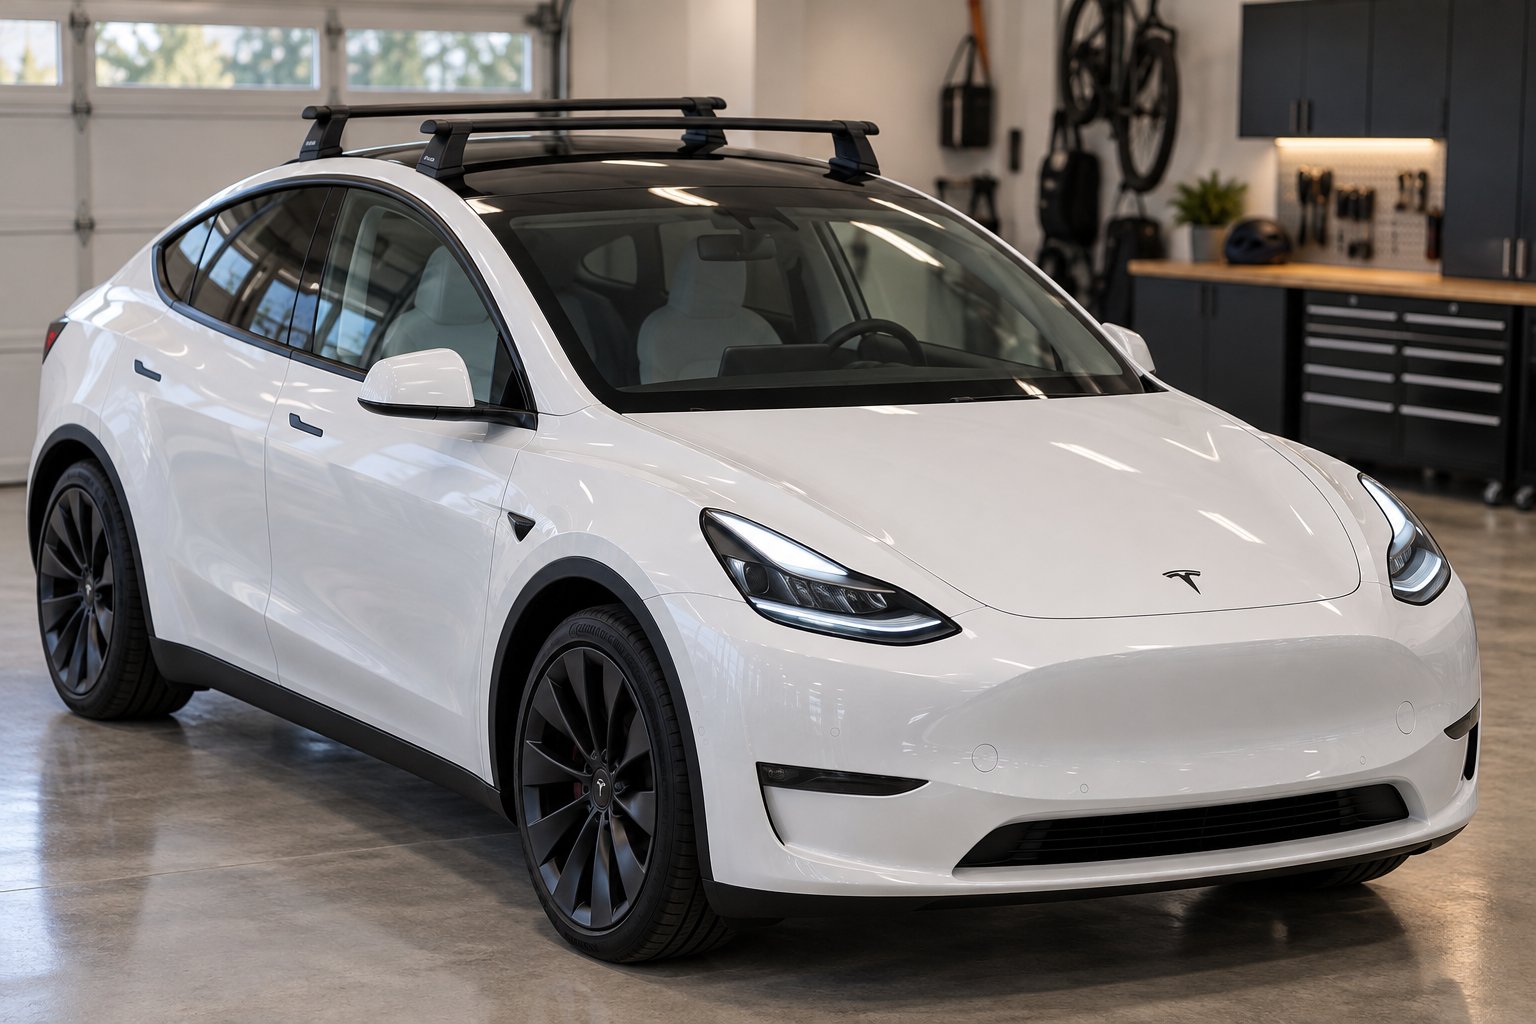
What Tesla Model Y Roof Rack Installation Actually Involves
Imagine standing in your garage, a brand-new roof rack kit laid out on the floor, and a massive panoramic glass roof staring back at you from above. You want to haul bikes, kayaks, or a cargo box — but one wrong move near that glass could turn a weekend project into a multi-thousand-dollar repair. That tension between simplicity and stakes is exactly what makes a Tesla Model Y roof rack installation unlike anything you have tackled on a traditional vehicle.
Here is the reality check most guides skip: Tesla's own service manual assigns this job a Flat Rate Time (FRT) of 0.42 hours — roughly 25 minutes for a trained technician working in a fully equipped service bay. That number reflects someone who has done this dozens of times, with every tool within arm's reach. For a first-time DIY installer, you should realistically budget 45 to 90 minutes. The extra time is not because the process is complicated — it is because each preparation step, from measuring anti-abrasion tape placement to verifying rail clip engagement, deserves your full, unhurried attention when glass is involved.
Why Model Y Installation Differs From Traditional Vehicles
On most SUVs and crossovers, roof racks clamp onto rain gutters or bolt into factory-threaded mounting points embedded in a steel roof panel. The Model Y has none of that. Its all-glass panoramic roof stretches from the windshield header all the way to the rear hatch, eliminating conventional attachment surfaces entirely.
So how does a Tesla roof rack actually attach? The mounting system relies on pre-engineered metal receivers — sometimes called J-hooks — hidden beneath the rubber seal along the roof edge. You lift the seal with a trim tool, slide in a rail clip that hooks onto the receiver, and then build outward from there with pads and crossbars. The entire load path transfers through these concealed slots rather than through the glass itself. Still, the mounting hardware sits directly adjacent to the glass surface, which is why Tesla's procedure explicitly requires anti-abrasion tape measured to precise locations: 227 mm from the front edge and 412 mm from the rear edge of the glass roof.
This design means you are not just bolting a rack onto a car — you are interfacing with a glass structure that has zero tolerance for careless tool drops, over-torqued fasteners, or skipped protective steps.
What This Guide Covers That Others Do Not
Most online walkthroughs give you a quick parts list and a handful of photos. They rarely explain why each step matters, what the consequences of skipping it look like, or how to verify your work before hitting the highway. This guide takes a different approach. You will get a consumer-friendly translation of professional-level procedures into plain language, covering glass roof protection protocols, a complete tools and materials checklist, post-installation verification checks, removal and reinstallation for seasonal use, and an honest assessment of whether DIY is the right call for your situation.
The Model Y roof rack installation is mechanically straightforward — limited fasteners, no drilling, no permanent modifications — but it demands careful preparation to avoid costly glass roof damage. Respect the process, and the job is well within a typical owner's ability.
The key is understanding that speed is not your friend here. A model y roof rack installed correctly the first time saves you from cracked glass, wind noise headaches, and the nagging anxiety of wondering whether your cargo is actually secure at 70 mph. Every step ahead is designed to give you that confidence — starting with choosing the right rack system in the first place.
OEM vs Third-Party Roof Racks for the Model Y
Choosing the right rack system is the single most consequential decision you will make before a wrench ever touches your car. A Tesla Model Y with roof rack can look and perform beautifully — or it can rattle, whistle, and slowly damage your glass roof — and the difference often traces back to this purchasing decision rather than the installation itself.
Tesla OEM Roof Rack Advantages and Limitations
The Tesla-branded roof rack carries one advantage no aftermarket option can replicate: VIN verification at the point of purchase. When you order through the Tesla Shop, the system cross-references your vehicle identification number to confirm that the rack is compatible with your specific Model Y variant and production date. That check eliminates the guesswork surrounding trim cap dimensions, mounting slot spacing, and hardware thread pitch.
Beyond compatibility assurance, the OEM tesla roof rack model y is engineered to match the vehicle's roof profile with factory-level precision. The crossbar curvature, foot pad geometry, and mounting hardware are all designed as a unified system — meaning every component is tested together rather than assembled from generic parts. The included hardware uses Tesla-specific fasteners, and the installation instructions reference the same anti-abrasion tape locations and torque specifications found in the professional service manual.
The limitations? Price and availability are the two most common concerns owners raise. Tesla's accessories inventory can fluctuate, and lead times occasionally stretch longer than expected. Feature-wise, the OEM tesla roof bars use a clean, low-profile design that prioritizes aerodynamics, but they lack integrated T-slot accessory channels that some owners prefer for quickly swapping cargo attachments.
One important note on weight capacity: Tesla's public product listing does not prominently display detailed load rating numbers. If you need precise figures, consult your owner's manual or contact Tesla service directly. Understanding the difference between dynamic and static load capacity matters here. Static load capacity refers to how much weight the roof supports while parked — think rooftop tent camping overnight. Dynamic load capacity is the limit while driving, and it is always significantly lower because braking, cornering, and road impacts multiply the effective force on every mounting point. Typically, static capacity can be three to six times higher than dynamic capacity, so a number that sounds generous in a campground may be far more restrictive at highway speed.
Third-Party Roof Rack Options and Trade-Offs
Why do owners look beyond the OEM option? Price is the obvious motivator — many third-party rack systems cost noticeably less. Some also offer features the factory rack does not, such as integrated T-slot channels for versatile accessory mounting, adjustable crossbar spacing, or bundled cargo accessories included in the kit price.
Here is where you need to slow down and think critically. A product page that says "compatible with Tesla Model Y" is making a marketing claim, not an engineering certification. Compatible can mean the crossbars are roughly the right length and the foot mounts happen to line up — it does not necessarily mean the complete system has been load-tested, vibration-tested, and validated against the Model Y's specific roof structure and glass tolerances. A general compatibility statement is not the same as a purpose-engineered, vehicle-approved system.
That distinction matters because a roof rack tesla owners bolt on and forget about for months sits through temperature swings, highway vibrations, car washes, and heavy rain. Marginal fitment that seems fine during a driveway test-fit can reveal problems hundreds of miles later — loose mounting feet, uneven load distribution, or protective pads that shift and expose glass to metal contact.
This is not an argument against every third-party option. Some aftermarket manufacturers invest heavily in vehicle-specific engineering and publish detailed, model-year-specific installation documentation. The key is learning how to tell those apart from generic, one-size-fits-many products.
How to Verify Any Rack System Before Purchase
Whether you are leaning toward OEM or aftermarket, run through this checklist before committing your money. These steps apply universally and will save you from compatibility headaches down the road.
- Confirm model year specificity. Verify the rack is explicitly designed for your production year — not just "Model Y" in general. Mounting point configurations and trim cap designs can vary between production runs.
- Check for vehicle-specific installation documentation. A trustworthy manufacturer provides step-by-step instructions written specifically for the Model Y, referencing its unique mounting slots and glass roof. Generic instructions shared across multiple vehicle brands are a red flag.
- Verify published weight ratings. Both dynamic and static load limits should be clearly stated, not buried or absent. If a manufacturer does not publish these numbers, you have no way to safely determine how much cargo you can carry.
- Confirm the mounting method matches the Model Y's attachment points. The rack should attach through the concealed mounting slots along the roof edge — not through suction cups, magnetic mounts, or clamp-on mechanisms designed for rain gutters the Model Y does not have.
- Look for owner reviews specific to your model year. Community feedback from other Tesla owners who drive the same variant you own is one of the most practical compatibility signals available.
Taking ten minutes to verify these details protects you from a far more frustrating scenario: unboxing a rack system in your garage only to discover that the mounting feet do not align, the hardware is wrong, or the crossbars sit at an awkward angle against the glass. With the right system confirmed and in hand, the next question is whether it actually fits your specific production year — a detail that matters more than most owners realize.
Model Year Differences That Affect Roof Rack Compatibility
You confirmed the mounting method, checked the weight ratings, and verified the manufacturer provides Model Y-specific documentation. Everything looks good — until you realize no one told you which Model Y the rack was actually designed for. A 2021 and a 2026 both carry the same nameplate, but they are not the same vehicle. This distinction catches more owners off guard than almost any other compatibility factor when shopping for a tesla y roof rack, and ignoring it can mean unboxing a system that simply does not fit your car.
Pre-Refresh Model Y Roof Rack Considerations
The original Model Y rolled off Tesla's production lines starting in early 2020 and continued through 2024 in what is now commonly called the "pre-refresh" or "classic" generation. This era established the baseline mounting point configuration — the concealed metal receivers beneath the rubber roof seal, the specific spacing between front and rear attachment slots, and the trim cap design that covers the hardware once installed.
Throughout this multi-year production run, Tesla made iterative changes to various vehicle systems — battery chemistry, interior trim, infotainment hardware — but the fundamental roof structure and glass panel dimensions remained consistent enough that a single roof rack design generally served the entire pre-refresh lineup. Tesla's own DIY installation guide references the same anti-abrasion tape measurements (227 mm from the front glass edge, 412 mm from the rear glass edge) and the same rail clip engagement method without distinguishing between specific pre-refresh model years. That consistency is reassuring if you own a 2021 through 2024 Model Y — the installation procedure and hardware fitment are effectively identical across those builds.
Still, minor production variances can exist between early and late pre-refresh units. If you are purchasing a third-party rack and you see owners on forums or Reddit threads debating slight fitment differences between, say, a 2021 and a 2023, the issue is more likely related to manufacturing tolerances on the rack itself than to changes Tesla made to the vehicle. Cross-referencing your experience with community feedback — including discussions like those found in tesery roof rack Reddit threads — can help you spot whether a specific aftermarket product has known inconsistencies across early production runs.
Juniper Refresh and What Changed for Roof Rack Fitment
Everything shifted in Q1 2025 when Tesla unveiled the Model Y "Juniper" refresh. This was not a minor mid-cycle update — over 40% of the vehicle's components were redesigned, touching the front fascia, rear bumper, interior architecture, electronic hardware, and exterior trim profiles. The drag coefficient dropped from 0.23 to 0.22, driven partly by smoothed body lines and aerodynamic refinements that subtly altered the vehicle's exterior surfaces.
So what does this mean for roof rack fitment specifically? The glass roof dimensions reportedly remain similar between the pre-refresh and Juniper variants, but the roof curvature is different. That curvature change — even if it measures only a few millimeters — can affect how foot pads seat against the glass, how anti-abrasion tape lays along the trim line, and whether crossbars achieve full, even contact across their mounting points. A rack designed to follow the pre-refresh roof profile may sit slightly off-center or create uneven pressure distribution on a Juniper, leading to noise, vibration, or inadequate clamping force.
There is an important nuance here that works in favor of owners buying the OEM rack from Tesla. Tesla's DIY installation guide includes a note for vehicles manufactured as of approximately February 2025 stating that "although the images may depict an earlier vehicle, the procedure is the same." This suggests Tesla engineered its official rack system to accommodate the Juniper's design changes while maintaining the same installation steps. For third-party racks, though, you cannot assume the same cross-generation compatibility exists unless the manufacturer explicitly confirms Juniper fitment — ideally with model-year-specific documentation rather than a blanket "fits all Model Y" claim.
The Juniper's updated exterior trim profiles also deserve attention. Changes to the rubber seal design, trim cap geometry, or the precise location of the concealed mounting slots — even shifts of a few millimeters — can mean the difference between a clean, rattle-free tesla model y roof rack installation and one that never quite feels right. If you are shopping for a rack and your vehicle was built after early 2025, treat Juniper compatibility as a hard requirement, not a nice-to-have.
How to Identify Your Model Year and Variant
Before purchasing any rack system, you need to know exactly what vehicle you are working with. "I have a Model Y" is not specific enough — you need the production date and variant. Here is how to confirm both:
- Check the door jamb sticker. Open the driver's door and look for the vehicle certification label on the door frame or B-pillar. This label includes the manufacture date, which tells you whether your Model Y was built before or after the Juniper transition in early 2025.
- Decode your VIN. Your 17-character Vehicle Identification Number encodes production details including the model year and manufacturing plant. Free online VIN decoders — including Tesla's own service tools — can translate this string into a clear production timeline. Pay particular attention to whether your build date falls before or after February 2025, since that is the approximate cutoff Tesla references for the refresh.
- Cross-reference with the rack manufacturer's compatibility chart. Once you know your build date and variant, match it against the specific model years listed by the rack manufacturer. Look for explicit mention of "Juniper," "2025 refresh," or "post-February 2025" compatibility — not just a generic Model Y designation.
Assuming cross-year compatibility without verification risks purchasing an incompatible system. A rack that fits a 2022 Model Y perfectly may not seat correctly on a 2026 Juniper — and the difference might not become obvious until you are already mid-installation.
Taking five minutes to confirm your production date saves you the frustration of a return, or worse, the risk of forcing an ill-fitting rack onto a glass roof that does not tolerate compromises. With your vehicle variant confirmed and the right system in hand, the next practical question becomes whether you have the right tools and materials ready — because a tesla model y roof rack installation demands a more specific prep list than most owners expect.
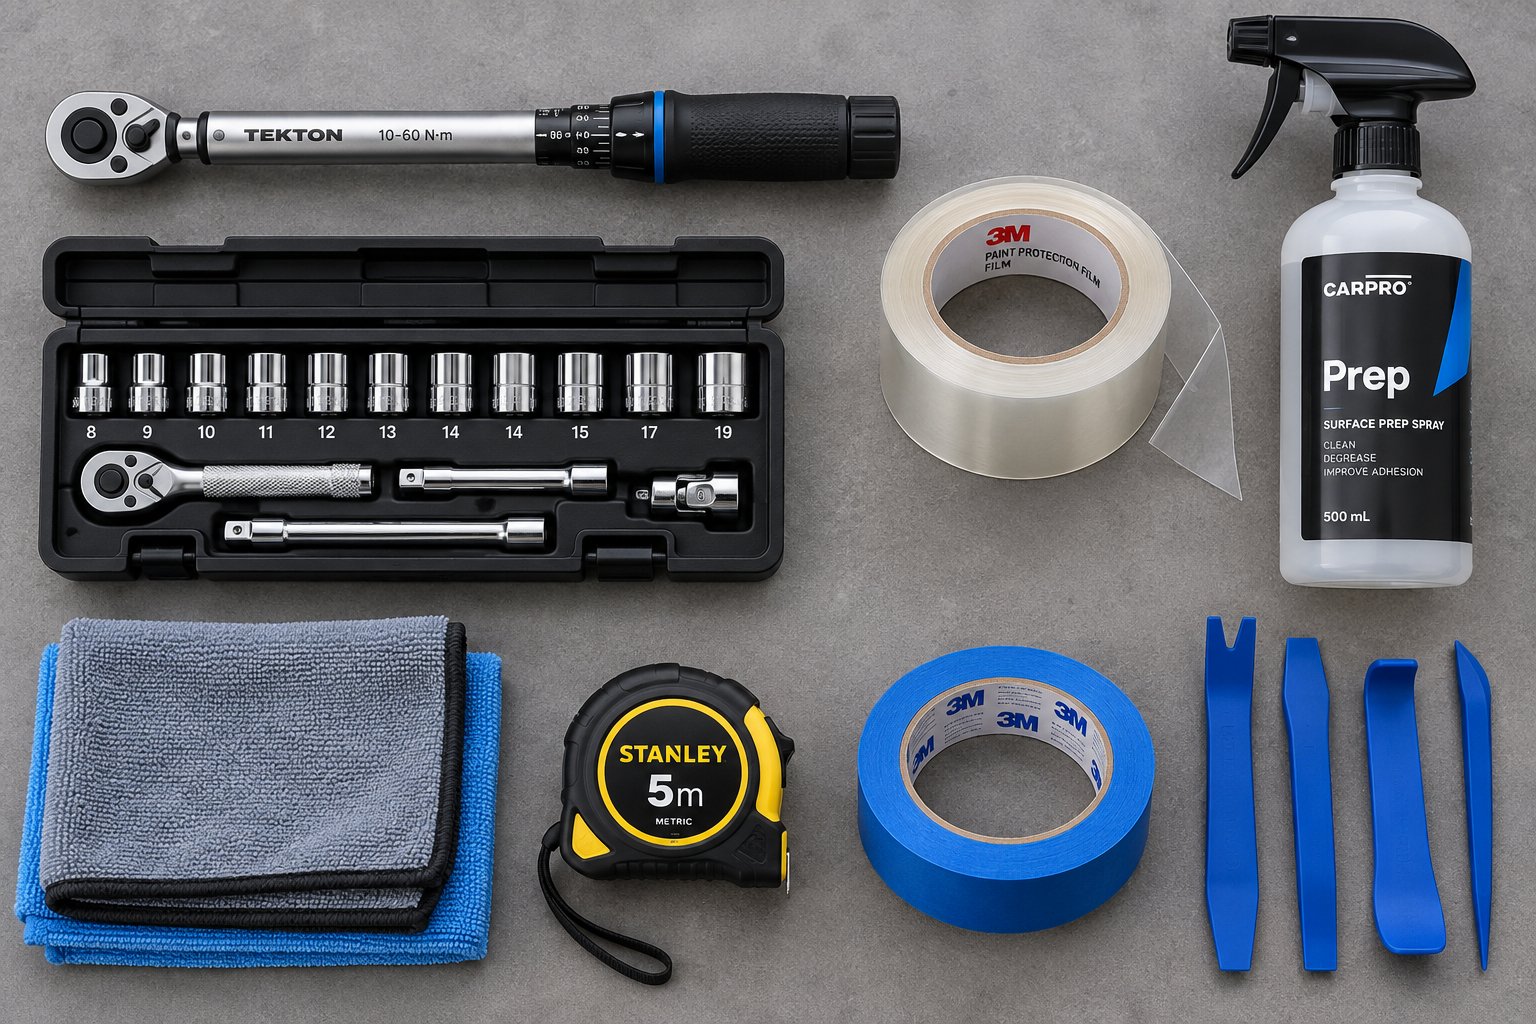
Complete Tools and Materials Checklist Before You Start
You have confirmed your Model Y variant, chosen a rack system, and verified fitment for your specific production year. The temptation now is to rip open the box and start bolting things on. Resist that urge. A tesla roof rack installation lives or dies in the preparation phase, and the difference between a clean, damage-free result and a scratched glass nightmare often comes down to whether you had the right tools and materials laid out before your hands ever touched the car.
Most rack kits ship with the structural hardware — crossbars, rail clips, pads, wingnuts, locking keys — but they assume you already own or will source the supporting tools and protective materials that make a safe installation possible. Here is everything you need, why you need it, and the details most guides leave out.
Required Tools for a Safe Installation
Tesla's professional service manual explicitly recommends a ratchet or torque wrench, a 1/4-inch to 3/8-inch adapter, and an 8 mm socket for the wingnut fasteners. Those three items are non-negotiable. Beyond them, you will want several supporting tools and materials that transform a stressful guessing game into a controlled, methodical process.
| Tool / Material | Purpose | Notes |
|---|---|---|
| Torque wrench (capable of 2.5–3.5 Nm) | Achieves manufacturer-specified fastener tightness without over-torquing near glass | A click-type torque wrench set to 3.5 Nm is ideal. Do not rely on feel — the margin between secure and damaged is narrow at these low torque values. |
| 8 mm socket | Fits the wingnut fasteners included with the Tesla OEM rack | Confirm the socket size against your specific rack's instructions if using a third-party system — some aftermarket kits use different hardware. |
| 1/4 in to 3/8 in adapter | Bridges the torque wrench drive size to the socket | Tesla's service manual lists this adapter as a recommended tool for the procedure. |
| Trim removal tool (supplied with OEM kit) | Carefully lifts the rubber seal to access the concealed rail clip mounting slots | If your kit does not include one, use a plastic pry tool — never a metal flathead screwdriver, which can gouge the seal or scratch glass. |
| Anti-abrasion tape (supplied with OEM kit) | Creates a sacrificial barrier between mounting hardware and the glass roof surface | Pre-cut and corner-labeled in the Tesla kit. If replacing worn tape, match the original dimensions exactly. |
| Isopropyl alcohol (IPA) wipes | Removes oils, dust, and debris from the glass surface before tape application | Tesla's installation procedure specifies IPA cleaning with a one-minute drying period before proceeding. |
| Microfiber cloths | Wipe down surfaces without leaving lint or micro-scratches | Keep two on hand — one for cleaning, one for drying. Avoid paper towels, which can shed fibers under tape. |
| Painter's tape / masking tape | Marks alignment positions and serves as temporary measurement references | Tesla's own procedure notes that on some Model Y Standard vehicles, alignment arrows may not be visible on the glass — masking tape creates a temporary substitute marking. |
| Measuring tape (metric) | Measures the 227 mm front and 412 mm rear anti-abrasion tape placement distances | Use a rigid tape measure rather than a flexible cloth one for accuracy on a curved surface. |
| Soft blanket or foam padding | Protects the glass roof surface while positioning crossbars overhead | Drape across the glass before lifting crossbars into place — prevents accidental tool drops or hardware scrapes. |
| Plastic squeegee or credit card | Presses anti-abrasion tape flat against the glass to eliminate air bubbles | Work from the center outward in slow, firm strokes. |
You will notice this list includes items that sound almost too basic — a measuring tape, painter's tape, a credit card. That is the nature of this job. The tesla roof rack installation process is not mechanically complex, but it is precision-dependent. Every millimeter of tape placement and every fraction of a newton-meter of torque matters when you are working inches from a panoramic glass panel.
Materials You Should Not Skip
Two items on that table deserve extra emphasis because they are the ones DIY installers most commonly dismiss as optional: anti-abrasion tape and IPA wipes. They are not optional. Both are explicitly referenced in Tesla's DIY installation guide and the professional service manual as required steps — not suggestions, not best practices, but procedural requirements baked into the installation sequence.
Think of the anti-abrasion tape as a sacrificial shield. The mounting pads and rail clips sit on or adjacent to the glass roof surface, and every mile you drive sends micro-vibrations through those contact points. Without the tape, you are allowing metal and hard plastic to oscillate directly against glass — a recipe for micro-scratches that start invisible and gradually deepen through thermal cycling and road vibration over weeks and months. Replacing that tape costs pennies. Replacing the glass roof costs thousands.
The IPA wipes serve a less obvious but equally critical role. Your glass roof collects a film of oils, pollen, road dust, and wax residue that is invisible to the naked eye. If you apply anti-abrasion tape over a contaminated surface, the adhesive bond weakens. Over time — especially through temperature swings — the tape edges lift, moisture creeps underneath, and the tape migrates away from its intended position under the mounting foot. The result is an unprotected patch of glass sitting directly under a vibrating hardware contact point. A 60-second wipe-down with IPA followed by a one-minute drying period, exactly as Tesla specifies, prevents that entire failure chain.
Setting Up Your Workspace
Where you work matters almost as much as what you work with. A flat, level surface is ideal because it ensures the vehicle sits evenly — if the car is parked on a slope, crossbar alignment can look correct during installation but appear visibly off once you drive onto flat ground. A garage with overhead lighting gives you the best combination of a controlled environment and visibility into the dark recesses under the roof seal where rail clips engage.
Plan to have a second person available, at least for steps involving crossbar placement. The front and rear crossbars are not heavy, but they are long enough to be awkward for one person to position precisely while simultaneously checking alignment on both sides of the vehicle. Your helper does not need any technical skill — just the ability to hold a crossbar steady in position for 30 seconds while you verify the clip studs are vertical and the pads are seated correctly.
One environmental factor that catches people off guard: direct sunlight. Working outside on a sunny day heats the glass roof surface, which accelerates IPA evaporation before it has fully cleaned the area and can cause anti-abrasion tape adhesive to become overly tacky during application — making precise repositioning difficult. If a garage is not available, aim for an overcast day or work in the early morning shade. Your tape application will be cleaner, your measurements steadier, and your glass surface properly prepared for the protective steps that come next.
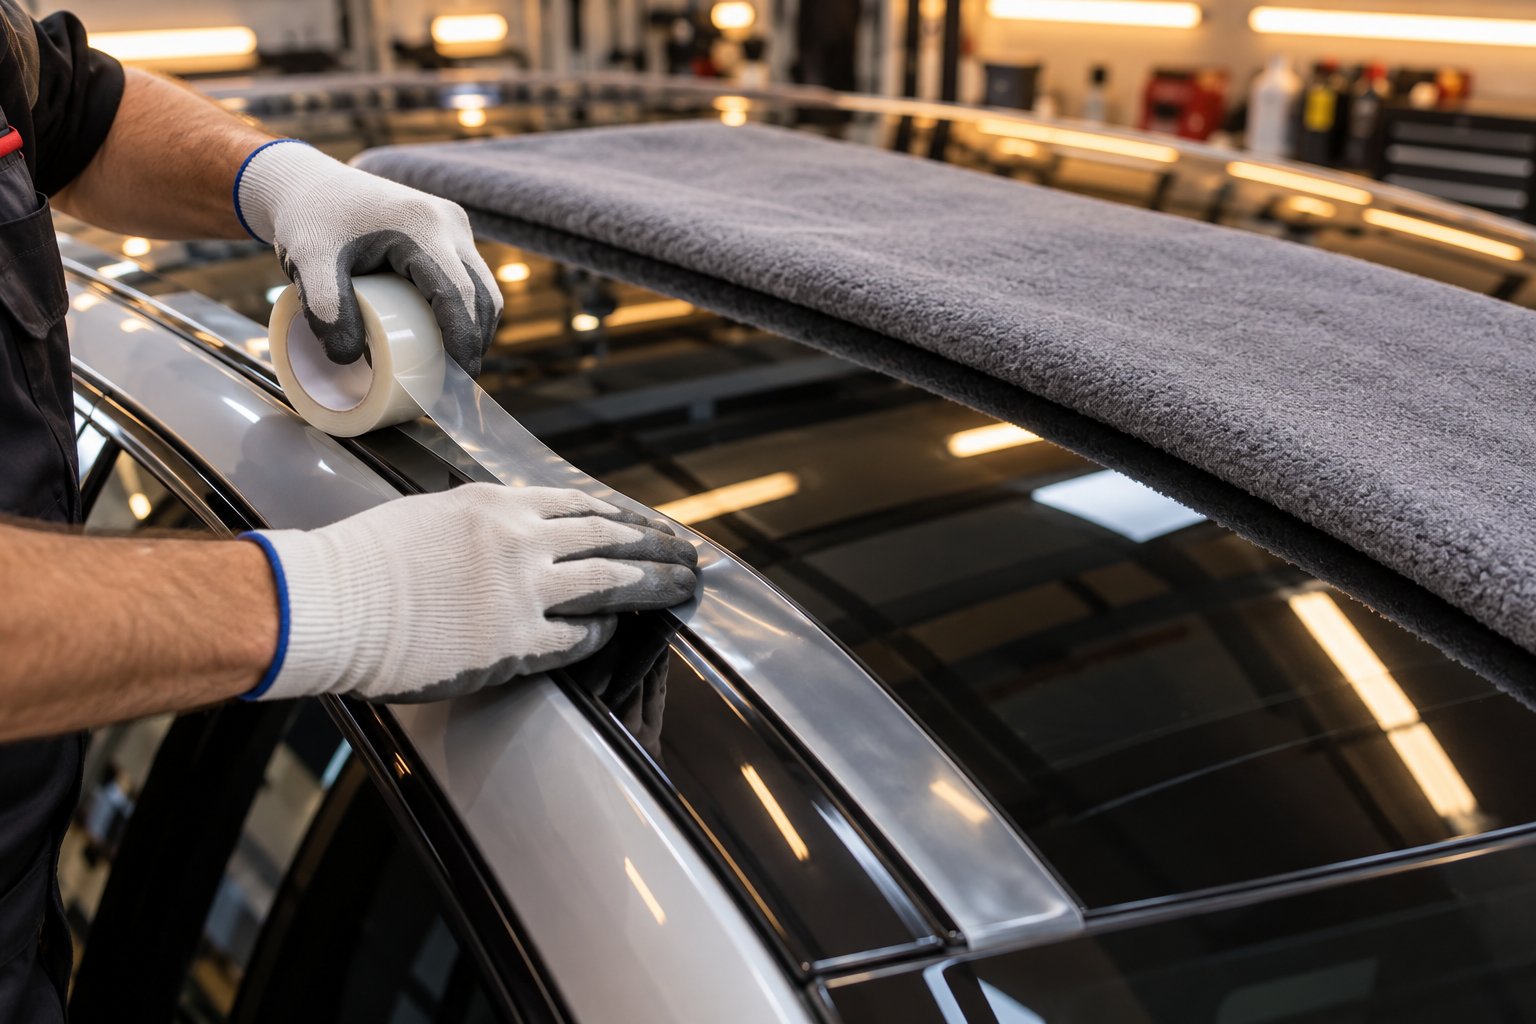
How to Protect Your Glass Roof During Installation
Your workspace is ready, your tools are staged, and that roll of anti-abrasion tape is sitting right next to your IPA wipes. Good. Because what you do with those materials in the next few minutes determines whether your glass roof survives the installation unscathed — or develops hairline damage that quietly worsens every time you drive.
Plenty of guides treat glass protection as a footnote — a quick "apply the tape and move on" mention buried between more exciting steps. That is a mistake. On a vehicle where the mounting hardware interfaces directly with a panoramic glass panel, the protection phase is not a preliminary chore. It is the most consequential part of the entire process.
Understanding Why Glass Roof Protection Is Non-Negotiable
Picture the Model Y's roof from above. A single uninterrupted glass panel stretches from the windshield header all the way back to the rear hatch — no metal crossmembers breaking up the surface, no traditional rain gutters reinforcing the edges. When you install tesla model y roof racks, the mounting pads, rail clips, and crossbar feet all sit directly adjacent to or on this glass surface depending on the specific rack design.
Here is the part that makes this different from bolting accessories onto a steel-roofed SUV: any metal-to-glass contact without a proper barrier creates a micro-abrasion zone. You will not see the damage on day one. But every mile driven sends vibrations through the mounting points, and each vibration cycle grinds unprotected hardware against the glass surface at a microscopic level. Over weeks and months, thermal cycling — the glass expanding in summer heat and contracting in winter cold — amplifies those micro-scratches into visible marks or, worse, stress fractures that propagate outward from the pressure point.
As documented by Tesla owners across forums, cracked glass roofs during or after roof rack installation are not rare freak accidents. They are predictable consequences of skipping or rushing the protection steps. The edge of tempered glass — exactly where the mounting hardware interfaces — is the weakest structural zone of the entire roof panel. Concentrated pressure from a misaligned clip or an unprotected mounting foot targets that vulnerability directly. And once tempered glass fails, it fails catastrophically and instantly, not gradually.
Glass roof replacement on a Model Y is not just expensive — it can also require recalibration of the forward-facing cameras and sensors integrated into the windshield and roof area. A five-dollar roll of anti-abrasion tape and ten minutes of careful application eliminates this entire risk category.
How to Properly Apply Anti-Abrasion Tape
Tesla's DIY installation guide does not treat tape application as optional — it is step two of the procedure, performed before any hardware touches the vehicle. The tape functions as a sacrificial barrier: it absorbs the micro-abrasion that would otherwise accumulate on the glass surface beneath each mounting foot. Think of it like a screen protector on your phone — it takes the daily punishment so the surface underneath stays pristine.
The OEM kit includes pre-cut anti-abrasion tape segments labeled with arrow icons that correspond to specific corners of the vehicle (front left, front right, rear left, rear right). Each piece is sized to match the mounting foot contact area with slight overhang. If you are using a third-party rack and need to cut your own tape, follow these steps precisely:
- Clean the application area thoroughly. Use an IPA wipe to remove all oils, pollen, road film, and wax residue from the glass surface where each mounting point will sit. Pay attention to the zone directly along the trim line — this area collects grime that is invisible to the eye but devastating to adhesive performance. Surface contaminants create a barrier that prevents the adhesive from making full contact with the substrate, reducing both initial tack and long-term bond strength.
- Allow the surface to dry completely. Give the cleaned area a full 60 seconds of drying time — rushing this step traps moisture beneath the tape. Residual moisture weakens adhesion and can cause the tape to lift at the edges over time, especially through temperature fluctuations. If you are working in humid conditions (above 50% relative humidity), extend the drying window.
- Measure and mark tape placement positions. For the OEM rack, Tesla specifies 227 mm from the front edge of the front-side glass for the forward tape segments and 412 mm from the rear edge of the rear-side glass for the rear segments. Use your metric measuring tape and place a small piece of painter's tape as a position marker. These measurements ensure the anti-abrasion tape aligns precisely with where the mounting pads will sit.
- Align the arrow markings. If using the Tesla OEM kit, match the arrow on the glass roof with the arrow printed on each anti-abrasion tape segment. This alignment system ensures the tape is oriented correctly for its designated corner of the vehicle and follows the trim line accurately.
- Apply the tape slowly from one edge. Peel the backing partially and anchor one end of the tape at your marked position. Then lay the tape down gradually, working from that anchored edge outward. Applying from one side prevents the air pockets that form when you press the entire piece down at once. Move slowly — you will not be able to cleanly reposition the tape once the adhesive makes full contact.
- Press firmly across the entire surface. Use a plastic squeegee or the flat edge of a credit card to apply even, firm pressure across the full length of the tape. Work from the center outward toward the edges, pushing trapped air ahead of you. For pressure-sensitive adhesive tapes, uniform pressure during application is critical to achieving maximum bond performance — you want every square millimeter of adhesive making full contact with the clean glass beneath it.
- Inspect for bubbles and edge lift. Run your finger along all four edges of each tape segment. If you feel any raised sections or see visible air pockets, peel back just far enough to release the trapped air and re-press. Small bubbles that seem harmless now become entry points for moisture and debris over hundreds of miles of driving vibration.
One detail worth repeating: the adhesive bond strengthens over time. Immediately after application, you have roughly 50–80% of the tape's ultimate holding power. Full bond strength develops over the following hours as the adhesive continues wetting out into the glass surface. This is another reason not to rush through the remaining installation steps — giving the tape even 15 to 20 minutes of undisturbed bonding time before placing mounting hardware on top of it produces a noticeably more secure protective layer.
Additional Protective Measures During Installation
Anti-abrasion tape guards the specific zones beneath the mounting feet, but the rest of the glass roof remains exposed during the physical installation process. You are lifting crossbars overhead, threading hardware, and reaching across the roof surface — all movements that create opportunities for accidental contact. A dropped wingnut, a swinging hex wrench, or a crossbar end that slips from your grip can chip or crack the glass in a fraction of a second.
Lay a soft blanket, moving pad, or sheet of foam padding across the center of the glass roof before you begin positioning crossbars. This creates a protective buffer zone across the most exposed area of the panel. You will remove it once the crossbars are seated on their mounting pads, but during the alignment phase — when you are holding components overhead and adjusting position — that blanket is your insurance policy against gravity and fumbled hardware.
Painter's tape serves double duty here. Beyond marking measurement positions for the anti-abrasion tape, use it to mark the intended final position of each crossbar foot on the roof edge trim. Place a small flag of painter's tape at each of the four mounting locations so you can visually confirm alignment from a distance before committing. This technique is especially valuable for owners installing a model y juniper roof rack for the first time, where the subtle differences in roof curvature compared to pre-refresh vehicles make visual alignment verification more important than ever. Marking positions in advance lets you check symmetry and spacing without repeatedly lifting and repositioning the crossbars — each repositioning attempt is another chance for accidental glass contact.
Finally, keep all loose hardware — wingnuts, hex wrenches, locking keys — in a small container or magnetic tray on your workbench rather than setting them on the roof surface. It sounds overly cautious, but a wingnut rolling off a curved glass roof and bouncing off the edge is exactly the kind of minor incident that leaves a chip you will notice every time you walk up to your car. Controlled placement of every component, every time, is the mindset that separates a flawless installation from one that leaves evidence behind.
With your glass fully protected and every mounting position clearly marked, the actual hardware installation becomes dramatically less stressful. The preparation you have invested in these protective steps is what transforms the next phase — physically mounting the crossbars — from a high-anxiety gamble into a calm, methodical sequence.
Step-by-Step Installation Walkthrough for DIY Owners
Your glass is protected, your tape is bonded, and your mounting positions are marked. This is the moment the job shifts from preparation to execution — and it is the part that intimidates most first-time installers. Here is the reassuring truth: the physical hardware installation is the simplest phase of the entire process. You are working with a handful of rail clips, four pads, two crossbars, and four wingnuts. No drilling, no adhesive curing, no irreversible modifications. If you followed the preparation steps in the previous sections, the hard part is already behind you.
What follows is a consumer-friendly translation of the procedure documented in Tesla's professional service manual — the same sequence a trained technician follows in a service center, broken into plain language that any careful owner can execute confidently. Each step below references the specific details, measurements, and cautions from that manual so you know exactly why you are doing what you are doing, not just how.
Steps One Through Three — Accessing Mounting Points and Initial Positioning
The anti-abrasion tape you applied in the preparation phase already marks exactly where the mounting hardware needs to go. Each tape segment has an arrow printed on it, and those arrows are your alignment targets for the rail clips that form the foundation of the entire rack system. If your tape placement followed the measurements from the previous section — 227 mm from the front glass edge for the forward positions and 412 mm from the rear glass edge for the rear positions — the arrows on the tape should align precisely with the corresponding arrows on the glass roof.
Step 1: Lift the roof seal to expose the mounting slot. Take the trim removal tool included in the rack kit — or a plastic pry tool if your kit did not include one — and carefully lift the rubber seal at the arrow location on the anti-abrasion tape. You are looking for a concealed metal receiver, often called a J-hook, tucked beneath the glass edge. This is the structural anchor point that the entire rack system ultimately connects to. Work the trim tool gently; the seal is designed to lift without tearing, but aggressive prying can deform it or scratch the glass edge underneath.
Step 2: Insert and secure the rail clips. Slide a rail clip into the exposed slot so that it aligns with the arrow on the anti-abrasion tape. The clip hooks onto the J-hook receiver beneath the roof glass — you should feel a definitive engagement as the clip seats into position. Confirm that the clip is properly secured by gently tugging it outward. It should resist movement firmly. Once engaged, remove the trim tool and verify the clip is centered on the arrow marking. Repeat this process at all four mounting locations: front left, front right, rear left, and rear right.
Step 3: Place the corner-specific pads over each rail clip. Each pad included in the kit is labeled with an icon identifying which corner of the vehicle it belongs to — do not mix them up. The pads are not interchangeable because their geometry is shaped to match the specific roof curvature at each mounting position. Place the appropriate pad over its corresponding rail clip so that the clip's threaded stud remains exposed through the opening in the pad. The pad sits on top of the anti-abrasion tape you applied earlier, creating a layered protection stack: glass, then tape, then pad, then crossbar foot. This layering is what prevents metal-on-glass contact throughout the life of the installation.
A note on front-to-rear crossbar spacing: the distance between your forward and rear mounting points is dictated by the tape placement measurements from Tesla's procedure, not by personal preference. That specific spacing — roughly 185 mm between the front and rear arrow positions, measured along the roof edge — is engineered to balance structural load distribution and aerodynamic performance. Wider spacing increases the rack's resistance to fore-and-aft rocking under braking and acceleration forces, while the specific positions Tesla chose also minimize turbulence interaction with the glass roof profile. Moving the crossbars to non-standard positions compromises both stability and wind noise characteristics, so trust the measurements.
Steps Four Through Six — Securing Crossbars and Achieving Proper Torque
With all four pads in place and their clip studs standing vertical, you are ready to mount the crossbars themselves. This is the step where having a second person makes the biggest difference — not because the crossbars are heavy, but because aligning both ends simultaneously over their respective clip studs is awkward when you are reaching across the full width of the roof by yourself.
Step 4: Position the crossbars onto the pads. The front crossbar is longer than the rear crossbar — Tesla's service manual explicitly notes this distinction, so verify which is which before lifting anything onto the roof. Pick up the front crossbar and lower it onto the two forward pads so that the threaded clip studs poke through the openings at each end of the crossbar. Repeat with the shorter rear crossbar on the rear pads. Ensure the clip studs are vertical before mounting — if a stud is tilted, the wingnut will thread on at an angle and cross-thread almost immediately.
Step 5: Hand-tighten all four wingnuts first. This is a critical sequence detail that separates a proper installation from a problematic one. Thread the wingnuts onto the clip studs by hand — finger-tight only. Do not torque any single wingnut until its counterpart on the opposite side of the vehicle is also hand-tightened. The reason? Tightening one side fully before engaging the other creates asymmetric clamping pressure that can shift the crossbar off-center, misalign the mounting pads, and concentrate stress unevenly across the glass surface. By hand-tightening all four corners first, you establish a balanced starting point before applying final torque.
Step 6: Torque all wingnuts to specification. This is the step where your torque wrench earns its place on the tool list. Tesla's service manual specifies a torque value of 3.5 Nm (2.6 lb-ft) for the wingnut fasteners, applied using a ratchet or torque wrench with a 1/4-inch to 3/8-inch adapter and an 8 mm socket. That number might sound surprisingly low — and that is exactly the point. You are tightening fasteners adjacent to a glass panel, not bolting together a suspension component.
Tighten the wingnuts in an alternating pattern: front left, then front right, then rear left, then rear right — or follow a diagonal star pattern. The goal is to distribute clamping force evenly across all four mounting points with each incremental tightening pass. Avoid the common mistake of fully torquing one corner before moving to the next. Instead, bring all four corners up to specification gradually, switching between sides after each partial turn.
What happens if you over-torque? At best, you crack or deform the wingnut or mounting hardware. At worst, you transfer excessive clamping force through the rail clip and pad stack into the glass edge — the weakest structural zone of the roof panel. Tesla's service manual includes an explicit caution: "To avoid damaging the roof glass, do not overtorque the fasteners, and alternately tighten both sides evenly." A calibrated torque wrench that clicks at 3.5 Nm removes all guesswork from this equation.
Under-torquing carries its own risks. A rack that feels stable in your driveway may loosen progressively as highway speeds generate aerodynamic lift and vibration. A roof rack tesla model y owners rely on at 70 mph needs every fastener at its specified torque — not almost there, not close enough, but precisely at specification. Fastener creep at highway speeds is a real phenomenon, and the consequences of a loosened crossbar range from annoying rattles to catastrophic detachment of cargo into traffic behind you.
Once all four wingnuts reach 3.5 Nm, align the marking on each wingnut with the corresponding marking on the crossbar — the notch should face outboard. Then use the provided locking keys to lock each crossbar in place. Tesla specifies rotating clockwise on left-hand side locks and counter-clockwise on right-hand side locks. You will feel the lock engage with a positive click. Store the locking keys somewhere secure — you will need them for future removal and reinstallation.
Step Seven — Final Alignment Check and Trim Cap Reinstallation
Before you declare the job done, step back and inspect the installation from multiple angles. Stand behind the vehicle and sight along both crossbars — they should be visually parallel to each other and perpendicular to the vehicle's centerline. Even a slight deviation from parallel creates asymmetric airflow at speed, which generates the whistling and humming that drives owners to online forums searching for "tesla model y roof rack wind noise" solutions. If one crossbar appears slightly rotated, loosen its wingnuts, reposition, and re-torque. This is far easier to correct now than after your first highway drive.
With alignment confirmed, perform the physical security check described in Tesla's procedure: push and pull on both crossbars firmly to ensure they are fully secured and locked in place. You should feel zero lateral or longitudinal movement. Any play at all indicates an incompletely seated rail clip, an unlocked wingnut, or insufficient torque — all of which must be corrected before driving.
The final hardware step is installing the side covers on each end of both crossbars. These cosmetic covers snap into place starting from the bottom — the bottom of each cover has guiding tabs that insert into a slot on the crossbar end. Work from the bottom up, pressing the cover gently until it clicks flush against the crossbar. The covers serve a dual purpose: they clean up the visual appearance of the installation and they protect the exposed wingnut and locking mechanism from road debris, moisture, and UV degradation.
With the covers seated and the crossbars locked, your roof racks tesla model y installation is physically complete. Every fastener is torqued, every pad is seated, every protective layer is in place. But here is the part that separates a careful installer from a reckless one:
Never drive immediately after installation. Complete the post-installation verification steps covered in the next section first — a short sequence of physical checks and a structured test-drive protocol that confirms your rack is genuinely road-ready, not just driveway-ready.
The difference between those two states — driveway-ready and highway-ready — is exactly what the verification process is designed to reveal. Fasteners that feel tight to the hand can behave differently under the combined forces of aerodynamic load, braking, and road vibration. Taking ten minutes to verify your work before that first drive is the final investment that turns a good installation into a fully trustworthy one.
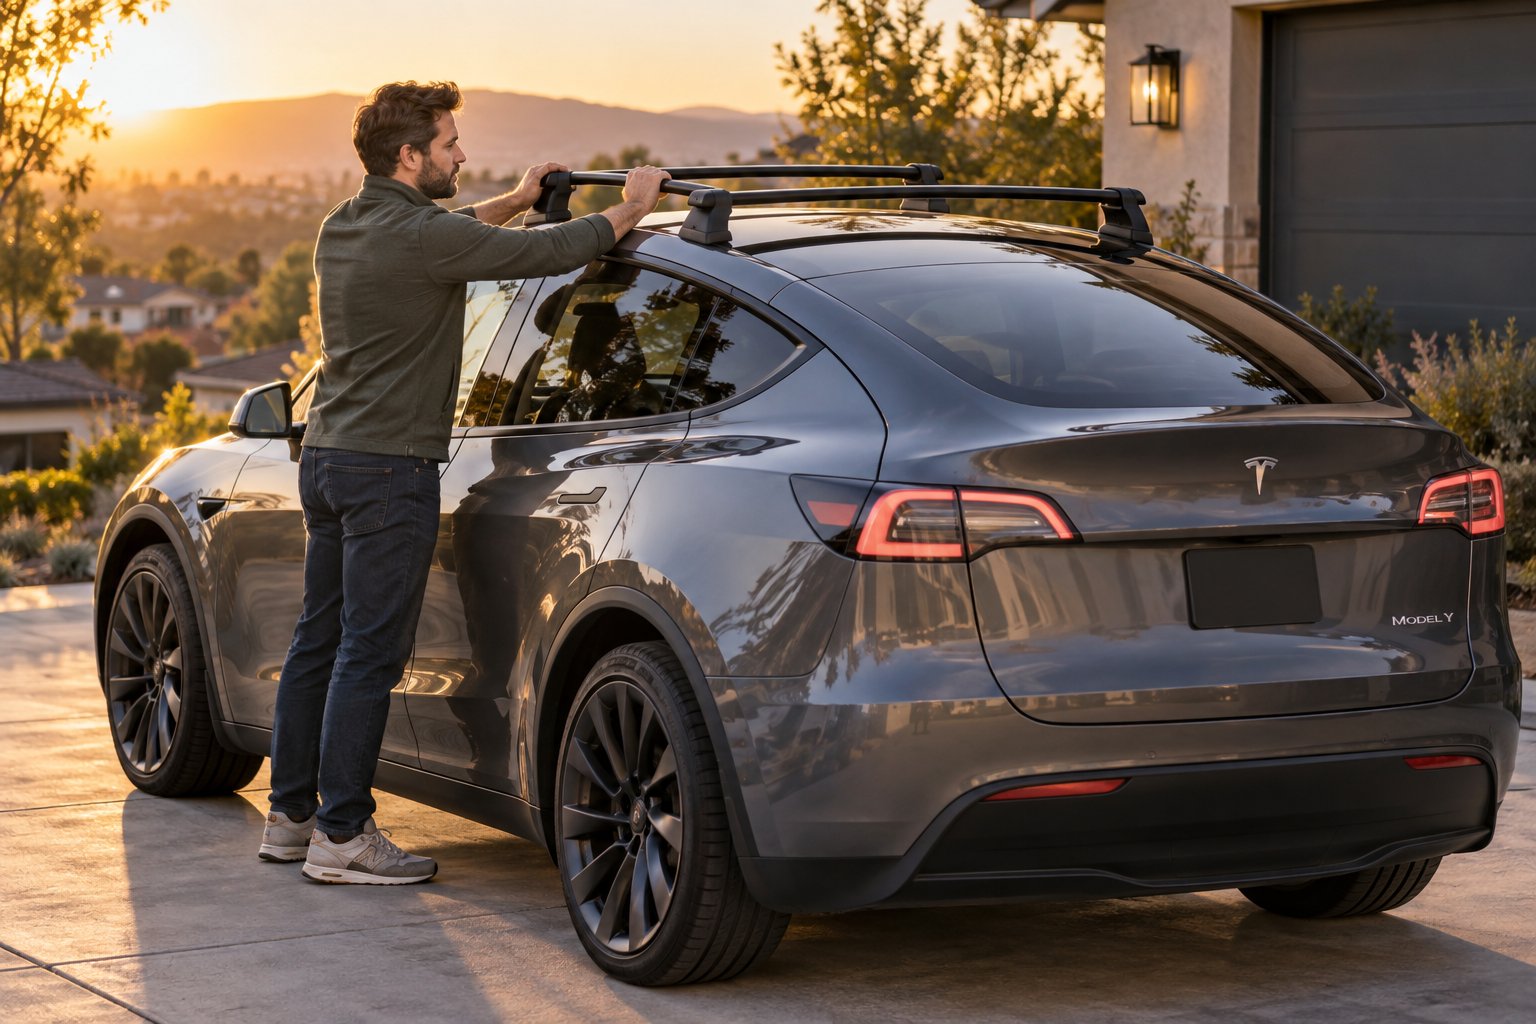
Post-Installation Verification and Weight Limits
Your crossbars are torqued, your side covers are snapped into place, and the installation looks clean from every angle. It is tempting to load up the bikes and head for the trailhead. Do not do that yet. A roof rack model y owners can trust at highway speed is one that has been verified through a deliberate sequence of physical checks and a structured first-drive protocol — not one that simply looked good in the driveway. The forces acting on a rack at 70 mph bear almost no resemblance to the static conditions under which you just installed it, and the gap between those two realities is exactly where problems hide.
Physical Security Checks Before Your First Drive
Before you even start the car, walk through this inspection sequence. It takes less than five minutes and catches the issues that would otherwise announce themselves as rattles, whistles, or worse — a shifting crossbar — once you are already on the road.
- Attempt to shift each crossbar laterally and longitudinally. Grip the center of each crossbar and push firmly side to side, then front to back. Apply moderate force — you are not trying to break anything, but you are simulating the directional loads that wind gusts, braking, and cornering will impose at speed. Any detectable movement means a rail clip is not fully seated, a wingnut is under-torqued, or a locking key did not engage. Correct the issue before proceeding.
- Visually inspect every mounting bolt for full engagement. Crouch down at each corner of the vehicle and look at the wingnut-to-stud interface from below. The wingnut should be flush against the crossbar's mounting surface with no visible thread gap. If you can see exposed threads between the wingnut and the crossbar foot, the fastener has not reached its seated position.
- Check that no protective tape has shifted or bunched during tightening. The torquing process applies clamping force through the pad stack and into the anti-abrasion tape beneath it. If a tape segment wrinkled, folded, or migrated during tightening, the protective barrier is compromised at that mounting point. You will need to loosen the hardware, reposition or replace the tape, and re-torque.
- Verify that trim caps and side covers are fully seated with no gaps. Run your finger along the edge of each side cover and around the rubber roof seal near every mounting point. Gaps indicate a cover that did not click fully into place or a seal that was not properly repositioned after rail clip installation. Unseated covers can vibrate loose at speed and become road debris.
- Confirm that no tools or materials were left on the roof surface. It sounds obvious, but a microfiber cloth draped over the glass roof or a locking key sitting in the crossbar channel is easy to overlook when you are focused on torque values and alignment. A quick visual sweep of the entire roof area takes seconds and prevents the embarrassment — or danger — of objects flying off at speed.
Think of this checklist as your pre-flight inspection. Pilots do not skip it because they installed the engine correctly — they verify it because the consequences of an undetected issue are unacceptable. The same logic applies here. Your rack may be perfectly installed, but you do not know that until you have confirmed it through hands-on verification rather than assumption.
The First-Drive Test Protocol
Passing the physical inspection earns you a test drive — but not the kind where you merge onto the highway and hope for the best. A structured two-phase approach reveals different categories of problems at different speeds, giving you the opportunity to catch and correct issues before they escalate.
Phase one: low-speed residential loop. Drive a short route through your neighborhood at 25 to 30 mph with all windows down. You are listening, not just driving. Rattling suggests a loose side cover or an incompletely seated trim cap. A rhythmic tapping usually points to a mounting pad that shifted slightly during the torquing sequence. Whistling at even these low speeds indicates an alignment issue — one crossbar may be rotated a few degrees off-parallel, creating an asymmetric leading edge that catches airflow unevenly. If you hear anything unusual, return home immediately and re-inspect the corresponding mounting points.
After completing the low-speed loop, park and re-inspect all four mounting locations. Here is why this matters: fasteners can settle during initial vibration exposure. The micro-movements caused by road surface irregularities allow hardware to find its final seated position, and that settling process can result in a slight loss of clamping force. A minor re-torque back to the specified 3.5 Nm at this stage is normal and expected — it does not mean you did something wrong during installation.
Phase two: moderate highway speed. Once the low-speed check is clean, take the vehicle up to 55 to 65 mph on a highway or open road. This speed range introduces meaningful aerodynamic forces — lift, drag, and crosswind loads — that simply do not exist at neighborhood speeds. Again, windows down, radio off, listening carefully. A roof rack that was silent at 30 mph may develop a low hum or whistle at highway speed if the crossbar alignment is even slightly off or if a side cover has a marginal fit. This is your final verification that the installation is genuinely road-ready under real-world conditions.
After returning from the highway run, perform one more torque check across all four wingnuts. Then — and this is a detail most guides omit entirely — plan to re-check torque again after your first 50 to 100 miles of regular driving. This follow-up catch accounts for the cumulative settling effect that occurs over the rack's initial break-in period, especially as the anti-abrasion tape fully bonds under sustained clamping pressure. Yakima's maintenance guidance recommends periodic shake tests as ongoing practice — grab the rack and give it a firm shake once a month to confirm nothing has loosened over time. That habit takes five seconds and is one of the most effective long-term safety practices for any roof rack system.
Understanding Weight Capacity and Load Ratings
Your rack is verified, your test drives are clean, and you are ready to load cargo. But how much cargo? This is where many owners make dangerous assumptions — and where the distinction between two different types of weight ratings becomes critically important.
Every roof rack system has two separate load limits, and they are not interchangeable:
| Load Type | Description | Typical Consideration |
|---|---|---|
| Static Load Rating | The maximum weight the rack supports while the vehicle is stationary — parked, engine off, no movement. | Relevant for rooftop tent camping, loading/unloading heavy items, or any scenario where the vehicle is not in motion. This number is always significantly higher than the dynamic rating. |
| Dynamic Load Rating | The maximum weight the rack supports while the vehicle is being driven, accounting for aerodynamic lift, braking forces, cornering loads, and road vibration. | This is the number that governs every real-world driving scenario. Exceeding it risks rack failure, fastener fatigue, or loss of cargo at speed — even if the static rating technically accommodates the weight. |
Why does the dynamic rating drop so dramatically compared to static? Imagine a 50-pound cargo box sitting on your rack in a parking lot. Gravity pulls it straight down, and the rack resists that force through four evenly distributed mounting points — straightforward physics. Now drive that same setup at 70 mph into a headwind. Aerodynamic drag pushes the cargo box backward, lift tries to pull it upward, and every lane change or braking event introduces lateral and longitudinal forces that multiply the effective load on individual mounting points far beyond the static 50 pounds. The dynamic rating accounts for all of these combined forces, which is why it is always substantially lower — often by a factor of three to six compared to the static figure.
For the Tesla OEM rack, Tesla's official documentation references a dynamic load capacity of approximately 150 lbs (68 kg) for the Model Y roof rack system. If you are shopping for a 2026 model y roof rack or evaluating any tesla oem roof rack purchase, confirm the published dynamic rating against your intended cargo weight — and remember that the total loaded weight includes the rack itself plus every accessory and piece of cargo mounted on it. A rack system that weighs 15 pounds leaves you with 135 pounds of usable cargo capacity under a 150-pound dynamic limit, not the full 150.
One final nuance that catches people off guard: your vehicle's roof load rating and your rack's load rating are two separate numbers, and the lower of the two governs what you can safely carry. The vehicle's roof structure has its own engineering limit — the maximum weight the roof itself can support — which may be higher or lower than what the rack hardware can handle. Always respect whichever number is lower. Overloading either the rack or the roof structure risks the same outcome: hardware failure, glass stress, or cargo loss at the worst possible moment.
With your rack verified, your test drives completed, and your load limits clearly understood, you have everything you need to use the system safely and confidently. The temptation at this point is to assume the hard work is done — and mechanically, it is. But the most common problems owners encounter with roof racks are not caused by what they did during installation. They are caused by what they skipped, rushed, or assumed was close enough. Those mistakes — and how to recognize them before they cost you — deserve their own focused discussion.
Common Tesla Model Y Roof Rack Installation Mistakes and How to Avoid Them
Every tesla roof rack problem has a traceable origin — a step that was skipped, a specification that was ignored, or an assumption that turned out to be wrong. The frustrating part? Nearly all of these mistakes are preventable. They do not require advanced mechanical skill to avoid, just awareness of what goes wrong and why. The three categories below cover the full spectrum of errors owners encounter, from glass-threatening blunders to the subtle alignment issues that generate maddening wind noise at highway speed.
Mistakes That Risk Glass Roof Damage
The most expensive mistakes all share one trait: they put uncontrolled pressure or contact onto the Model Y's tempered glass roof panel. Here is how each one unfolds and what it costs you.
Skipping anti-abrasion tape entirely. This is the single most common — and most consequential — shortcut. Some owners assume the rubber mounting pads provide enough cushion on their own. They do not. The pads prevent macro-level scratching, but micro-vibrations from driving generate thousands of tiny oscillations per mile between the pad and the glass. Without the sacrificial tape layer absorbing that friction, invisible micro-scratches accumulate and deepen through thermal cycling. Weeks or months later, you notice haze marks or hairline fractures radiating from the mounting points — damage that was avoidable with a five-dollar roll of tape.
Applying tape to a dirty or wet surface. Even owners who use anti-abrasion tape sometimes undermine it by applying it over an uncleaned surface. Oils, pollen, road film, and residual moisture create a barrier between the adhesive and the glass. The tape appears to stick initially, but as temperatures fluctuate, the edges lift and the tape migrates out from under the mounting foot. The result is an unprotected glass zone sitting directly beneath a vibrating hardware contact point — exactly the scenario the tape was supposed to prevent. A 60-second IPA wipe followed by a one-minute drying period, as Tesla's procedure specifies, eliminates this failure mode entirely.
Over-torquing bolts near the glass edge. The temptation to crank the wingnuts "just a little tighter for safety" is understandable — but on a glass-roofed vehicle, it is dangerous. Tesla specifies 3.5 Nm for a reason. Exceeding that value concentrates clamping force through the rail clip directly onto the glass edge, which is the weakest structural zone of the entire roof panel. Damage from over-torquing does not always appear immediately — some owners complete the installation with no visible issues, only to discover stress fractures days or weeks later after temperature changes and highway vibration finish what the excessive clamping force started.
Dropping tools or hardware onto the glass. A wingnut that slips from your fingers, a hex wrench that rolls off the crossbar, a socket that bounces off the roof edge — any of these can chip or crack tempered glass on impact. The panoramic roof is expansive, and your hands are working directly above it throughout the installation. This is why the preparation section recommended draping a soft blanket across the glass surface during the hardware mounting phase. One dropped fastener against an unprotected glass panel can turn a $0.50 wingnut into a multi-thousand-dollar repair bill that may also require recalibration of the forward-facing cameras and sensors integrated into the roof area.
Mistakes That Compromise Rack Security
Glass damage is the most expensive failure mode, but a poorly secured rack creates a safety hazard that affects everyone on the road behind you. These errors target the structural integrity of the installation itself.
Relying on "feels tight enough" instead of a torque wrench. Human hands are remarkably bad at estimating torque values below 5 Nm — the range where roof rack fasteners operate. What feels adequately tight to you might be 2 Nm or 6 Nm, and both are outside specification. Under-torqued fasteners allow progressive loosening through vibration, while over-torqued fasteners risk the glass damage described above. A calibrated click-type torque wrench removes all subjectivity from the equation. For a 2026 tesla model y roof rack or any model year, this is not optional equipment — it is the single most important tool in the entire installation.
Not re-checking torque after the initial driving period. Fasteners settle during the first 50 to 100 miles of driving as the mounting pads compress slightly, anti-abrasion tape achieves its final bond, and the hardware finds its fully seated position. This settling process can reduce clamping force just enough to allow micro-movement under sustained highway loads. A quick re-torque after your initial break-in drives — and periodically thereafter — catches this normal settling before it progresses into a genuine looseness problem.
Cross-threading mounting bolts by using power tools. The wingnuts should always be started by hand. Threading them onto the clip studs with your fingers lets you feel whether the threads are engaging cleanly. If you reach for a powered ratchet or impact driver to speed things up, you lose that tactile feedback entirely. Cross-threaded fasteners feel tight but are not structurally engaged — the threads are deforming rather than mating, and the joint can fail under load without warning. Hand-start every fastener until you feel smooth, resistance-free engagement for at least two full turns before switching to your torque wrench.
Installing crossbars in incorrect mounting slots. If your rack system offers multiple position options — or if your vehicle has more than four concealed receivers along the roof edge — installing the crossbars in the wrong slots changes the load distribution geometry. The spacing between crossbars affects how braking, cornering, and aerodynamic forces are distributed across the mounting points. Tesla's specified positions (227 mm front, 412 mm rear from the glass edges) are engineered to optimize that distribution. Moving the bars to non-standard positions can overload individual mounting points and compromise the system's rated capacity.
Mistakes That Increase Drag and Wind Noise
These errors will not damage your glass or send cargo flying into traffic, but they will annoy you every single time you drive — and they silently drain your battery range mile after mile.
Improper crossbar alignment. Even a few degrees of rotation — one crossbar slightly off-parallel from the other — creates asymmetric airflow across the roof. Air hits the leading edge of the misaligned bar at a different angle than the correctly positioned one, generating turbulence that manifests as an audible whistle or hum at highway speeds. This is the root cause behind most tesla model y roof rack wind noise complaints. The fix is straightforward: loosen, realign until both bars are visually parallel and perpendicular to the vehicle centerline, and re-torque. But it is far easier to get alignment right during initial installation than to diagnose and correct it after the fact.
Leaving the rack installed when not carrying cargo. This is less a mistake and more a habit that costs you range without providing any benefit. Testing by i1Tesla found approximately 1% efficiency reduction with the Tesla OEM rack installed and unloaded — 281 Wh/mile versus 278 Wh/mile over a 60-mile test. That sounds minor in isolation, but it compounds over thousands of miles and worsens significantly once you add cargo that further disrupts the vehicle's aerodynamic profile. The Model Y's 0.22 drag coefficient (Juniper) was achieved without a rack on the roof. Every day you leave the crossbars mounted without cargo, you are voluntarily degrading that engineering. Removal and reinstallation should be part of your routine — take the rack off between trips, and your range and noise levels return to factory baseline.
Ignoring wind noise as "normal." Some degree of additional wind noise is inherent to any roof rack system — you are introducing a non-aerodynamic structure into the vehicle's airstream. But excessive noise, particularly a pronounced whistle or rhythmic throbbing, usually signals a correctable problem: misaligned crossbars, an unseated side cover, a gap in the trim seal, or a crossbar channel left open without a fairing. Do not accept abnormal noise as the price of having a rack. Investigate it, identify the source, and correct it. Model y roof rack installation tips from experienced owners consistently point to alignment and cover fitment as the two most common culprits behind noise complaints.
Pre-Installation Mistake Prevention Checklist
Before you begin any installation — whether it is your first time or a seasonal reinstallation — review this consolidated list. Print it, bookmark it, or pull it up on your phone in the garage. Every item below traces directly to a specific failure mode discussed in this section.
- Anti-abrasion tape is on hand, and the glass surface has been cleaned with IPA wipes and allowed to dry completely before application.
- A soft blanket or foam pad is draped over the glass roof to protect against dropped tools and hardware during installation.
- A calibrated torque wrench is set to the manufacturer-specified value (3.5 Nm for the Tesla OEM rack) — not an adjustable wrench, not a ratchet used by feel.
- All wingnuts will be started by hand to verify clean thread engagement before any tool is used.
- Crossbar positions match the manufacturer's specified mounting slot locations — not estimated, not eyeballed, measured.
- All four wingnuts will be tightened in an alternating pattern, not sequentially corner by corner.
- A post-installation torque re-check is planned after the first 50–100 miles of driving.
- Both crossbars have been visually confirmed as parallel to each other and perpendicular to the vehicle centerline before the first drive.
- Side covers are fully snapped into place with no gaps or loose edges.
- The rack will be removed between trips when not actively carrying cargo to preserve range and minimize unnecessary wear.
Every item on that list takes seconds to verify. Skipping any one of them creates a specific, predictable problem — glass damage, fastener failure, wind noise, or range loss — that takes hours or dollars to fix after the fact. The pattern is consistent: the owners who have trouble-free roof rack experiences are not luckier or more mechanically talented. They are simply more deliberate during preparation and more disciplined about verification.
That discipline also extends to a bigger-picture question many owners wrestle with before they ever open the box: is this a job I should be doing myself in the first place? The answer depends on factors that have nothing to do with the rack itself — your tool inventory, your comfort around glass panels, and whether you have someone who can hold a crossbar steady while you verify alignment on both sides. Making that assessment honestly, before you start, is worth more than any installation tip.
Deciding Between DIY and Professional Tesla Model Y Roof Rack Install
Knowing what mistakes to avoid is valuable — but the most important question might be one you should have asked before buying the rack kit at all: should you actually be doing this yourself? The honest answer is not the same for every owner. A tesla model y roof rack diy install is well within reach for most people who are comfortable with basic hand tools and willing to follow a structured procedure. But "within reach" and "right for you" are different conversations, and the glass roof raises the stakes high enough that an honest self-assessment deserves more than a quick gut check.
A Realistic DIY Difficulty Assessment
Here is the paradox of this job: mechanically, it is one of the simplest automotive accessory installations you will ever encounter. You are working with four rail clips, four pads, two crossbars, four wingnuts, and a hex wrench. No drilling, no wiring, no permanent modifications. A trained Tesla technician completes the procedure in roughly 25 minutes. Yet the consequences of a single careless moment — a dropped socket, an over-torqued wingnut, tape applied to a dirty surface — can result in a cracked glass roof that costs thousands to replace and may require camera recalibration.
That combination of low mechanical complexity and high mistake consequences is unusual. Most automotive DIY projects are either easy and low-risk (installing floor mats) or complex and high-risk (replacing brake calipers). This one sits in the rare quadrant of easy but unforgiving. The question is not whether you can turn a wrench — it is whether you can maintain the patience and precision the glass roof demands throughout a 45- to 90-minute process.
Use this table to make an honest assessment of where you fall:
| Factor | DIY-Friendly Indicators | Consider Professional Help |
|---|---|---|
| Prior experience with automotive accessories | You have installed roof racks, bike mounts, or similar bolt-on accessories on any vehicle before — even once. | You have never worked on the exterior of a car and are not confident handling components near painted or glass surfaces. |
| Availability of a torque wrench | You own or can borrow a torque wrench capable of accurate readings at 2.5–3.5 Nm. You understand how to set and use it. | You do not own a torque wrench and plan to tighten fasteners by feel. At the low torque values involved, guessing is not safe. |
| Comfort working around glass panels | You can work slowly and methodically near fragile surfaces without rushing. Dropped tools and hurried movements are not part of your work style. | You tend to work quickly and impatiently, or the thought of being inches from a panoramic glass roof while handling metal hardware makes you genuinely anxious. |
| Assistant for crossbar positioning | A second person is available to hold crossbars in position while you verify alignment and thread wingnuts on both sides. | You will be working entirely alone. Solo installation is possible but significantly increases the risk of misalignment and accidental glass contact during crossbar placement. |
| Workspace conditions | You have access to a flat, level surface with good lighting — ideally a garage or shaded driveway. A metric measuring tape is on hand. | Your only option is an uneven surface in direct sunlight with limited visibility, which compromises tape application, IPA cleaning, and alignment accuracy. |
| Willingness to follow precise measurements | You are comfortable measuring to millimeter precision (227 mm front, 412 mm rear) and will not skip or approximate these steps. | You prefer to eyeball positions and consider precise measurement unnecessary for a "simple" bolt-on accessory. |
If you checked mostly left-column indicators, the DIY route is a strong fit. If multiple right-column factors apply, there is no shame in having a Tesla Service Center or a trusted installer handle it. A professional installation typically costs far less than the glass roof replacement you are trying to avoid — and most Tesla service locations complete the job in under 30 minutes.
How to Evaluate Your Rack Setup Before Installation
Whether you plan to install the rack yourself or hand the job to a professional, one critical step belongs entirely to you as the owner: verifying that the rack system you purchased is genuinely supported for your specific vehicle. This is not the same as confirming it arrived in the right box. It means running through a structured set of checks that catch compatibility issues before any hardware touches the car.
Why does this matter? Because "compatible with Tesla Model Y" on a product listing is a marketing statement, not an engineering certification. A general compatibility claim does not prove that a complete rack system has been tested, validated, and approved for your specific model year and variant. The difference between a rack that is broadly marketed as compatible and one that is genuinely engineered for your car can show up as misaligned mounting feet, incorrect hardware thread pitch, or pads that do not match the roof curvature of your particular build — problems you discover mid-installation when it is too late to return the product easily.
Before you begin, confirm each of the following:
- Vehicle model year and variant match. Check whether the rack is explicitly listed for your production year. A pre-refresh Model Y (2020–2024) and a Juniper refresh (2025 onward) have different roof profiles, and a rack designed for one may not seat correctly on the other. Use the door jamb sticker and VIN decoder methods discussed earlier to confirm your build date.
- Vehicle-specific installation documentation exists. The manufacturer should provide step-by-step instructions written specifically for the Model Y — referencing its concealed mounting slots, anti-abrasion tape placement, and torque specifications. Generic instructions shared across multiple vehicle platforms are a warning sign that the product was not engineered with Model Y-specific tolerances in mind.
- Hardware completeness is verified. Open the kit and inventory every component against the included parts list before starting. Missing rail clips, pads, or fasteners will halt your installation mid-process. If any piece is absent, contact the manufacturer before proceeding rather than improvising with non-original hardware.
- Published weight ratings are clearly stated. Both dynamic and static load limits should be printed in the documentation — not vaguely implied or absent entirely. If you cannot find a specific tesla roof rack weight limit for your system, you have no safe basis for determining how much cargo you can carry. Contact the manufacturer for clarification before loading anything onto the roof.
For owners who want a structured framework to walk through these pre-installation checks systematically, CUTIM's Tesla Model Y Roof Rack Installation Guide covers vehicle-level, rack-approval, hardware, and documentation verification steps in detail — helping you evaluate whether a proposed setup is actually supported for your car rather than relying on a general compatibility claim as proof of approval. That kind of structured evaluation is especially valuable for owners comparing multiple aftermarket options where compatibility claims vary in specificity and reliability.
Removal, Reinstallation, and Seasonal Use Considerations
A roof rack is not a permanent fixture — or at least, it should not be. As covered in the previous section on drag and range impact, leaving crossbars mounted when you are not actively carrying cargo wastes energy on every drive. Many owners treat their rack as seasonal equipment: mounted for summer road trips, ski season, or camping weekends, then removed for the months of daily commuting in between. Making that model y roof rack seasonal use pattern practical requires a bit of planning around the removal and reinstallation process.
Removal is essentially the installation in reverse. Unlock each tower with the locking key, remove the side covers (pull from the top edge first), loosen all four wingnuts in an alternating pattern — not sequentially — then lift the crossbars off the pads and remove the pads and rail clips. Retract each rail clip from its slot, gently reposition the rubber roof seal, and you are back to a clean, rack-free roof.
A few practical details make tesla model y roof rack removal go smoothly and set you up for a faster reinstallation next time:
- Inspect the anti-abrasion tape upon removal. After weeks or months of clamping pressure, road vibration, and thermal cycling, the tape may show compression marks, edge curl, or adhesive degradation. If the tape is visibly worn, wrinkled, or no longer sits flat against the glass, replace it before the next installation. Fresh tape is cheap insurance — reusing compromised tape defeats its entire purpose.
- Store all mounting hardware together. Place rail clips, pads, wingnuts, the hex wrench, and locking keys in a single labeled zip-lock bag or small container. Losing a single rail clip or locking key between seasons means a frustrating delay and a parts order before you can reinstall. Labeling which pad belongs to which corner (front left, rear right, etc.) saves you from re-reading the installation manual months later.
- Mark crossbar positions with painter's tape before removal. Place a small strip of painter's tape on the roof edge trim at each mounting location, noting which crossbar (front or rear) goes where. When reinstallation day arrives, you can skip the measuring phase entirely — the tape flags show you exactly where to position the anti-abrasion tape and rail clips. This shortcut alone can cut reinstallation time by 15 to 20 minutes compared to starting from scratch with a measuring tape.
- Clean the glass after removal. The area beneath the mounting pads collects trapped moisture, dust, and adhesive residue over time. A quick IPA wipe-down after pulling the pads and tape off keeps the glass surface in optimal condition and prevents residue buildup that could interfere with adhesion during the next installation cycle.
For owners who use their rack frequently — mounting and removing it multiple times per season — consider keeping a dedicated "rack kit" bin in the garage with the hardware bag, a fresh roll of anti-abrasion tape, IPA wipes, the torque wrench already set to 3.5 Nm, and a printed copy of the torque and measurement specifications. Having everything staged and ready transforms reinstallation from a 90-minute project into a 30-minute routine.
The broader takeaway across this entire guide is consistent: the tesla model y roof rack installation process rewards preparation, punishes shortcuts, and delivers reliable, trouble-free results to owners who respect the procedure. The glass roof is not a reason to avoid installing a rack — it is a reason to install one correctly. Every step covered in these sections, from verifying your model year to re-torquing after your first hundred miles, exists to give you the confidence that your cargo is secure, your glass is protected, and your next road trip starts without a single worry about the equipment overhead.
Tesla Model Y Roof Rack Installation FAQs
1. How long does it take to install a roof rack on a Tesla Model Y?
A trained Tesla technician can complete the installation in roughly 25 minutes, based on the official Flat Rate Time of 0.42 hours. For a first-time DIY installer, plan for 45 to 90 minutes. The extra time accounts for careful surface preparation, precise anti-abrasion tape placement at 227 mm and 412 mm from the glass edges, and methodical torquing to the specified 3.5 Nm — steps that protect the panoramic glass roof and should never be rushed.
2. Will a pre-refresh Model Y roof rack fit the 2025 Juniper refresh?
Not necessarily. The Juniper refresh redesigned over 40% of the vehicle's components, including subtle changes to roof curvature and exterior trim profiles. Even a few millimeters of curvature difference can affect how mounting pads seat against the glass and how crossbars achieve even contact. Tesla's OEM rack appears engineered to accommodate both generations, but third-party racks require explicit Juniper compatibility confirmation from the manufacturer — a blanket 'fits all Model Y' claim is not sufficient. Always verify your build date using the door jamb sticker or VIN decoder before purchasing.
3. What is the weight limit for a Tesla Model Y roof rack?
Tesla's official documentation references a dynamic load capacity of approximately 150 lbs (68 kg) for the Model Y roof rack system. This is the limit while driving and accounts for aerodynamic lift, braking, and cornering forces. The static load rating — applicable only when parked — is significantly higher. Crucially, the total loaded weight includes the rack hardware itself plus all cargo and accessories, so a rack weighing 15 lbs leaves roughly 135 lbs of usable cargo capacity under the dynamic limit.
4. Can you install a Tesla Model Y roof rack without damaging the glass roof?
Yes, when you follow the correct preparation steps. The key is applying anti-abrasion tape to IPA-cleaned glass at Tesla's specified mounting locations, using a calibrated torque wrench set to exactly 3.5 Nm to avoid over-torquing near the glass edge, and draping a soft blanket over the roof during crossbar positioning to guard against dropped hardware. Skipping any of these protective measures — particularly the anti-abrasion tape — is the primary cause of glass damage during installation. For owners who want a structured pre-installation checklist, CUTIM's Tesla Model Y Roof Rack Installation Guide walks through vehicle-level and hardware verification steps before any tool touches the car.
5. Should I remove my Tesla Model Y roof rack when not in use?
Yes, removing the rack between trips is recommended for both range preservation and reduced wind noise. Testing has shown approximately 1% efficiency loss with the OEM rack installed and unloaded — roughly 3 Wh/mile — which compounds over thousands of miles and worsens with cargo attached. To make reinstallation faster, mark crossbar positions with painter's tape before removal, store all hardware in a labeled bag, and inspect anti-abrasion tape for wear each time you remount. This routine can cut reinstallation time to around 30 minutes.