
Before You Start Scraping, Read This
You're staring at a stubborn patch of sticky residue where your phone mount used to be, and that sinking feeling in your stomach is growing. Maybe you already tried prying it off with a fingernail, or worse, a butter knife. The adhesive won't budge, your dashboard looks like a mess, and you're worried you're about to turn a minor annoyance into an expensive repair. Sound familiar?
Take a breath. Nearly every adhesive situation is completely fixable — you just need the right game plan. The problem is that most people reach for a single generic trick they found online, apply it blindly, and end up with a shiny spot on a matte dash or a gouge in their soft-touch trim. That's exactly what this guide helps you avoid.
Learning how to remove phone mount adhesive the right way comes down to two critical variables: the type of adhesive you're dealing with and the dashboard material underneath it. A thick strip of 3M VHB tape bonded to hard plastic demands a completely different approach than a gel nano pad stuck to a leather-wrapped surface. Suction cup residue, magnetic plate backing, foam-backed tape — each one responds to different tools and solvents. Pair the wrong method with the wrong material, and you'll create the very damage you were trying to prevent.
Why Most Removal Attempts Go Wrong
Imagine using rubbing alcohol on a delicate faux leather dash because a forum post said it works great on plastic. The alcohol strips the finish, leaving a permanent discolored blotch. Or picture blasting a piano black trim panel with a heat gun because someone recommended "a little heat." Within seconds the glossy surface warps and bubbles. These disasters happen every day, and they all share the same root cause: a one-size-fits-all method applied to a situation that requires a specific solution. The adhesive type dictates how much force and heat you'll need. The dashboard material dictates which chemicals and tools are safe. Miss either variable, and the results can be irreversible.
The Method Escalation Principle
This entire guide follows a simple but powerful framework — start with the gentlest possible technique and only escalate to stronger methods when the previous step falls short. Think of it like turning a volume dial, not flipping a switch. You'll begin with low heat and dental floss, move to mild solvents if residue remains, and only reach for commercial removers as a last resort. Each step is designed to remove the adhesive from your car dashboard without risking unnecessary harm to the surface beneath it.
Always test any removal method in an inconspicuous area first before applying it to the main adhesive spot.
That single rule prevents more dashboard disasters than any tool or product ever could. A quick test under the dash lip or inside a storage compartment takes thirty seconds and tells you exactly how your specific material reacts before you commit to the visible area.
With that principle locked in, the very first — and most overlooked — step is figuring out precisely what kind of adhesive and surface you're working with. Getting this diagnosis right changes everything about the removal process.
Step 1 – Identify Your Adhesive Type and Dashboard Material
Picking the right removal strategy is a lot like choosing the right medicine — the cure depends entirely on the diagnosis. Grab a flashlight, lean in close, and spend sixty seconds examining the adhesive spot before you touch a single tool. That quick inspection tells you which techniques will work and, more importantly, which ones could ruin the finish underneath.
Identify Your Adhesive Type
Run your finger across the residue. Is it thick and rigid, thin and rubbery, or soft and squishy? The feel and appearance narrow down the adhesive family almost instantly, and each family behaves differently during removal.
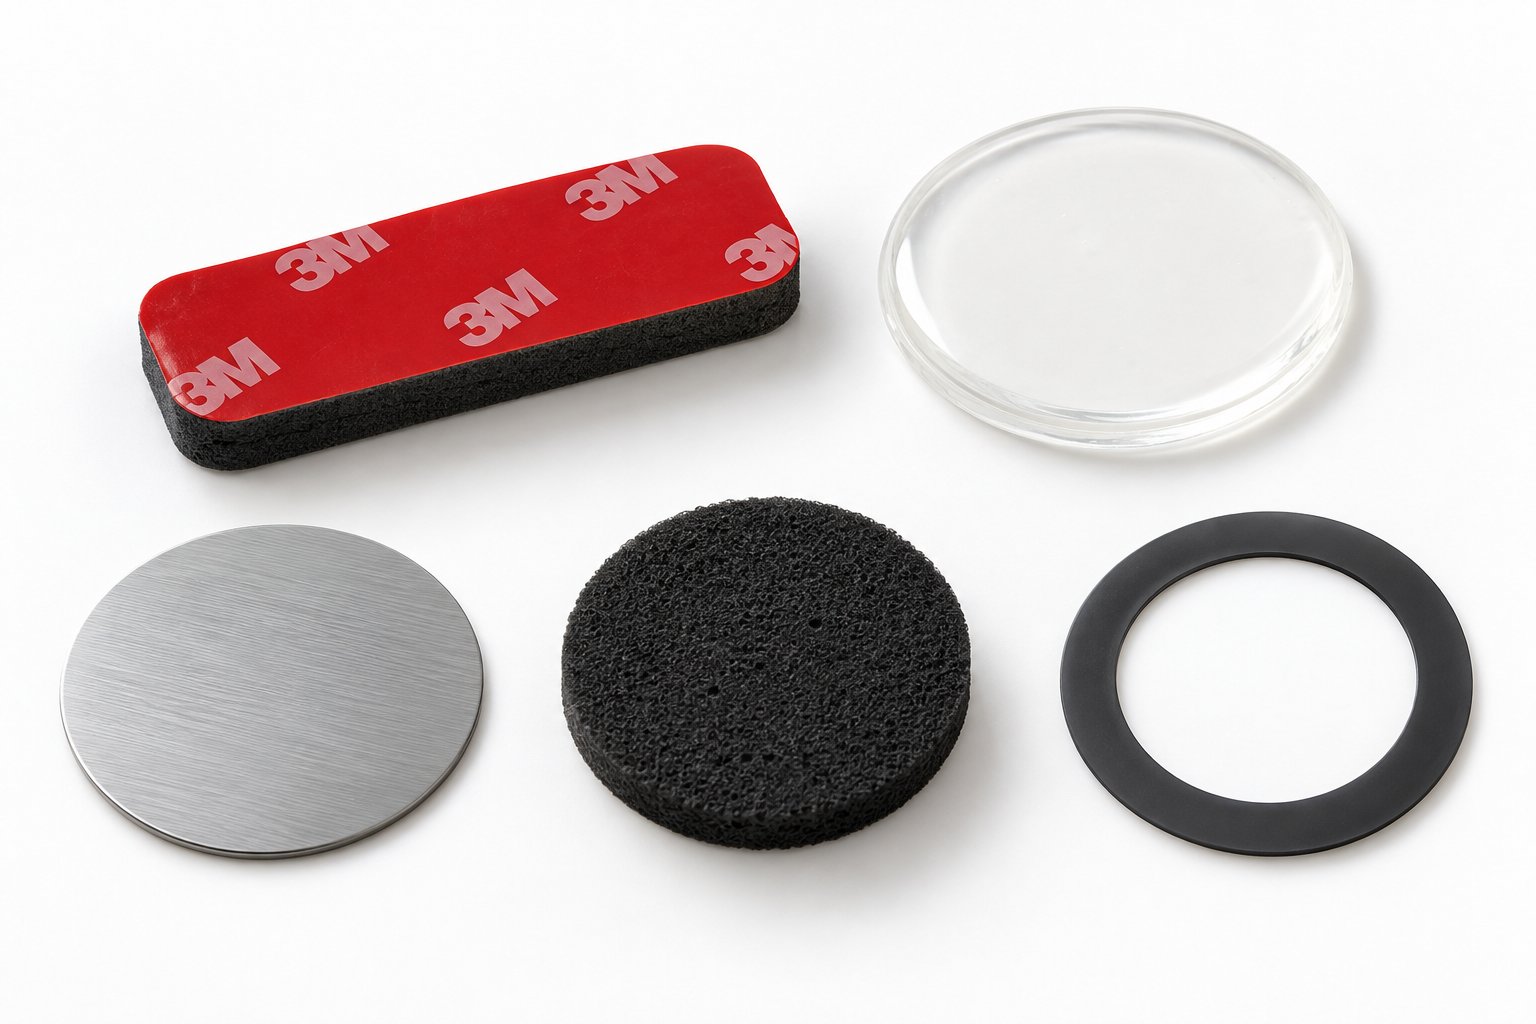
- 3M VHB tape — A thick, double-sided acrylic foam tape, usually dark gray or clear. It feels dense and slightly spongy when you press on it. 3M VHB is engineered for permanent bonding, which is why it resists peeling so aggressively. Many popular dashboard mounts rely on this tape because of its impressive hold on plastics and metals.
- Suction cup residue — You won't find a thick pad here, just faint ring-shaped marks or a thin, slightly rubbery film left behind after the cup lost its seal. It looks like a ghostly circle on the surface.
- Gel or nano pads — Clear, jelly-like, and noticeably squishy. These reusable-style adhesives feel tacky to the touch and often stretch when you pull on them. They're common on budget-friendly mounts marketed as "washable" or "reusable."
- Magnetic plate adhesive — A thin metallic disc with a slim adhesive backing. You'll notice the disc itself is rigid, but the adhesive layer underneath is paper-thin. When you try to remove car mount adhesive from a phone or dashboard, this type tends to tear mid-peel because the backing is so fragile.
- Foam-backed tape — Soft, spongy, and usually black or white. It compresses easily between your fingers and often crumbles into small pieces rather than peeling off cleanly.
The table below gives you a quick side-by-side comparison so you can match what you're seeing to the correct adhesive type:
| Adhesive Type | Visual Appearance | Typical Strength | Common Mounts That Use It |
|---|---|---|---|
| 3M VHB Tape | Thick, dark gray or clear foam strip | Very high — designed for permanent bonds | Premium dashboard mounts, heavy-duty holders |
| Suction Cup Residue | Thin ring marks, slight rubbery film | Low — residue only, not structural | Windshield suction mounts |
| Gel / Nano Pad | Clear, squishy, jelly-like surface | Moderate — reusable and repositionable | Budget and mid-range dashboard mounts |
| Magnetic Plate Adhesive | Thin metallic disc with slim adhesive layer | Low to moderate — adhesive is minimal | Magnetic phone holders |
| Foam-Backed Tape | Soft, spongy, black or white | Moderate — compresses and crumbles | Clip-style mounts, older dashboard holders |
Identify Your Dashboard Material
Knowing the adhesive is only half the equation. The surface underneath determines which solvents, temperatures, and tools are safe. Press your fingertip firmly against the dashboard near the adhesive spot and pay attention to how the material responds.
- Hard plastic — Rigid and unyielding. It can be shiny or matte, but it doesn't compress at all under finger pressure. This is the most forgiving surface for removal.
- Soft-touch plastic — Gives slightly when you press, almost like there's a thin rubber coating over the plastic underneath. It feels velvety or lightly padded. Excessive heat or harsh solvents can leave permanent shiny spots on this coating.
- Leather or faux leather — Look for a grain pattern and any visible stitching nearby. Real leather shows natural imperfections and an earthy scent, while faux leather has a uniform, repeating texture and may carry a faint chemical smell. You can confirm with the fingernail test: press your nail gently into the surface — real leather shows a temporary mark that fades, while faux leather bounces right back. Choosing a removable adhesive for faux leather phone mount setups matters because alcohol-based solvents can strip the polyurethane or PVC coating and cause irreversible discoloration.
- Vinyl — Smooth, slightly flexible, and cooler to the touch than leather. It lacks the grain depth of leather and feels more uniform. Vinyl tolerates gentle cleaning well but can be damaged by acetone or aggressive scraping.
- Textured surfaces — Pebbled, patterned, or stippled finishes designed to hide fingerprints and wear. Adhesive residue can settle into the tiny grooves, making removal trickier and requiring softer tools that reach into the texture without flattening it.
- Piano black or gloss trim — Mirror-like, high-gloss finish that shows every fingerprint and micro-scratch. This is the most delicate dashboard surface you'll encounter. Even a paper towel can leave fine swirl marks, so you'll need microfiber cloths and extremely gentle methods.
Here's the critical takeaway: pairing the wrong solvent with leather or blasting soft-touch plastic with too much heat doesn't just leave a mark — it causes damage you can't undo with a quick polish. A thirty-second material check prevents a problem that could cost hundreds to repair professionally.
With both your adhesive type and dashboard material identified, you have the diagnostic foundation that drives every decision from this point forward — starting with gathering the exact tools and supplies your specific combination requires.
Step 2 – Gather Your Supplies and Prep the Surface
Jumping straight into scraping or scrubbing without the right tools is how dashboards end up with scratches, discolored patches, and gouges that cost far more to fix than the mount itself. A few minutes of preparation saves hours of regret — and potentially hundreds of dollars in interior repair. Every item on the list below serves a specific purpose, and skipping even one can force you into a risky improvisation mid-removal.
Essential Tools and Supplies Checklist
You probably own most of these already. Gather everything before you start so you're never tempted to grab a metal utensil or household chemical out of frustration halfway through the job.
- Plastic pry tool or old credit card — This is your primary scraping instrument. The soft plastic edge lifts adhesive without gouging the dash surface. Never substitute a metal scraper, flathead screwdriver, or knife — even "careful" metal contact leaves permanent scratches on soft-touch plastic, vinyl, and piano black trim.
- Hair dryer — Gentle, controllable heat softens adhesive bonds so they release instead of tear. A standard household hair dryer on its medium setting is perfect. Avoid heat guns unless you have detailing experience; they reach temperatures that can warp or melt dashboard plastics within seconds.
- Isopropyl alcohol (90% or higher) — Higher concentrations evaporate faster, which means less liquid soaking into porous surfaces. A 70% solution works in a pinch, but it leaves more moisture behind and increases the risk of watermarks on sensitive materials. Interestingly, some manufacturer guidelines recommend keeping alcohol concentration below 75% on certain interior trims to prevent finish damage — a reminder to always test first.
- Microfiber cloths (at least three) — One for applying solvent, one for wiping residue, and one for final buffing. Microfiber traps particles instead of dragging them across the finish, which matters enormously on gloss and piano black surfaces. Paper towels and bath towels shed lint and scratch — leave them in the kitchen.
- Painter's tape — Creates a protective border around the work area. You'll use this to shield surrounding surfaces from accidental solvent contact, especially critical near leather panels, stitching, and infotainment screens.
- Dental floss or fishing line — The secret weapon for slicing through thick adhesive pads like 3M VHB tape. The thin filament slides behind the mount base and cuts through the bond without contacting the dashboard surface at all.
- Commercial adhesive remover (such as Goo Gone) — Your escalation option when heat and alcohol aren't enough. These citrus-based or solvent-based formulas dissolve stubborn residue, but they can also dissolve certain dashboard finishes if used carelessly. Only reach for this after gentler methods fall short.
- Plastic razor blade (optional, for glass only) — If you're removing an adhesive phone mount from a windshield, a plastic razor blade held at a low angle is safe and effective on glass. Keep it away from any dashboard surface, tinted film, or coated trim.
Missing a plastic pry tool? A loyalty card, expired gift card, or even a sturdy guitar pick works as a stand-in. The key requirement is a firm but non-abrasive edge that won't score the surface underneath.
Prepare and Protect the Surrounding Area
Picture this: you're carefully dabbing isopropyl alcohol on an adhesive patch, and a drop rolls sideways onto untouched leather trim. Within minutes, a faint bleached streak appears that no amount of conditioning will fully reverse. Protecting the area around the adhesive is just as important as choosing the right removal technique.
Start by applying strips of painter's tape around the adhesive spot, creating a border roughly half an inch out from every edge. Press the tape down firmly so solvent can't seep underneath. On leather and soft-touch dashboards, extend the tape further — solvents spread more easily on these surfaces, and even small amounts of alcohol or adhesive remover can leave shiny or discolored marks on the surrounding finish. If the mount is near your infotainment screen or any electronic controls, tape off those areas as well. As a general best practice, always apply product to your cloth rather than spraying it directly onto the car's interior — this keeps liquid from running into seams, vents, or button gaps.
Here's the step most people skip entirely: the pre-test. Before you use any solvent on the visible adhesive area, apply a small amount of your chosen cleaning agent to a hidden section of the same dashboard material. Good test spots include the underside of the dashboard lip, the inside of a storage compartment, or a section tucked behind the steering column. Dab the solvent on, wait a full 10 minutes, then check for any changes — discoloration, cloudiness, softening, or texture shifts. If the hidden spot looks exactly the same, you're safe to proceed. If anything looks off, switch to a gentler alternative before touching the main area.
Drivers with rental or leased vehicles need extra caution here. Any visible change to the dashboard — a shiny spot on a matte surface, a faint chemical stain, a light scratch — can trigger damage charges at return. For these situations, skip chemical agents entirely on the first attempt. Start with the absolute gentlest combination: warm air from a hair dryer paired with dental floss to remove phone mount adhesive from the dashboard mechanically. Heat and floss leave zero chemical residue and carry the lowest risk of altering the surface appearance. Only escalate to isopropyl alcohol or a Vava car phone mount remove adhesive pad scenario involving commercial remover if the mechanical approach genuinely isn't working — and even then, test religiously on a hidden spot first.
With your tools assembled and the surrounding area masked off, the real work begins. The next move is applying heat — but how much heat, how close, and for how long depends entirely on the dashboard material you identified earlier.
Step 3 – Apply Heat to Soften the Adhesive Bond
Heat is the single most effective way to weaken an adhesive bond without chemicals — but it's also the step where most dashboard damage happens. A few degrees too hot or a few seconds too long, and you're dealing with warped plastic, bubbling coatings, or a permanent glossy patch on a once-matte surface. The difference between a clean removal and a costly repair often comes down to temperature control, timing, and knowing exactly how your specific dashboard material responds.
Safe Heat Application Technique
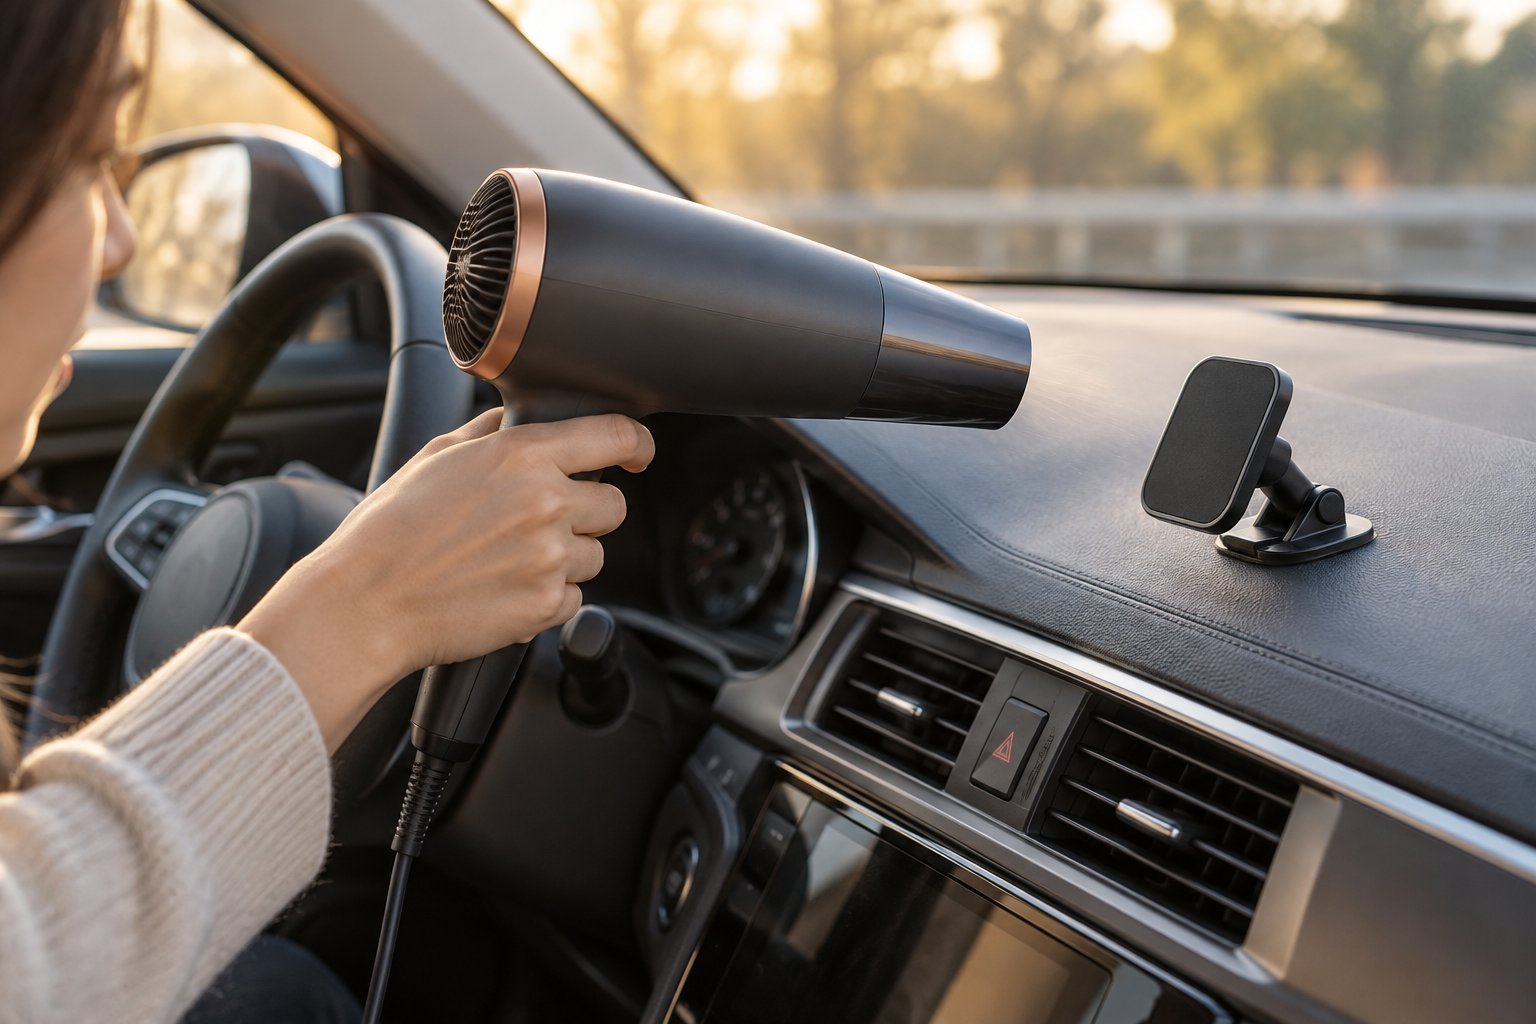
A standard household hair dryer set to medium heat is the safest tool for this job. It delivers enough warmth to soften phone mount adhesive for removal without the intensity that makes heat guns dangerous in inexperienced hands. Here's the step-by-step technique:
- Position the hair dryer 4–6 inches from the adhesive surface. Any closer and you create a concentrated hot spot that can damage the material underneath before the adhesive even begins to soften.
- Apply heat in 30-second intervals. After each interval, turn off the dryer and gently touch the adhesive with your fingertip. You're feeling for a subtle change — the adhesive should become slightly warm and noticeably more pliable, almost like it's losing its grip. If it still feels rock-hard, run another 30-second pass.
- Keep the dryer moving in slow circles. Holding it perfectly still on one point creates uneven heating that stresses the dashboard material. A gentle sweeping motion distributes warmth across the entire adhesive pad and the surrounding surface evenly.
- Total heat time should fall between 1 and 3 minutes depending on adhesive thickness. Thin magnetic plate backings may need only 60 seconds, while thick 3M VHB tape — the kind used on heavy-duty dashboard mounts — often requires the full three minutes to become workable. If you're trying to figure out how to remove 3M phone mount adhesive specifically, patience with heat is non-negotiable because this acrylic foam tape is engineered to resist peeling at room temperature.
Throughout the process, your dashboard surface itself should feel pleasantly warm at most — never hot to the touch. If you pull your finger away from the dash instinctively, it's too hot. The adhesive absorbs heat faster than the surrounding material, so the pad will always feel warmer than the area around it. That temperature gap is your safety indicator.
Knowing when to stop matters just as much as knowing how to start. Watch for these warning signs that heat exposure has gone too far:
- The dashboard plastic feels soft or spongy when you press near the adhesive — this means the material itself is starting to deform, not just the glue.
- Warping or bubbling appears on the surface, even slightly. Dashboard materials are often layered — a foam or adhesive sublayer sits beneath the visible skin — and excessive heat weakens those internal bonds, causing the top layer to lift or distort.
- Discoloration develops around or beneath the adhesive spot. Color changes signal chemical breakdown in the dashboard material and are usually irreversible.
- A chemical smell emerges. Plastics, vinyls, and synthetic coatings release volatile compounds when overheated. If you smell anything unusual, stop immediately and let the area cool completely before continuing.
If any of these signs appear, power off the hair dryer, step back, and allow the dashboard to return to room temperature before reassessing. Rushing back in while the surface is still stressed almost always makes the damage worse.
Material-Specific Heat Guidelines
Not every dashboard surface tolerates heat the same way. Hard plastic can handle considerably more warmth than a soft-touch coating or a leather wrap. The table below gives you precise parameters based on the material you identified in Step 1 — use it as your go-to reference before you plug in the hair dryer.
| Dashboard Material | Max Heat Setting | Distance | Max Duration | Risk Level |
|---|---|---|---|---|
| Hard Plastic | Medium-High | 4–6 inches | 3 minutes | Low |
| Soft-Touch Plastic | Low-Medium | 6–8 inches | 90 seconds | Moderate-High |
| Leather / Faux Leather | Low | 8–10 inches | 60 seconds | High |
| Vinyl | Medium | 5–7 inches | 2 minutes | Moderate |
| Textured Surfaces | Medium | 5–7 inches | 2 minutes | Moderate |
| Piano Black / Gloss Trim | Low | 8–10 inches | 60 seconds | Very High |
A few patterns jump out. Hard plastic sits at the forgiving end of the spectrum — it's rigid, heat-resistant, and unlikely to warp under a hair dryer's output. You can work closer and longer without much worry. Soft-touch plastic is a different story entirely. That velvety coating is typically only a fraction of a millimeter thick, and too much heat permanently alters its texture, leaving a shiny or sticky patch that no amount of cleaning fixes. Keep the dryer further away and cut your intervals shorter.
Leather and faux leather demand the gentlest approach. Heat dries out natural leather and can cause synthetic coatings on faux leather to delaminate. Use low heat, stay well back, and limit exposure to a single 60-second pass before checking progress. If the adhesive hasn't loosened, wait 30 seconds for the surface to cool slightly, then try one more brief pass rather than extending the duration.
Piano black and gloss trim panels deserve the most caution of all. These mirror-finish surfaces show every imperfection, and heat-induced clouding or micro-distortion is visible from across the cabin. Keep the dryer on its lowest warm setting, maintain maximum distance, and check the surface between every pass for any change in clarity or reflection. When learning how to remove an adhesive phone mount from a dash with this finish, less heat and more patience is always the winning formula.
One final note on tool choice: avoid heat guns unless you have hands-on experience with automotive detailing. A heat gun's output can exceed 500°F (260°C) — temperatures that warp or melt most dashboard plastics in seconds. A hair dryer tops out around 140°F (60°C) on high, giving you a much wider safety margin. For the vast majority of adhesive removal scenarios, a hair dryer provides more than enough heat to soften the bond without putting the surface at risk.
With the adhesive warmed and pliable, the window for clean removal is open — but it won't stay open long. The physical peel-and-pry step needs to happen while the adhesive is still soft, and the technique you use determines whether the mount lifts away cleanly or leaves a torn, stubborn mess behind.
Step 4 – Peel and Pry the Mount Base Away Safely
Softened adhesive doesn't stay soft forever. You've got a narrow window — roughly two to four minutes — before the bond cools and re-hardens, so pick up your tools and get to work. But "work fast" doesn't mean "work aggressively." Patience is the single biggest factor separating a clean removal from a gouged, torn-up dashboard. Rushing this step — yanking, twisting, or prying at a steep angle — is the number one cause of surface damage. The mount will come off. You just need to let it happen at the adhesive's pace, not yours.
The Dental Floss and Pry Technique
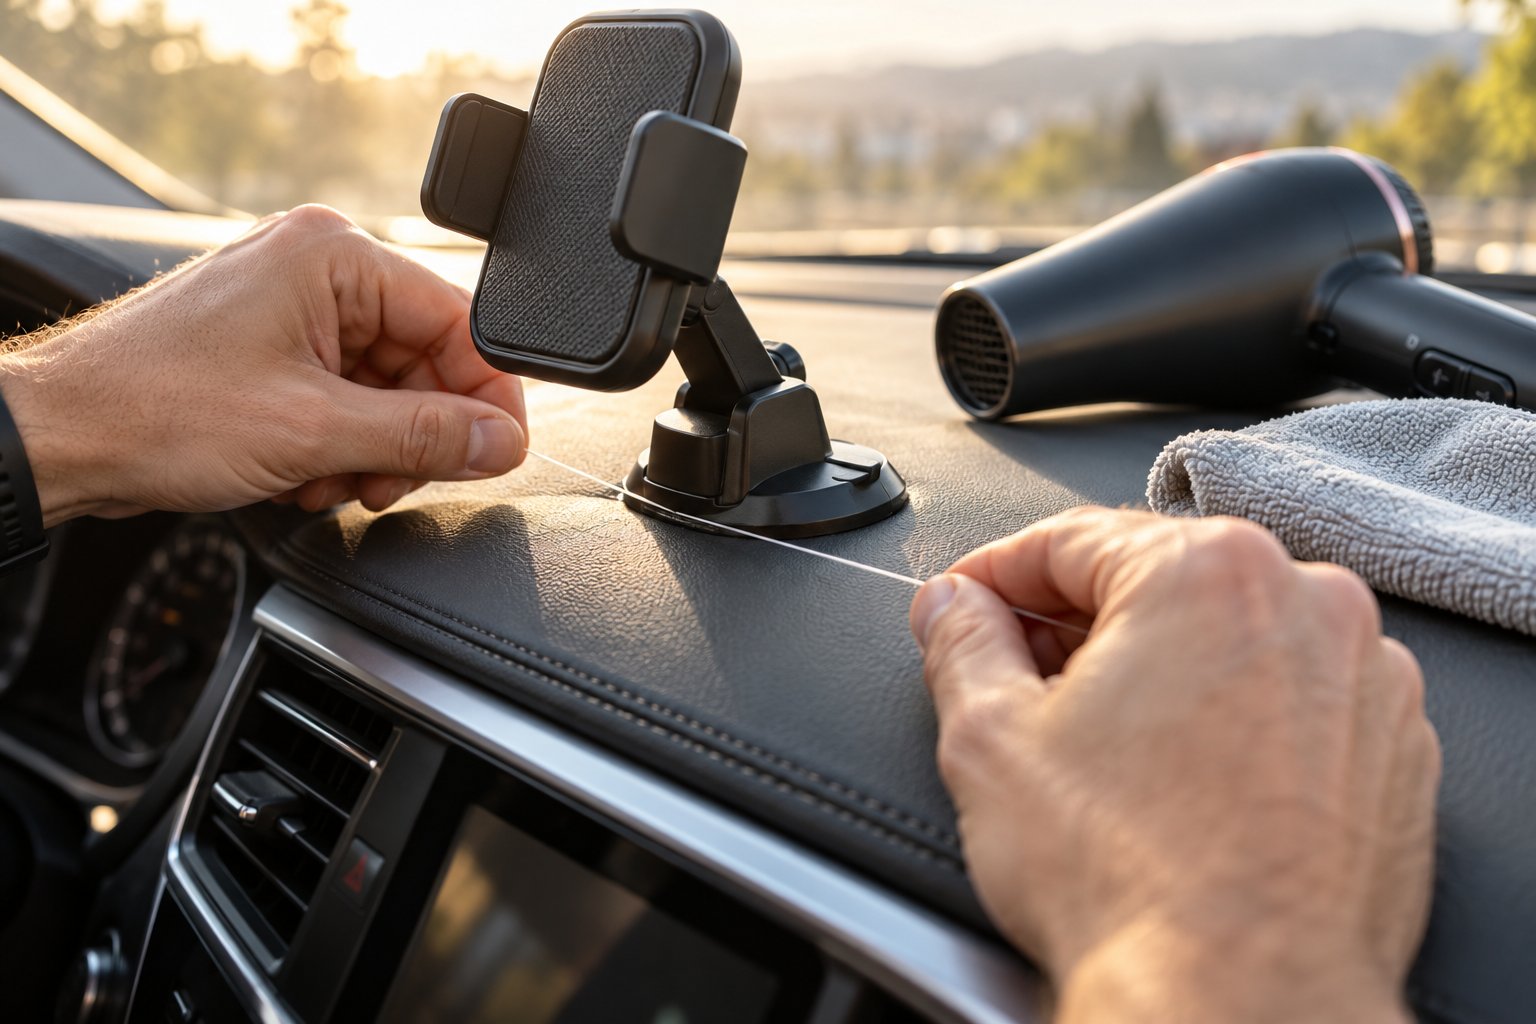
Wondering how to peel off a phone mount from a car dashboard without leaving a mark? The answer is surprisingly low-tech. Grab a length of unwaxed dental floss or thin fishing line — about 18 inches gives you enough to wrap around both hands and maintain control. Slide the floss behind one corner or edge of the mount base, then use a slow, steady sawing motion to work it deeper into the bond. Think of it like cutting through a block of cheese: gentle back-and-forth pressure, never a hard pull.
A critical detail from CNET's removal guide reinforces the technique: pulling the tape fast makes it resist and tear, while an infuriatingly slow pull convinces the adhesive to let go cleanly. If you're not annoyed by how slow you're going, you're probably not going slowly enough. Keep the pulling angle low and oblique — nearly parallel to the dashboard surface — rather than lifting straight up. A steep angle concentrates force on a tiny point and risks pulling up dashboard material along with the adhesive.
If the mount has a large base plate, resist the urge to pop the entire thing off at once. Work from one corner across to the opposite side, letting the floss cut through the full width of the bond before attempting to lift anything. For mounts with especially thick adhesive pads, you may need to re-apply heat for 15–20 seconds midway through if you feel the resistance increasing. Never force it — re-warm and resume.
Once the mount body separates from the surface, you'll likely see a layer of adhesive residue still stuck to the dashboard. This is completely normal. Grab your plastic pry tool or an old credit card and hold it at a very low angle — nearly flat against the surface, roughly 10 to 15 degrees. Gently slide the edge under the adhesive layer and lift in small sections. Short, controlled strokes are safer than trying to scrape a long path in one motion. And the rule that never bends: no metal tools on any dashboard surface, period. A metal scraper, razor blade, or even a flathead screwdriver will gouge plastic, slice through leather, and leave visible scratches on vinyl and gloss trim in a single pass.
Escalation Approach by Adhesive Type
Different adhesives behave differently during removal, even after heat softening. The technique that peels a gel pad off in seconds might shred foam tape into a crumbly mess. Match your approach to the adhesive type you identified earlier:
- 3M VHB tape — This is the toughest adhesive you'll encounter. Heat plus dental floss is essential because VHB tape won't peel cleanly on its own — it's engineered to resist exactly that. 3M's own removal guidance recommends cutting through the tape bond rather than pulling, which is why the floss technique works so well here. Work slowly, re-heat as needed, and expect the process to take several minutes. When you're figuring out how to remove a VHB tape phone mount from a car, think "cutting" not "peeling."
- Gel or nano pads — Good news here. These adhesives are designed to be repositionable, so once you lift a corner or edge with a plastic pry tool, the entire pad often peels away in one satisfying piece. Pull low and slow, and it should release without leaving much residue behind.
- Suction cup residue — Typically the easiest to handle. There's no thick pad to contend with — just a thin film or ring mark. A damp microfiber cloth with gentle circular pressure usually wipes it right off. If it's stubborn, a tiny amount of isopropyl alcohol on the cloth does the trick.
- Magnetic plate adhesive — The thin metal disc makes this one tricky. The adhesive backing is so slim that it loves to tear partway through removal, leaving half the adhesive on the dash and half on the disc. Apply heat, then lift from one edge very slowly and at a flat angle. If you feel the backing starting to split, stop, re-heat the torn edge, and continue from the new starting point rather than pulling harder.
- Foam-backed tape — Expect crumbling. Foam tape rarely comes off in one clean piece. Instead, it breaks apart into small chunks and fragments. Work in small sections: heat a portion, lift it, then move to the next. A plastic pry tool is more effective than floss here because you need to scrape the crumbled bits rather than slice through them. Patience keeps the mess manageable.
One principle applies to every adhesive type on this list: if resistance suddenly increases, stop and re-apply heat. Trying to power through a re-hardened bond is exactly how people remove sticky phone mount base from dash — along with a chunk of the dash finish. A quick 15-second burst from the hair dryer re-softens the adhesive and lets you continue safely. Better to pause five times than to repair one gouge.
Even with a flawless peel, a thin layer of residue almost always clings to the surface. That leftover film needs its own targeted cleaning approach — and the safe method shifts dramatically depending on whether you're working on a dashboard or a windshield.
Step 5 – Clean Residual Adhesive from Dashboard and Windshield
The mount is off, but a sticky ghost remains. That thin, tacky layer of leftover adhesive clinging to your dash might look minor, but it attracts dust, smears when touched, and becomes harder to remove the longer it sits exposed to cabin heat. Cleaning phone mount adhesive residue from a dashboard requires a different mindset than the peel-and-pry phase you just finished. Brute force is out. Targeted chemistry and controlled friction are in — and the best way to remove adhesive residue from a car dash depends entirely on the surface material underneath it.
Removing Residual Adhesive from Dashboard Surfaces
Resist the urge to immediately soak the area in solvent. The smartest approach follows the same escalation principle that's guided every step so far: start with the least aggressive technique and only move up the ladder when the previous method isn't getting the job done.
Level 1 — Friction alone. This sounds almost too simple, but try it first. Press your thumb firmly against the residue and rub in small, tight circles. The warmth and friction from your skin rolls thin adhesive films into small balls that lift right off the surface. You'll be surprised how often this handles the entire job, especially with gel pad and suction cup residue. If you still feel tackiness after 30 seconds of rubbing, move on.
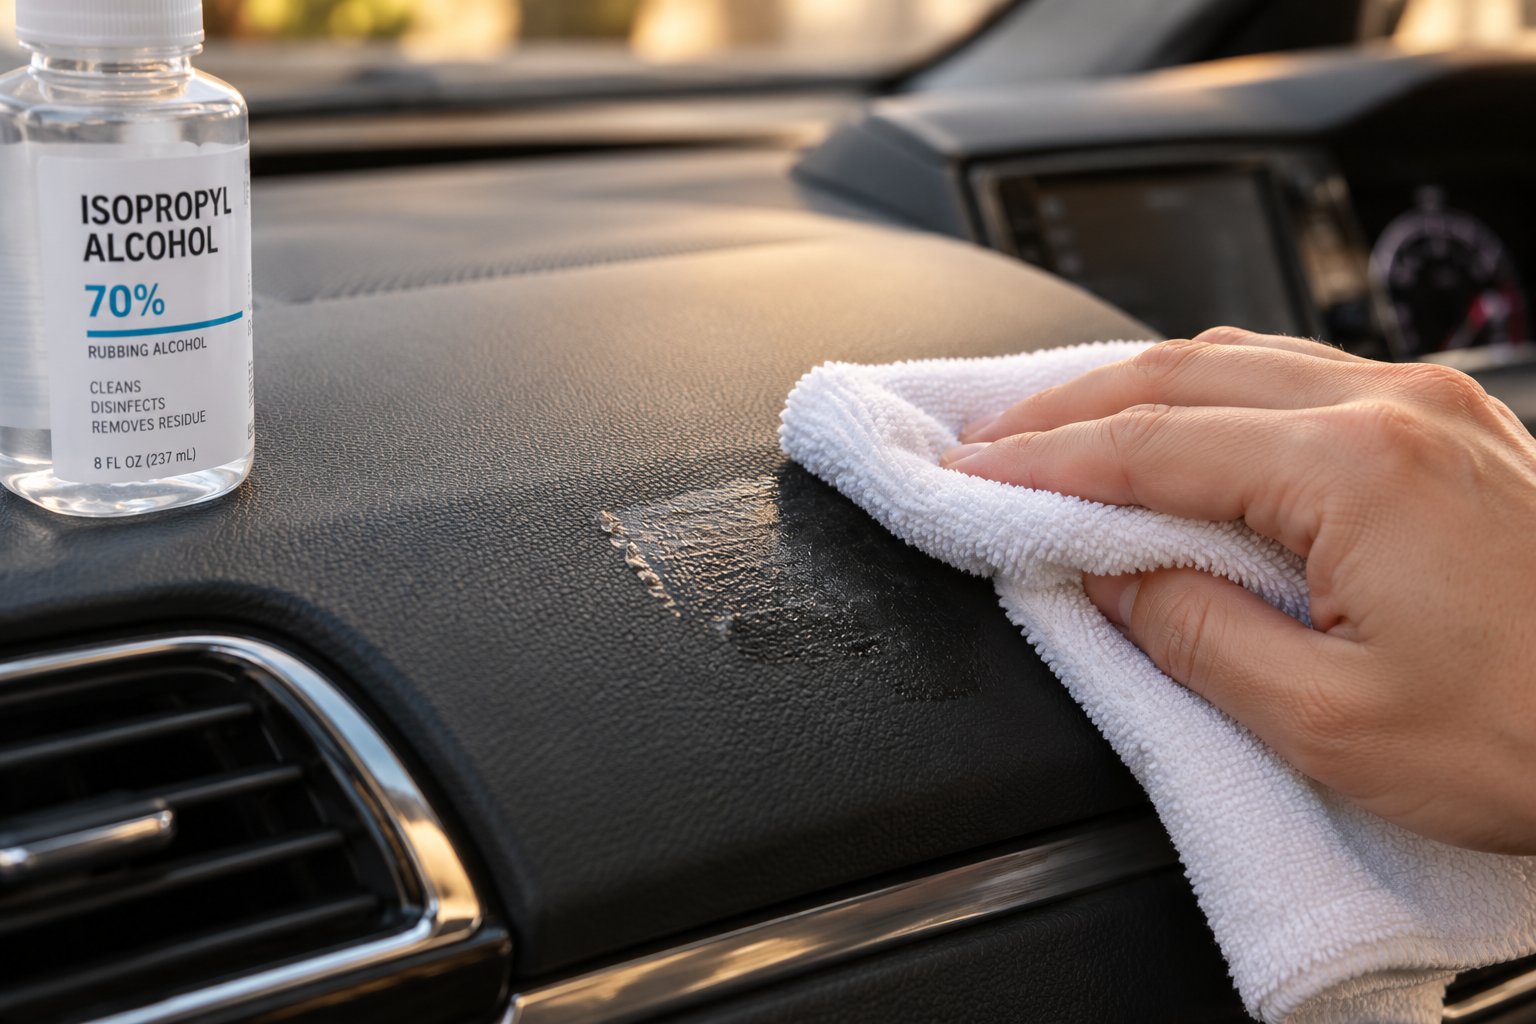
Level 2 — Isopropyl alcohol on a microfiber cloth. Dampen — don't drench — a clean microfiber cloth with 90% or higher isopropyl alcohol. Apply it to the residue using gentle circular motions, letting the alcohol dissolve the adhesive layer without scrubbing hard enough to abrade the finish. Work in small areas, flipping to a fresh section of the cloth frequently so you're lifting residue rather than spreading it around. For most hard plastic and vinyl surfaces, this step eliminates everything the thumb-rub missed.
Level 3 — Commercial adhesive remover. Products like Goo Gone use citrus-based solvents to break down adhesive bonds that alcohol can't touch. Apply a small amount to your microfiber cloth, let it sit on the residue for 60 to 90 seconds to penetrate, then wipe in slow, even strokes. Follow up with a clean damp cloth to remove any oily remover residue, and finish with a dry microfiber buff. This level is your last resort for stubborn 3M VHB remnants that survived heat, floss, and alcohol.
That three-tier system works beautifully on standard surfaces, but certain dashboard materials need specific precautions that override the general approach. Ignoring these warnings is how a successful adhesive removal turns into a visible blemish.
- Leather and faux leather — Skip alcohol-based solvents entirely. Isopropyl alcohol strips the protective finish on both genuine and synthetic leather, leaving behind dried-out, discolored patches that conditioning alone won't fix. Instead, use a dedicated leather-safe cleaner applied with a soft microfiber cloth. Gentle friction and a pH-balanced formula will handle most residue without compromising the surface coating.
- Piano black and gloss trim — This mirror-finish surface micro-scratches at the slightest provocation. Use only the softest microfiber cloth you own, apply the gentlest solvent available (a small amount of isopropyl alcohol is acceptable here, but never a gritty or abrasive remover), and wipe in straight lines rather than circles to minimize swirl marks. If the residue is stubborn, let the solvent dwell on the spot for a minute instead of increasing pressure.
- Soft-touch plastic — That velvety coating reacts unpredictably to chemical agents. Some commercial removers leave permanent shiny spots where the solvent dissolved the top layer of the soft-touch finish. Test any product on a hidden area and wait the full 10 minutes before committing. When in doubt, stick with thumb friction and warm water — slower, yes, but far safer.
- Aftermarket dashboard wraps, carbon fiber trim, or matte finishes — Commercial adhesive removers can dissolve the adhesive holding a vinyl wrap to the dash, stain carbon fiber clear coats, or leave glossy streaks on matte surfaces. For these materials, limit yourself to warm water on a microfiber cloth combined with patient manual friction. No alcohol, no Goo Gone, no shortcuts. The margin for error on specialty finishes is essentially zero.
A quick wipe-down with a dedicated interior detailer or dashboard protectant after all residue is gone restores a uniform appearance and adds a light protective layer to the cleaned spot. This blending step helps the treated area match the rest of the dashboard rather than standing out as a conspicuously clean patch.
Removing Adhesive from Windshield Glass
If your phone mount was a windshield-suction type or an adhesive-pad mount stuck directly to the glass, you're in luck. Glass is dramatically more forgiving than any dashboard material. It doesn't discolor from solvents, won't warp from heat, and tolerates physical scraping far better than plastic, leather, or vinyl.
To remove phone mount sticky residue from a windshield, start with a plastic razor blade held at approximately a 30-degree angle to the glass. Push the blade forward in smooth, controlled strokes, letting the sharp edge slide under the adhesive layer without gouging. Plastic blades flex slightly on contact, which prevents the chipping or scratching that metal blades can cause on glass surfaces.
For any remaining film or haze, standard glass cleaner sprayed onto a microfiber cloth handles the job quickly. Spray the cloth, not the glass, to prevent overspray from reaching dashboard surfaces or headliner fabric. Wipe firmly in straight, overlapping passes until the glass feels perfectly smooth under your fingertip.
Dealing with an especially stubborn adhesive patch on the windshield? Acetone — ordinary nail polish remover — dissolves most adhesive residues on glass within seconds. Apply a small amount to a cloth, press it against the residue for 15 to 20 seconds, then wipe clean. Acetone evaporates rapidly and leaves no film behind on bare glass. Just keep it far from any dashboard surface, trim piece, or painted area, where it would cause immediate damage.
Never use a metal razor blade on tinted windows — it will scratch or peel the tint film.
This applies to both factory-installed and aftermarket tint. The tint layer sits on the interior surface of the glass — the same surface your adhesive was stuck to — so a metal blade cuts directly into the film. Stick with plastic blades and chemical solvents on any tinted window, and you'll remove the residue without sacrificing the tint.
A perfectly clean surface is the goal, and for most readers, this step wraps up the process entirely. But what about the unlucky few who discover a discolored spot, a shiny patch, or a torn section of soft-touch coating after the adhesive is gone? Damage from a previous botched attempt — or from the adhesive itself bonding too aggressively over months of heat exposure — requires a different kind of fix entirely.
Step 6 – How to Fix Dashboard Damage from an Adhesive Mount
Sometimes the adhesive wins. Maybe you arrived at this guide a step too late, or the mount sat baking in summer heat for two years and fused with the dashboard surface at a molecular level. Either way, you're now looking at something worse than sticky residue — a visible mark, a texture change, or a torn patch of material where the adhesive ripped the finish right off. It's frustrating, but it's not the end of the road. Most dashboard damage from phone mount adhesive falls into a handful of predictable categories, and each one has a targeted repair path that can make the blemish far less noticeable — or, in many cases, virtually invisible.
Assessing the Damage
Before you buy any repair products, take a close look at the affected area under good lighting. Angle a flashlight across the surface to highlight imperfections that overhead cabin light might hide. What you're seeing will fall into one of these four categories, and correctly identifying the damage type determines which fix actually works.
- Minor discoloration or ghosting — A faint outline or shadow where the adhesive used to sit. The surface itself is intact and smooth to the touch, but the color or sheen differs slightly from the surrounding area. This happens when UV rays age the exposed dashboard around the mount while the covered patch stays protected, creating a visible contrast once the mount comes off. It's the most common — and most easily corrected — type of damage.
- Surface texture change — A shiny spot on a matte finish, or a rough, dulled patch on an otherwise glossy surface. You'll feel it when you run a fingertip across the boundary between the damaged and undamaged areas. This typically results from solvent exposure, excessive heat, or aggressive scrubbing that altered the surface layer without actually removing material.
- Material tear or lift — The soft-touch coating physically peeled away, leaving a hard plastic underlayer exposed. This is one of the more distressing outcomes because it's immediately obvious — a different color and texture sits right in the middle of your dashboard. It happens most often with soft-touch plastics that bonded more strongly to the adhesive than to the substrate beneath them.
- Deep gouge or crack — A visible scratch, dent, or crack in the dashboard surface, usually caused by metal tools, aggressive prying, or attempting to rip a heavily bonded mount off by brute force. The damage extends beyond the surface layer into the underlying plastic structure.
Take an honest look and decide which description matches your situation. Minor discoloration? You can probably handle the fix yourself in fifteen minutes. A deep crack in a premium trim piece? That likely needs professional hands. Matching the repair approach to the severity saves both time and money.
Repair and Restoration Options by Damage Type
Each damage category responds to a different treatment. Trying a fix designed for one type of damage on a completely different type won't help — and can occasionally make things worse. Work through the list below based on what you identified above.
- Discoloration or ghosting — This is often the simplest repair. A quality dashboard protectant or interior conditioner applied to the entire panel — not just the faded spot — usually blends the discolored area back to a uniform appearance. The protectant restores moisture and adds a consistent sheen across the surface, minimizing the contrast between the "shadowed" patch and the sun-aged surrounding area. Apply with a microfiber cloth, let it absorb for a few minutes, then buff gently. Two or three applications over a week can make the ghosting virtually disappear as the protectant evens out the UV damage across the whole panel.
- Texture mismatch on matte surfaces — That shiny spot standing out against a matte dashboard is a clear sign the surface layer was partially dissolved or compressed. A matte-finish interior detailer can help restore consistency by leaving a flat, non-reflective layer over the treated area. Spray onto a microfiber cloth, apply in straight overlapping passes, and allow it to dry naturally. Avoid products labeled "high-gloss" or "shine-enhancing" — they'll make the mismatch worse, not better. For stubborn glossy patches on matte trim, some detailers recommend lightly misting the area with a fine-grain interior restorer that re-textures the top layer to match the factory appearance.
- Peeled soft-touch coating — When the velvety top layer rips away and exposes bare plastic underneath, no amount of conditioner fills that gap. You need an automotive interior repair kit specifically designed for soft-touch plastics. These kits typically include a flexible filler compound and a texturing agent that mimics the original soft-touch feel. Clean the exposed area thoroughly, apply the filler in thin layers to build up to the surrounding surface level, then use the texturing pad or spray included in the kit to recreate the original grain pattern. The result won't be factory-perfect under a magnifying glass, but from normal viewing distance — sitting in the driver's seat — the repair blends remarkably well. Expect the process to take a couple of hours including drying time.
- Leather or vinyl damage — Scuffs, discoloration, or small tears on leather and vinyl respond well to color-matched leather or vinyl repair kits. These kits come with a range of tinting compounds you mix to match your interior's exact shade. Clean the damaged area with a leather-safe cleaner first, then apply the repair compound in thin layers using the included applicator, letting each layer dry before adding the next. A grain-imprint pad pressed into the final layer replicates the surrounding texture. For genuine leather, follow up with a leather conditioner once the repair has fully cured to restore suppleness and prevent the patched area from drying out and cracking over time.
- Piano black scratches — Light scratches and swirl marks on gloss trim can be significantly reduced with a plastic polish and an ultra-soft microfiber cloth. Apply a small amount of polish to the cloth, work it into the scratched area using gentle straight-line motions (never circles — circular buffing creates new swirl patterns), and wipe clean with a fresh microfiber. Multiple passes progressively smooth the scratch edges until they catch less light and become far less visible. Deep scratches that catch your fingernail won't disappear completely with polish alone, but the improvement is usually dramatic enough to make them blend with the surrounding surface.
For any of these repairs, realistic expectations matter. A DIY fix makes the damage significantly less noticeable — it doesn't make the dashboard brand new again. Under certain lighting angles or close inspection, a repaired area may still be faintly visible. That said, from normal seating positions and typical cabin lighting, a well-executed repair is virtually undetectable to passengers and even to most auto inspectors.
When professional repair makes more sense: deep gouges, large areas of peeled coating, cracked trim panels, or damage on high-value surfaces like wood inlays or carbon fiber accents usually exceed the scope of DIY kits. A professional auto interior repair technician uses specialized tools, color-matching technology, and industrial-grade compounds to achieve near-invisible results. The cost typically ranges from $75 to $250 depending on the severity and location — real money, but a fraction of what a full trim panel replacement runs.
Drivers returning a leased vehicle deserve a specific callout here. Lease-return inspectors look for exactly the kind of damage adhesive mounts leave behind — discolored patches, torn coatings, scratched trim. The dealer's standard damage charge for a marked dashboard panel often lands between $200 and $500, sometimes higher on luxury vehicles. Getting a professional interior repair done before the return appointment — usually at half that cost or less — is almost always the smarter financial move. It's an easy calculation: pay a little now for a repair, or pay a lot later for a penalty.
Whether the fix is a quick wipe of conditioner or a full repair kit application, the real question shifts once the dashboard looks right again: how do you make sure this never happens a second time? The answer isn't "never use a phone mount" — it's choosing the right mounting method from the start.
Step 7 – Prevent Adhesive Damage Next Time
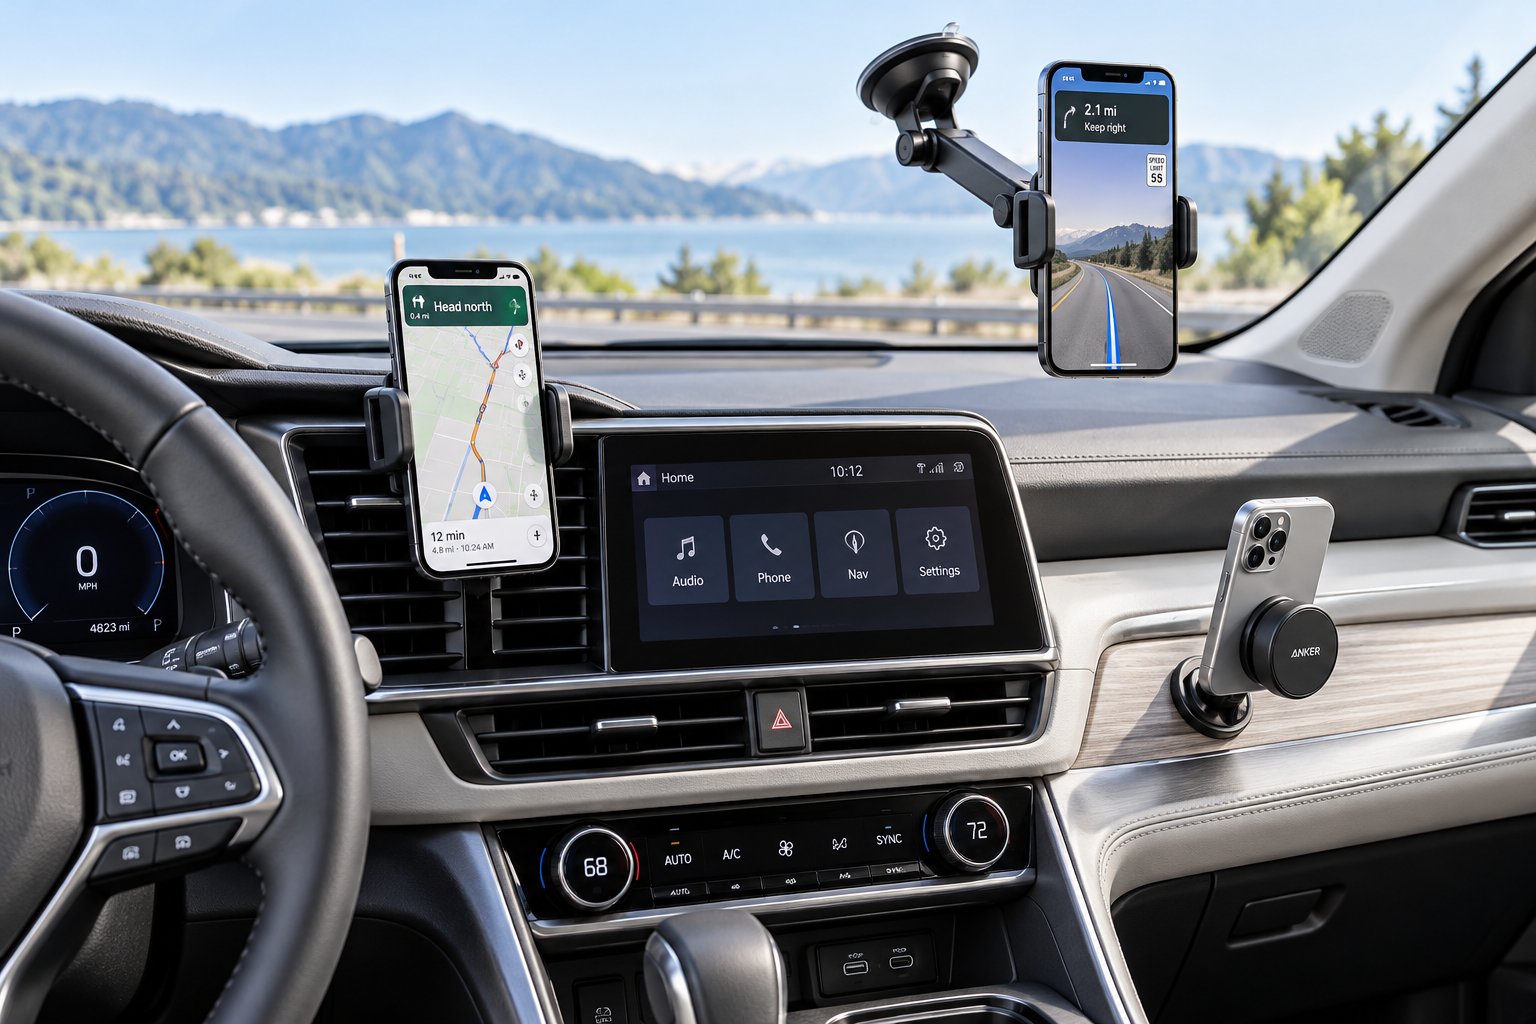
You just spent real time and effort rescuing your dashboard from a stubborn adhesive bond. The last thing you want is to slap a new mount on the same spot and repeat the entire cycle six months from now. The good news? You don't have to. The phone mount market has evolved dramatically, and adhesive pads are no longer the only — or even the best — way to secure your device in the car. Knowing how to mount a phone in a car without adhesive opens up options that keep your interior pristine and your phone exactly where you need it.
Adhesive-Free Mounting Methods Worth Considering
Each of these alternatives eliminates direct adhesive contact with your dashboard or windshield entirely — or at the very least, minimizes the footprint to something easily reversible.
- Vent-clip mounts — These hook directly onto your air vent fins using a spring-loaded or friction-based clip. No tape, no suction, no residue. They install in seconds and come off just as fast. Car and Driver's hands-on testing found that vent mounts provide excellent line-of-sight positioning while keeping the windshield and dashboard completely untouched. The trade-off? You lose a bit of airflow from the occupied vent, and heavier phones can cause lighter vent fins to droop over time. Still, for most drivers, vent clips are the best phone mount that won't damage a dashboard.
- Suction-cup mounts with quick-release bases — A well-engineered suction cup on clean glass creates a surprisingly strong hold without any adhesive whatsoever. Look for mounts with a locking lever that creates a vacuum seal — they grip far better than basic press-on suction cups and release cleanly when you flip the lever. Any residue left behind is typically just a faint ring that wipes off with a damp cloth in seconds, nothing like the nightmare you just dealt with.
- Magnetic mounts with removable metal plates — These use a small, thin metallic disc that attaches to your phone or case, then snaps onto a magnetic cradle mounted in the car. The adhesive footprint is minimal — just the tiny disc on the back of your phone case, not on the dashboard itself. The car-side magnet typically clips to a vent or mounts via a small suction base. Swapping phones or cases means peeling one small disc rather than wrestling an entire adhesive pad off the dash.
- Dashboard protector discs — If you genuinely prefer an adhesive-mounted holder for its rock-solid stability, a protector disc acts as a sacrificial layer between the adhesive and your actual dashboard surface. You stick the disc to the dash first, then mount the phone holder on top of the disc. When it's time to remove everything, the disc peels away far more easily than the mount's industrial adhesive would from the raw dashboard material. Think of it as insurance — a two-dollar accessory that prevents a two-hundred-dollar repair.
- Cupholder mounts — These expand inside a cupholder and raise your phone on an adjustable arm. Zero surface contact with the dash, windshield, or vents. They're particularly popular in trucks and SUVs where the cupholders sit high enough to keep the phone near the driver's line of sight.
Every option above eliminates or drastically reduces the sticky residue problem. The right choice depends on your vehicle layout, phone size, and whether you want features like wireless charging or MagSafe compatibility.
Choosing a Replacement Mount That Protects Your Interior
Modern phone mounts have moved well beyond the basic adhesive pads that caused your current headache. Many manufacturers now offer entire product lines spanning multiple mounting styles, so you can compare vent-clip, dashboard, magnetic, and wireless-charging designs side by side before committing. For example, CUTIM's Tesla Phone Mounts & Holders collection lets Tesla owners evaluate vent-mounted, dashboard, magnetic, and wireless-charging options in one place — comparing mounting methods, phone and case compatibility, and charging features to find the right fit for their specific interior. That kind of range matters because no single mounting style works perfectly for every vehicle or every driver.
A quick word of caution: browsing any mount collection — CUTIM's or anyone else's — doesn't mean every option listed is adhesive-free. Some dashboard-style mounts still use adhesive pads because they provide the strongest hold for heavy phones or rough-road driving. Always check the product's mounting method specifications before purchasing. If the listing mentions "3M tape," "adhesive pad," or "permanent mount," you know exactly what you're getting into — and you can pair it with a protector disc to keep your dash safe.
Whether you go adhesive-free or stick with a tape-based mount on a protector disc, a few simple habits prevent you from ever needing to search for adhesive removal tips again.
- Check the mounting method before buying. This sounds obvious, but most people focus on phone compatibility, charging speed, and price — then discover the attachment style only after opening the box. Spend 30 seconds reading how the mount attaches to the car. That half-minute of diligence saves hours of scraping later.
- Prefer mounts with removable or clip-based attachment. Vent clips, suction cups with release levers, and magnetic snap-on cradles are all designed for easy installation and easy removal. If your driving situation changes — new car, new phone, different preferred position — these mounts come off without a trace. A no adhesive car phone mount alternative is almost always the smarter long-term investment.
- If using an adhesive mount, apply it to a protector disc rather than directly to the dashboard. This single step transforms a permanent bond into a reversible one. The adhesive still grips with full strength, but the disc takes the punishment instead of your interior surface. When removal day comes, you peel the disc — not your dash finish.
- Avoid leaving adhesive mounts in extreme heat for extended periods. A car parked in direct summer sun can see dashboard surface temperatures exceeding 160°F (71°C). At those temperatures, adhesive compounds undergo chemical changes that dramatically strengthen the bond over time. What started as a moderately sticky pad in January becomes a semi-permanent weld by August. If you live in a hot climate, use a windshield sunshade, park in shade when possible, and consider removing the mount during extended periods of non-use. These small habits keep the adhesive from becoming a permanent part of your car.
- Clean the mounting surface before installation. Dirt, oils, and dashboard protectant residue trapped beneath an adhesive pad create an uneven bond that's harder to remove cleanly later. Wipe the area with isopropyl alcohol on a microfiber cloth and let it dry completely before pressing the mount — or protector disc — into place. A clean bond releases more predictably than a dirty one when removal time eventually arrives.
Every frustrating adhesive removal comes down to a choice made weeks, months, or years earlier — the moment someone pressed a sticky pad onto a dashboard without thinking about the exit strategy. You've already done the hard part: getting the old mount off and restoring the surface. The easy part is making a smarter choice this time around. Pick a mounting method that matches your vehicle, protects your interior, and lets you change your mind without reaching for dental floss and a hair dryer ever again.
Frequently Asked Questions About Removing Phone Mount Adhesive
1. Will removing a phone mount adhesive damage my dashboard?
Not if you use the right method for your specific dashboard material. The key is matching your removal technique to both the adhesive type and the surface underneath. Hard plastic is the most forgiving, while soft-touch plastic, leather, and piano black trim require gentler approaches with lower heat and milder solvents. Always start with the least aggressive method — such as low heat and dental floss — and test any cleaning product on a hidden area first. Rushing the process or using metal tools is what typically causes scratches, discoloration, or peeled coatings.
2. What is the best way to remove 3M VHB tape from a car dashboard?
3M VHB tape is engineered for permanent bonding, so it requires a specific approach. Apply medium heat from a hair dryer held 4 to 6 inches away for up to 3 minutes to soften the acrylic foam. Then slide unwaxed dental floss or fishing line behind the mount base using a slow sawing motion to cut through the bond. Avoid pulling or peeling, as VHB tape resists that action by design. If resistance builds, pause and reapply heat for 15 to 20 seconds before continuing. Clean any remaining residue with isopropyl alcohol or a commercial adhesive remover like Goo Gone.
3. Can I use a heat gun to remove phone mount adhesive?
A heat gun is not recommended unless you have professional automotive detailing experience. Heat guns can exceed 500 degrees Fahrenheit, which is hot enough to warp, melt, or permanently discolor most dashboard plastics within seconds. A standard household hair dryer on medium heat tops out around 140 degrees Fahrenheit and provides more than enough warmth to soften adhesive bonds safely. The wider safety margin of a hair dryer makes it the better choice for virtually every home removal scenario.
4. How do I remove phone mount adhesive residue from a windshield?
Glass is far more forgiving than dashboard surfaces. Use a plastic razor blade held at a 30-degree angle to scrape away the bulk of the adhesive, then wipe the area with standard glass cleaner on a microfiber cloth. For stubborn residue, acetone (nail polish remover) dissolves most adhesive films on bare glass within seconds. However, never use a metal razor blade on tinted windows, as it will scratch or peel the tint film. Stick with plastic blades and chemical solvents on any tinted surface.
5. What phone mount options won't leave adhesive residue on my car?
Several adhesive-free mounting styles are available today. Vent-clip mounts hook onto air vent fins with no surface contact. Suction-cup mounts with locking levers grip glass without tape and release cleanly. Magnetic mounts use a small metal disc on your phone case rather than adhesive on the dashboard. If you prefer the stability of an adhesive mount, apply it to a dashboard protector disc that acts as a sacrificial layer between the tape and your actual surface. Collections like CUTIM's Tesla Phone Mounts and Holders at cutimauto.com let drivers compare vent-mounted, dashboard, magnetic, and wireless-charging designs before choosing a method that fits their vehicle.