
Why Salt Stains Wreck Your Car Mats and Why Speed Matters
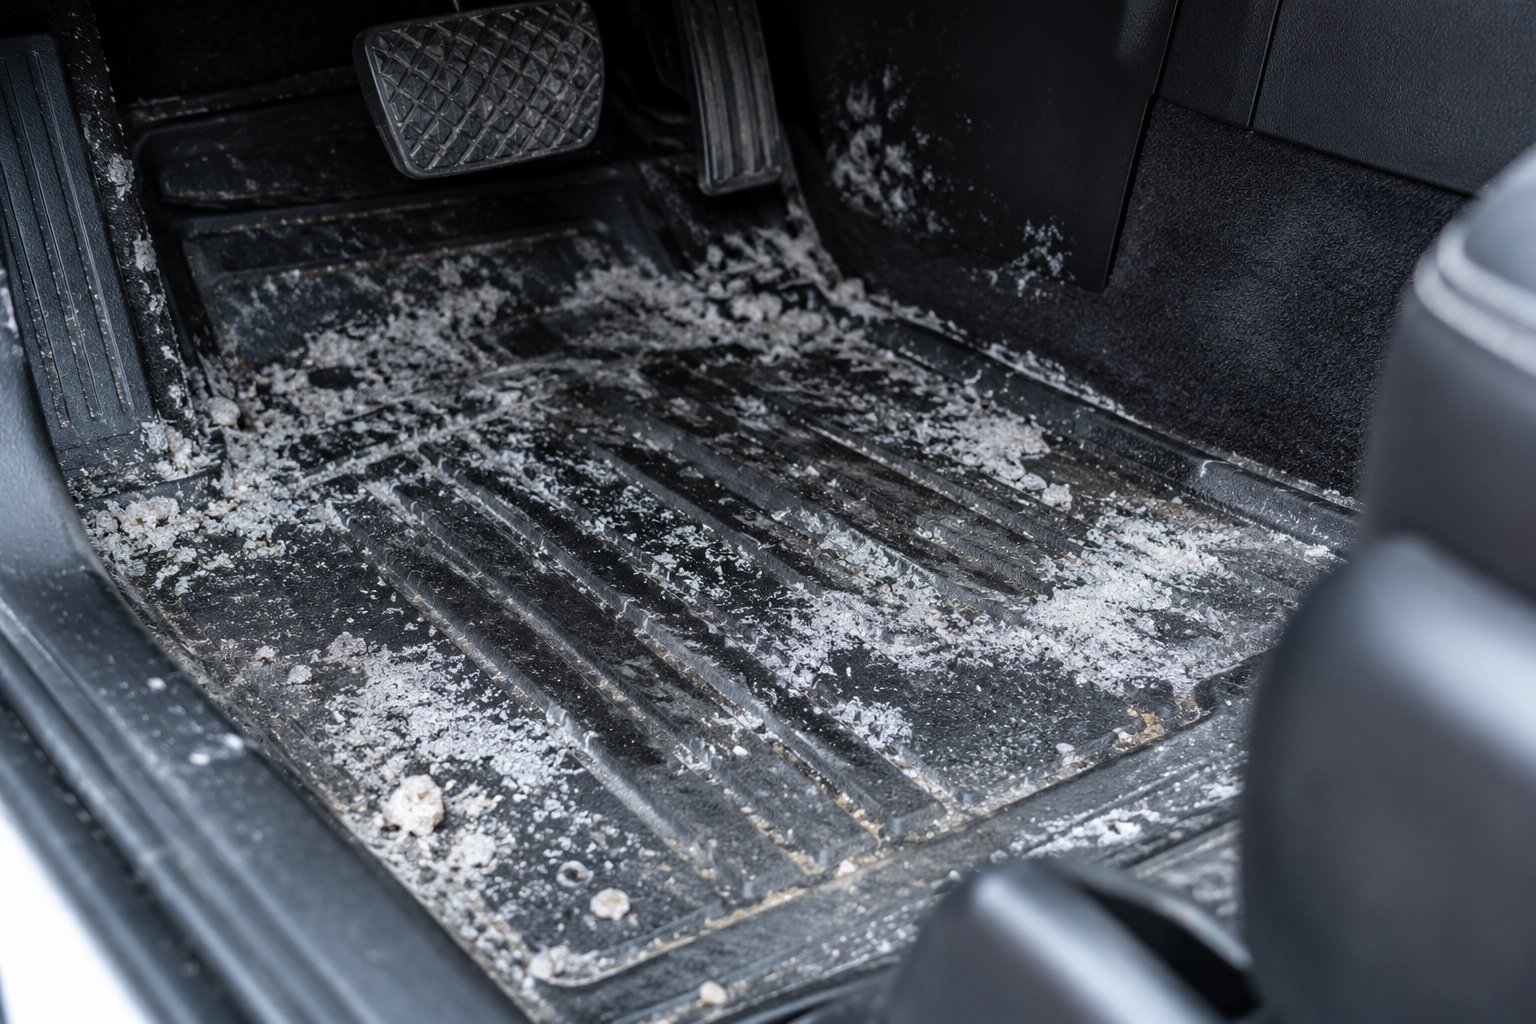
Imagine sliding into the driver's seat after a long winter commute and glancing down at your floor mats. White, crusty streaks fan out across the surface like dried tide marks. You brush at them with your shoe, but nothing budges. Sound familiar? Those stubborn deposits are more than just an eyesore — they're actively breaking down your mats from the inside out.
What Road Salt Actually Does to Your Car Mats
Road crews rely on several de-icing chemicals to keep highways safe. Traditional sodium chloride (rock salt) is the most common, but many municipalities also use calcium chloride and magnesium chloride because these compounds release more ions when dissolved, lowering the freezing point of water more effectively. All of these agents dissolve into snow and slush, hitch a ride on your boots, and end up on your car mats.
Here's where the real trouble starts. As that slushy moisture evaporates inside your warm cabin, it leaves behind crystalline mineral residue — the white crust you see on the surface. These salt deposits are hygroscopic, meaning they continuously attract and retain moisture from the surrounding air. On carpet mats, that constant moisture cycling stiffens fibers, causes fraying, and pulls color right out of the fabric. Even rubber and all-weather mats aren't immune; prolonged contact leads to discoloration and surface dulling. Different regions use different de-icing blends, too, so stain color, texture, and how to remove salt stains in car carpet can vary depending on where you live.
Why Quick Action Prevents Permanent Damage
Fresh salt residue sits loosely on the surface and responds well to simple cleaning — a basic vinegar for salt stains solution can often handle it. Leave those deposits for a week or two, though, and each moisture absorption-and-evaporation cycle bonds the minerals more tightly to carpet fibers. The longer you wait, the harder it becomes to remove salt from car carpet without aggressive scrubbing that damages the material itself.
Salt damage is cumulative. Every freeze-thaw cycle drives mineral deposits deeper into mat fibers, making removal progressively harder and permanent discoloration more likely.
This guide walks you through how to remove salt stains from car mats based on material type — rubber, carpet, and TPE — because each surface demands a different approach. The first step? Figuring out exactly how severe your stain situation really is.
Step 1 – Assess the Severity of Your Salt Stains
Reaching for a spray bottle or scrub brush right away is tempting, but choosing the wrong cleaning method for the wrong stain level wastes time and can even make things worse. A quick assessment takes less than a minute and tells you exactly which approach will work — a simple wipe-down, a deeper cleaning session, or a call to a professional detailer.
Three Levels of Salt Stain Severity
Not all salt stains are created equal. The key to figuring out how to get salt out of carpet in car situations — or off any mat surface — starts with identifying which stage your stains have reached. Here's a simple finger-rub test you can do right now: dampen your fingertip and rub it firmly across the white residue. If the mark dissolves easily and your finger picks up a chalky film, you're dealing with surface-level salt. If the white streak barely budges or you can still feel a gritty, rough patch after wiping, the deposits have bonded to the material.
Use these three categories to classify what you see:
- Light surface salt — A thin, powdery white film that appeared within the last day or two. You'll notice it looks almost like a haze across the mat. It dissolves quickly with a damp cloth and hasn't had time to work into fibers or grooves.
- Moderate buildup — Visible crusty patches with noticeable texture, usually about a week old. These deposits resist a simple wipe and may flake when scratched with a fingernail. Salt on car mats at this stage has started bonding to carpet fibers or settling into rubber channels.
- Deep-set staining — Hardened deposits that feel rough or gritty even after you brush away loose crystals. Carpet fibers may already show discoloration underneath. At this level, the salt has gone through multiple moisture absorption-and-evaporation cycles, locking it tightly into the material.
The table below maps each severity level to visual cues and the recommended cleaning path, so you can jump straight to the method that fits your situation:
| Severity Level | Visual Indicators | Finger-Rub Test Result | Recommended Path |
|---|---|---|---|
| Light (1–2 days old) | Thin white haze, powdery texture | Dissolves easily with a damp finger | Quick cleanup — damp cloth wipe or a single pass with vinegar-water spray |
| Moderate (about 1 week old) | Crusty patches, visible texture, flakes when scratched | Partially dissolves but white mark remains | Deep clean — vinegar method, dish soap scrub, or baking soda paste |
| Deep-set (2+ weeks old) | Hardened, rough deposits; discoloration persists after brushing away loose crystals | Residue barely moves; gritty texture remains | Escalated treatment — multiple cleaning rounds, commercial salt remover, steam cleaning, or professional detailing |
Removable Mats vs. Glued-Down Footwell Carpet
Your mat type shapes the entire cleaning workflow just as much as stain severity does. There are three common setups you'll find in most vehicles:
- Removable rubber or all-weather mats — These lift right out and can be cleaned outdoors with a hose, brush, and cleaning solution. They're the simplest to handle because you can rinse and scrub freely without worrying about water reaching anything underneath.
- Removable carpet mats — Also easy to pull out, but they absorb liquid, so cleaning requires more care around saturation levels and drying time. Always remove salt from carpet mats outside the vehicle.
- Glued-down or permanently installed footwell carpet — This is the trickiest scenario. You can't take it out, so every drop of liquid you apply stays inside the cabin. Over-wetting pushes dissolved salt deeper into the padding and can soak through to the metal floor pan, inviting rust and mildew.
If your mats are removable — regardless of material — take them out of the car before any liquid touches them. Cleaning mats in place risks water running beneath them and pooling on the vehicle floor. That trapped moisture creates the exact damp environment that accelerates future salt damage, breeds mildew, and introduces musty odors into the cabin. Even a few tablespoons of runoff can cause problems you won't notice until weeks later.
For glued-down carpet, the golden rule is spray and blot, never pour. You'll use the same cleaning solutions covered in later steps, but in smaller amounts with immediate blotting after each application to keep moisture under control.
With your stain severity classified and your mat type identified, you have everything you need to pick the right tools and cleaning method — which is exactly what comes next.
Step 2 – Gather Your Tools and Cleaning Supplies
Knowing your stain severity and mat type points you toward the right cleaning approach — but even the best method falls flat without the right supplies on hand. The good news? You probably already own what you need for most salt stains. Rather than running out to buy specialty products right away, take a quick inventory of what's already in your kitchen, laundry room, and garage.
The supplies below are organized into three tiers so you can match your toolkit to the severity level you identified in the previous step. Most car owners wondering how to get salt out of car mats will find that Tier 1 handles the job perfectly well.
Household Supplies You Already Own
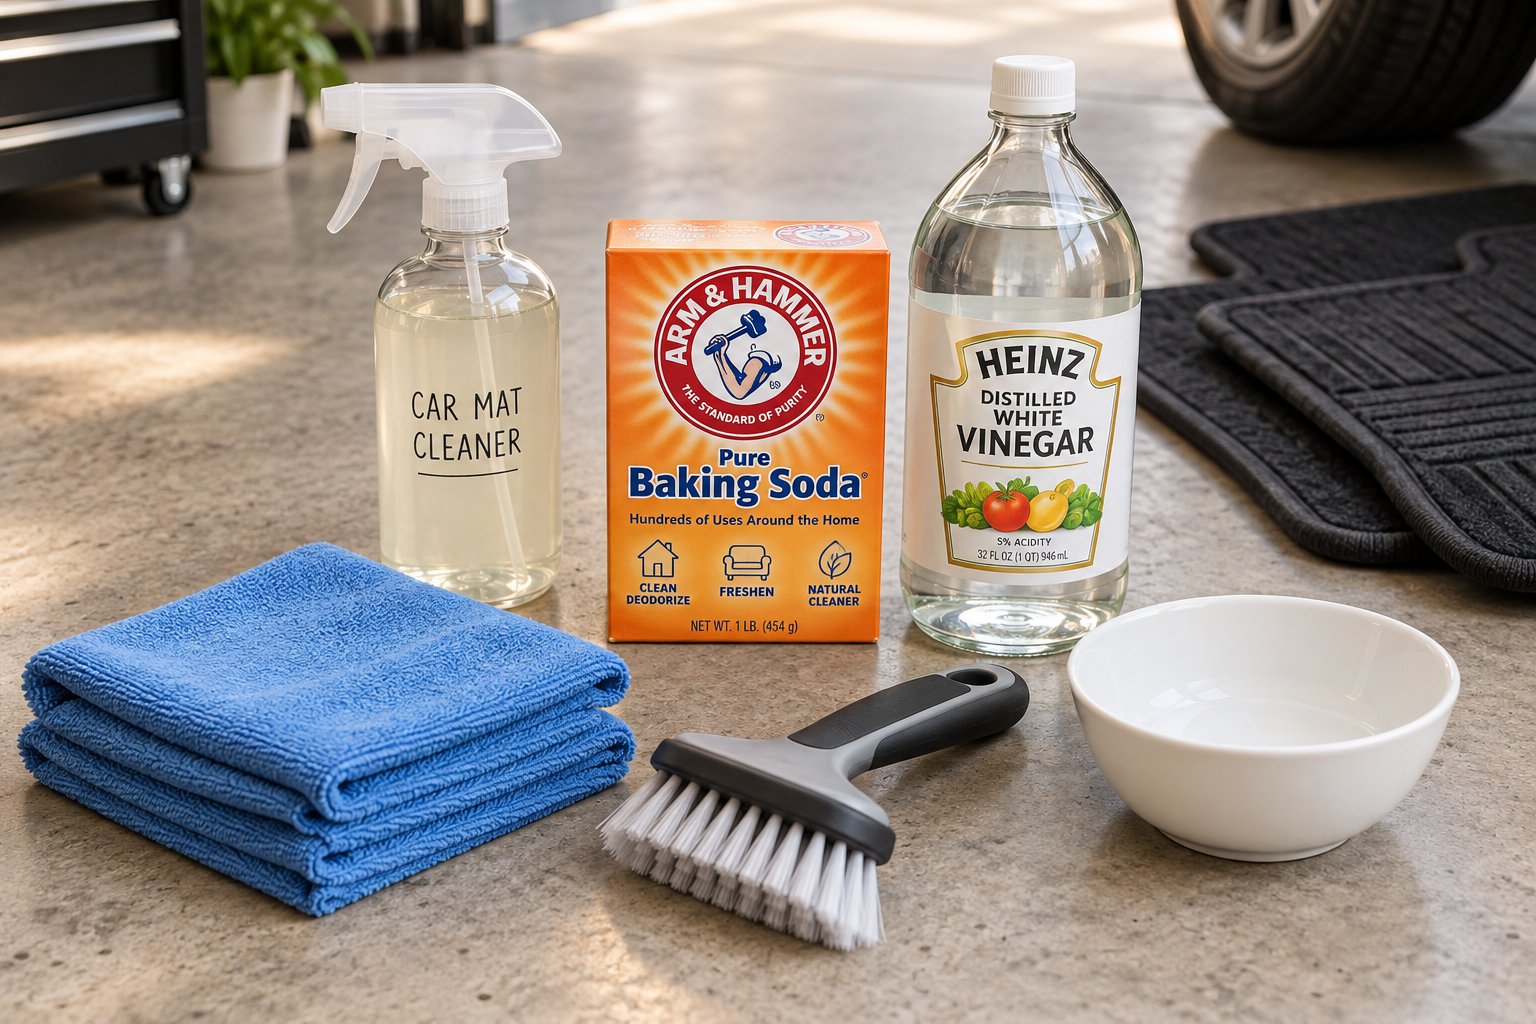
For light-to-moderate salt stains — the kind most people deal with during a typical winter — everyday household items are all you need. A standard spray bottle filled with a 50/50 mix of distilled white vinegar and warm water is the single most effective and affordable starting point. The mild acidity in vinegar dissolves mineral salt deposits without damaging carpet fibers or dulling rubber surfaces.
Here's your Tier 1 supply list and what each item does:
- Distilled white vinegar — The active cleaning agent. Its acetic acid breaks down crystalline salt deposits so they can be wiped or blotted away.
- Warm water — Helps dissolve salt faster than cold water and boosts the vinegar's cleaning power. Avoid hot water, which can set certain stains or shrink carpet backing.
- Spray bottle — Delivers the vinegar-water solution in a controlled mist, preventing over-saturation. Pouring liquid directly onto mats pushes dissolved salt deeper into fibers.
- Clean microfiber cloths (2–3 minimum) — Absorb dissolved salt and dirty liquid during the blotting phase. Microfiber picks up residue far more effectively than cotton rags or paper towels.
- Soft-bristle brush — Agitates the cleaning solution into carpet fibers or rubber grooves without shredding the material. A nylon-bristle dish brush or detailing brush works well.
- Dish soap — A backup cleaning agent for lighter stains. A few drops in warm water create a gentle solution that lifts surface salt and grime.
- Baking soda — Useful as a paste for drawing out deep moisture and absorbing odors after cleaning. Also doubles as a mild abrasive for scrubbing stubborn spots on rubber mats.
If you're trying to figure out how do you get salt out of carpet with minimal effort and expense, this tier covers roughly 80% of winter salt stain situations. Don't feel pressured to invest in specialty products unless you've already tried these basics and the stain persists.
Commercial and Professional-Grade Options
When household supplies aren't enough — or when you're dealing with deep-set stains that survived multiple rounds of vinegar treatment — it's worth stepping up to commercial or professional-grade tools.
Tier 2: Commercial off-the-shelf products
- Automotive carpet cleaner sprays — Foaming sprays like Meguiar's Carpet & Upholstery Cleaner are designed for interior fabrics and work well on general dirt and grime around salt-affected areas. Look for products that specifically mention salt or mineral stain removal on the label.
- Dedicated salt remover concentrates — Products formulated to neutralize road salt residue, such as Detco Road Salt Neutralizer, target mineral deposits directly. These are especially useful for how to remove salt stains from auto carpet that has been neglected for weeks. Keep in mind that some concentrates come in large commercial sizes, so check the quantity before purchasing.
- All-purpose interior detailing sprays — Versatile cleaners that handle mixed stains — salt, mud, and everyday grime — in a single step. Handy if your mats need a general refresh beyond just salt removal.
Tier 3: Professional-grade tools
- Wet/dry vacuum (shop vac) — Extracts dissolved salt and dirty liquid from carpet fibers far more effectively than blotting alone. If you own one, use it after every spray-and-scrub cycle to pull contaminated moisture out before it dries back into the mat.
- Portable carpet extractor — Sprays heated cleaning solution into the fibers and immediately vacuums it back out in one pass. This is the same technology professional detailers rely on, and compact home models are available at most hardware stores.
- Steam cleaner — Combines high heat and moisture to loosen deep mineral bonds without any chemicals at all. Particularly effective on hardened deposits that have gone through multiple freeze-thaw cycles. Many auto parts retailers offer rental units if buying one isn't practical.
A practical rule of thumb: start with Tier 1 for your first cleaning attempt. Move to Tier 2 only if stains remain after two or three vinegar-and-blot cycles. Reserve Tier 3 tools for the most stubborn cases — or when you're cleaning an entire vehicle's worth of winter buildup and want to save serious time.
With your supplies gathered and organized, the actual cleaning can begin. The approach splits depending on what your mats are made of, and rubber and all-weather mats are the fastest and simplest place to start.
Step 3 – Clean Salt Off Rubber and All-Weather Mats
Rubber, silicone, and all-weather mats are by far the easiest type to clean because salt sits on the surface and inside molded grooves rather than soaking into fibers. That means you're dealing with a removal job, not an extraction project. With a garden hose, a spray bottle of vinegar solution, and about ten minutes of effort, even moderate salt buildup comes off completely.
Rinse, Spray, and Scrub Rubber Mats
The process is straightforward, but the order of steps matters. Jumping straight to scrubbing with a wet brush just smears dissolved salt into channels where it dries again later. Follow this sequence instead, and you'll pull the deposits off cleanly in a single session:
- Remove the mats from the vehicle. Pull each mat out and take them outdoors or to a utility sink. Cleaning rubber mats inside the car sends dirty water underneath, where it pools on the vehicle floor and creates exactly the moisture problems you're trying to avoid.
- Shake and brush off loose salt. Hold each mat at an angle and shake it vigorously to dislodge dry crystals. For stubborn flaky patches, use a soft-bristle brush or even tap the back of the mat firmly against a hard surface. This dry step removes the bulk of loose deposits before any liquid is involved — a road salt remover for cars works best when it doesn't have to fight through layers of loose grit first.
- Rinse with a garden hose or under running water. Flush the entire surface with cool or lukewarm water. Aim the stream into grooves and along raised edges where salty slurry tends to collect. You'll see white residue dissolving and washing away immediately. If you don't have a hose, a bucket of water and a few firm splashes in a utility sink work just as well.
- Spray with the 50/50 white vinegar and warm water solution. Fill your spray bottle and mist the entire mat surface evenly, paying extra attention to any areas where a white film remains after rinsing. Let the solution sit for two to three minutes. The mild acidity dissolves mineral salt deposits that plain water leaves behind — this is exactly how to get salt stains out of auto carpet and hard-surface mats alike, though rubber responds faster since there are no fibers to penetrate.
- Scrub with a soft-bristle brush in circular motions. Work across the mat methodically, pressing firmly enough to agitate the solution into textured surfaces but not so hard that you gouge the rubber. You'll notice the white residue lifting into the liquid almost immediately.
- Rinse thoroughly and inspect. Flush the entire mat again with clean water. Tilt it under bright light and look for any remaining hazy patches or white streaks. Run your fingers across suspect areas — if they feel smooth and clean, you're done.
- If marks persist, apply a small amount of dish soap. Put a few drops of mild dish soap directly onto your brush, scrub the stubborn spots, and rinse again. Soap cuts through any oily road grime that may be trapping salt residue against the surface. A quick soapy pass usually handles whatever the vinegar missed.
- Dry completely before reinstalling. Towel off both sides of the mat with a clean microfiber cloth, then stand or hang the mats in a well-ventilated area until no moisture remains. Rubber mats dry much faster than carpet — typically 30 minutes to an hour in open air — but don't rush it. Water trapped under a reinstalled rubber mat creates a sealed, damp environment that breeds mildew and produces that unmistakable musty cabin odor within days.
One detail worth emphasizing: always use cool or warm water, never hot. As one cleaning guide for winter car mats cautions, hot water can drive dissolved salt deeper into backing materials and cause warping on certain rubber compounds. Warm water dissolves salt effectively without the side effects.
Cleaning Grooves and Raised-Edge Channels
All-weather mats are specifically designed with raised perimeter walls and deep interior channels to contain slush and liquid runoff. That containment is a huge advantage during winter, but those same grooves become salt traps if you don't clean them thoroughly.
Salty slurry settles into the lowest points of the channel pattern and dries into thin crusts that are easy to overlook. You might wipe the flat surfaces clean and think the job is finished — only to find white lines reappearing along every groove a day later as trapped moisture evaporates.
Here's how to get into those textured surfaces where salt hides:
- Direct the hose stream along channels, not across them. Angle the water so it flows through each groove lengthwise, flushing deposits out toward the edge of the mat rather than just pushing them from one channel to the next.
- Use an old toothbrush or narrow detailing brush for tight grooves. A standard dish brush may be too wide to reach the bottom of deep channels. A toothbrush gives you precise scrubbing pressure exactly where the residue sits.
- Spray vinegar solution directly into channels and let it dwell. Tilt the mat slightly so the solution pools in the grooves for the full two to three minutes. This extended contact time lets the acid dissolve dried mineral buildup you can't reach with bristles alone.
- Flip the mat and rinse the underside. Salt water that overflows raised edges often seeps underneath. Rinse the bottom surface thoroughly and check for any white residue clinging to the flat underside — this is the layer that sits directly against your vehicle floor carpet.
A final rinse, a thorough towel-dry, and a visual inspection under good lighting wrap up the process. Rubber and all-weather mats should look nearly factory-fresh at this point. Carpet and fabric mats, on the other hand, demand a fundamentally different strategy — salt doesn't just sit on their surface but buries itself deep into woven fibers, which makes the cleaning process longer and the margin for error much smaller.
Step 4 – Remove Salt Stains from Carpet and Fabric Mats
Carpet and fabric mats are where salt stains go from a quick chore to a real challenge. Unlike rubber surfaces that let deposits sit on top, woven fibers absorb dissolved salt deep into their structure. Every time moisture evaporates, those minerals recrystallize inside the pile — which is why a white crust keeps reappearing even after you've wiped the surface clean. The good news? With the right preparation and technique, you can pull salt out of carpet completely using supplies you already have at home.
Vacuum First to Avoid Pushing Salt Deeper
This is the step most people skip — and it's the one that makes or breaks the entire process. Before any liquid touches the mat, vacuum it thoroughly in multiple directions to remove every loose salt crystal, dirt particle, and bit of grit sitting on the surface.
Why does this matter so much? A cleaning guide for car carpet explains that applying liquid before dry vacuuming dissolves loose crystals into a concentrated brine that drives deeper into the fibers, making removal significantly harder. Imagine all that dry, powdery salt on the surface suddenly turning into a salty solution that soaks straight down through the pile and into the backing. You'd essentially be pushing the problem deeper instead of solving it.
Here's how to do it right:
- Remove the mat from the vehicle and place it on a clean, dry surface like a driveway or garage floor.
- Beat the back of the mat against a hard surface a few times to knock loose crystals free from deep in the fibers.
- Vacuum in multiple directions — run the nozzle lengthwise, then crosswise, then diagonally. Salt hides between fibers that lay in different directions, so a single pass misses a lot.
- Use a crevice attachment along edges and seams where crystals accumulate.
You'll likely see a surprising amount of white powder come out. That's salt you won't have to fight with liquid later — and it's the single biggest reason dry prep makes the rest of the job faster and more effective.
Three DIY Methods for Carpet Mat Salt Stains
With loose crystals cleared, it's time to tackle the salt that's bonded into the fibers. You have three proven methods to choose from depending on what you have on hand and how stubborn the stains are. Each one follows the same core principle: dissolve the mineral deposits, lift them out of the fibers, and remove the contaminated liquid before it dries and redeposits the salt.
Method 1: Vinegar Solution (Best All-Around Option)
This is the method most detailers and DIY guides recommend as the go-to approach for learning how to get salt out of car carpet. Salt deposits are alkaline, and as professional detailers note, acidic, pH-balanced cleaners break them down far more effectively than neutral soaps. White vinegar's mild acidity makes it an ideal, inexpensive salt remover car owners can rely on all winter long.
- Fill a spray bottle with a 50/50 mix of distilled white vinegar and warm water.
- Mist the stained area evenly — don't drench it, just dampen the surface thoroughly.
- Let the solution sit for two to three minutes so the acid can dissolve the mineral crystals.
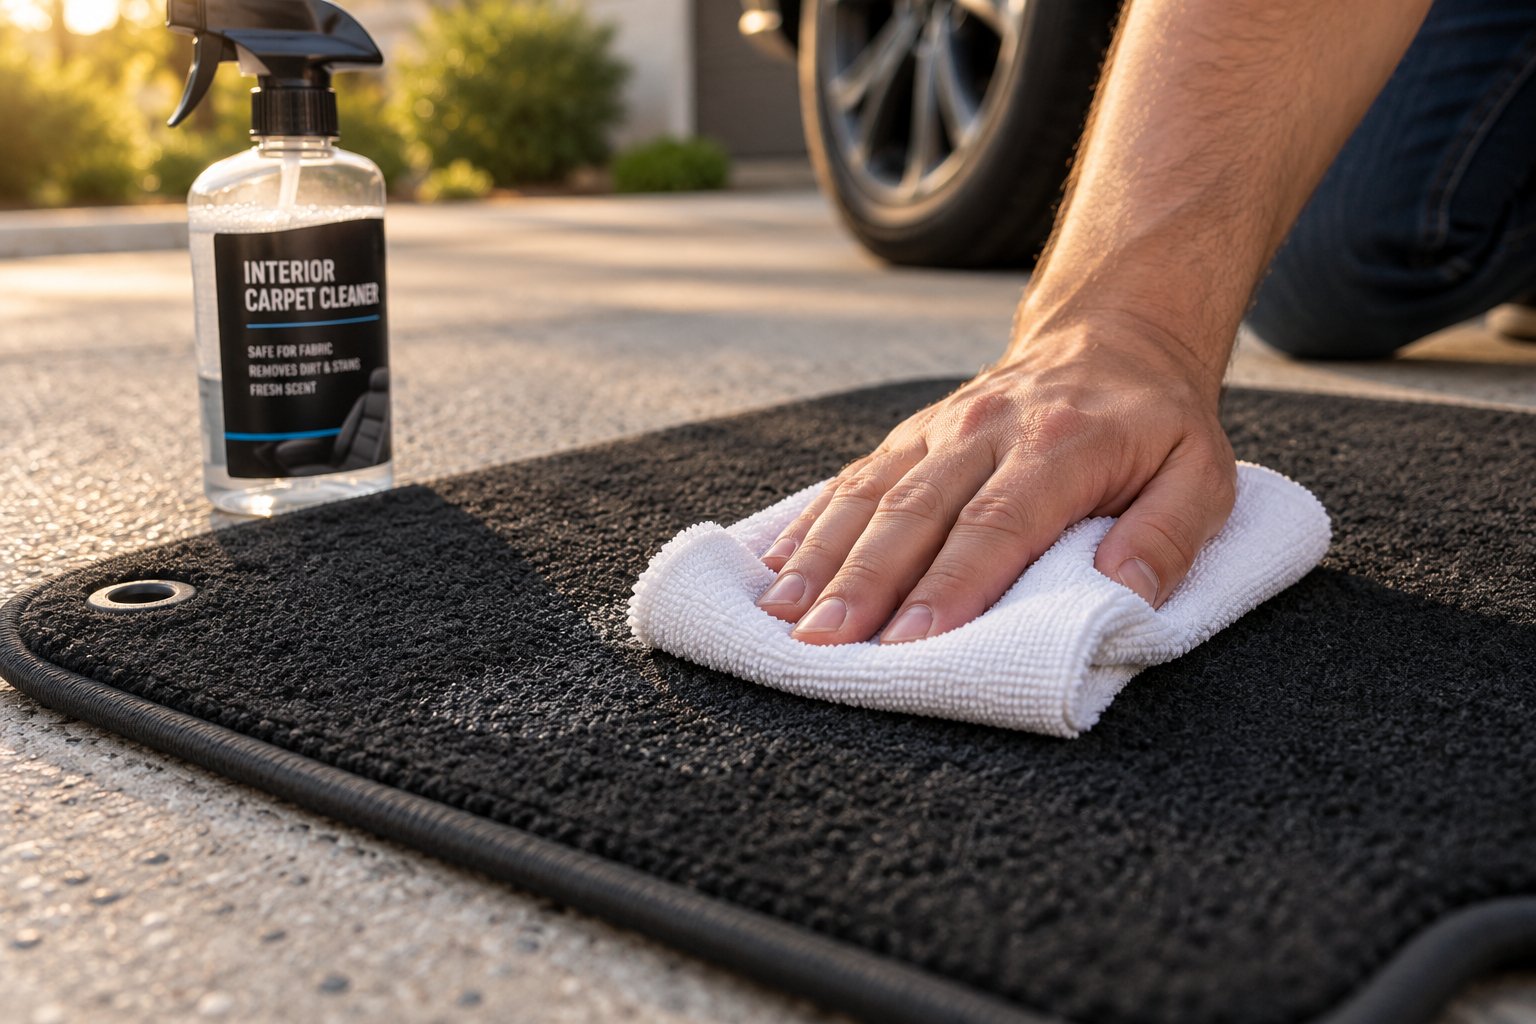
- Blot firmly with a clean, folded microfiber cloth. Press down and lift — don't rub or drag, which spreads dissolved salt sideways.
- Check the cloth. If you see white residue transferring onto it, refold to a clean section and blot again.
- Repeat the spray-and-blot cycle until the cloth comes away clean.
A widely cited home recipe takes this a step further by combining 1 teaspoon of white vinegar, 1 teaspoon of mild liquid dish detergent, and 1 pint of lukewarm water for heavier buildup. If you try vinegar alone and a hazy film remains, this blended version often finishes the job. Just test any vinegar mix on a small, hidden corner first — vinegar can shift dye color on sensitive fabrics, and you want to confirm the carpet holds before treating visible areas.
Method 2: Dish Soap Solution (Gentle for Light Stains)
When the salt on carpet is relatively light — a thin white haze rather than heavy crusty patches — dish soap alone can handle it without bringing vinegar into the mix.
- Add three to four drops of mild dish soap to a bowl of warm water. Stir gently until slightly sudsy.
- Dip a clean microfiber cloth into the solution and wring it out so it's damp but not dripping.
- Work the soapy cloth over the stained area in gentle, overlapping strokes.
- Follow with a soft-bristle brush, scrubbing lightly in circular motions to agitate any remaining residue from the fibers.
- Blot with a separate dry microfiber cloth to pull out the soapy, salt-laden moisture.
- Dampen a fresh cloth with plain water and blot again to rinse soap residue — leftover detergent attracts dirt quickly if it's not removed.
This method is gentler on dye-sensitive carpets and works well for weekly maintenance cleaning during salt season. It's less effective on moderate-to-heavy deposits because soap is pH-neutral and doesn't chemically break down alkaline mineral bonds the way vinegar does.
Method 3: Baking Soda Paste (Best for Deep Absorption)
Baking soda works differently from the first two methods. Instead of dissolving salt into a liquid you blot away, it draws moisture and dissolved minerals up and out of the fibers through absorption — almost like a poultice. This makes it particularly useful for how to get salt out of carpet that has been damp for a while and carries a slight musty smell along with the stain.
- Mix baking soda with just enough water to form a thick, spreadable paste — roughly the consistency of toothpaste.
- Apply the paste generously over the stained area, pressing it into the fibers with a spatula, old credit card, or your fingers.
- Let it dry completely. This takes several hours or overnight depending on humidity and paste thickness. Don't rush it — the paste needs to fully harden to pull salt from deep in the pile.
- Once the paste has dried into a solid, chalky layer, vacuum it up thoroughly. The dried baking soda pulls absorbed salt along with it as it lifts away.
- Inspect under bright light. For stubborn remnants, follow up with a quick pass of the vinegar spray-and-blot method to catch anything the paste missed.
Baking soda also neutralizes odors trapped in damp carpet fibers, giving you a dual benefit that the other methods don't provide on their own.
The table below compares all three methods so you can pick the best fit for your situation:
| Criteria | Vinegar Solution | Dish Soap Solution | Baking Soda Paste |
|---|---|---|---|
| Ease of Use | Simple — spray and blot | Simple — wipe, scrub, and blot | Easy to apply but requires several hours of drying time |
| Effectiveness on Light Stains | Excellent — dissolves surface deposits in one or two passes | Good — handles thin, fresh salt film well | Good — works but slower than liquid methods for light buildup |
| Effectiveness on Heavy Stains | Very good — acidity breaks down bonded mineral deposits | Limited — neutral pH struggles with deep alkaline residue | Very good — absorbs deep moisture and pulls salt from fiber base |
| Supplies Needed | White vinegar, warm water, spray bottle, microfiber cloths | Dish soap, warm water, microfiber cloths, soft-bristle brush | Baking soda, water, spatula or card, vacuum cleaner |
| Best For | Most situations — the reliable default method | Weekly maintenance and light, recent stains | Deep-set stains with lingering dampness or odor |
Cleaning Salt from Glued-Down Footwell Carpet
Everything above applies to glued-down or permanently installed footwell carpet — with one critical difference: you cannot over-saturate. There's no way to remove this carpet, flip it over, or hang it up to dry. Every drop of liquid you introduce stays inside the cabin, and any excess moisture seeps through the carpet backing into the padding and down to the metal floor pan. A detailing guide for winter interiors warns that excess moisture carries dissolved salt through the backing into the padding, where no vacuum can reach it — and that briny liquid then wicks back up as it dries, recreating the white crust all over again.
Here's how to adapt the process for fixed carpet:
- Use the spray-and-blot technique exclusively. Mist a light, even layer of your chosen solution — never pour or squeeze liquid onto the carpet.
- Work in small sections rather than treating the entire footwell at once. Clean one area, blot it dry, then move to the next. This keeps total moisture to a minimum.
- Blot immediately and repeatedly. Press a dry microfiber cloth firmly into the carpet after each spray, folding to a clean side frequently. Your goal is to pull contaminated liquid out before it has time to soak through.
- Use a wet/dry vacuum if available. Even a few passes with a shop vac after each spray-and-blot round extracts significantly more dissolved salt than hand blotting alone.
- Ventilate the cabin afterward. Leave windows cracked or doors open for an hour or more to let residual moisture evaporate. Running the heater with the fan on high also speeds drying. Trapped dampness under fixed carpet leads directly to musty odors and mildew growth.
Patience is the common thread across all three methods and every mat type. Salt that has bonded into carpet fibers rarely comes out in a single attempt — and forcing it with too much liquid or too much pressure only creates new problems. Sometimes, though, even patient, repeated cleaning sessions aren't enough to fully eliminate deep-set deposits. When that happens, a structured escalation plan keeps you moving forward instead of scrubbing the same spot in circles.
Step 5 – Tackle Stubborn and Deep-Set Salt Stains
You've sprayed, scrubbed, and blotted — and the white marks are still staring back at you. Before frustration sets in, understand that this is completely normal for older car carpet salt stains. Salt that has been sitting in carpet fibers for weeks or even months doesn't behave like a fresh spill. Each time humidity rises and falls inside your cabin, moisture dissolves a thin layer of embedded salt crystals, then evaporates and redeposits them slightly deeper into the pile. After enough of these cycles, the mineral deposits essentially fuse with the fiber structure. A single cleaning pass — no matter how thorough — can't undo what dozens of moisture cycles have built up.
That doesn't mean the stains are permanent. It means you need a structured escalation plan rather than repeating the same step harder and hoping for a different result.
Escalation Steps When Stains Survive the First Clean
Think of this as a troubleshooting ladder. Start at the bottom rung — the least aggressive option — and only climb higher if the stain persists. Each step increases cleaning power, and moving through them in order protects your mat from unnecessary wear.
- Repeat the vinegar spray-and-blot method three to four times with drying intervals. This is the most important detail people miss. After your first cleaning pass, let the carpet dry fully — at least an hour or two — before inspecting under bright light. Residue that was invisible while the fibers were damp often reappears as a faint white film once dry. Spray the 50/50 vinegar-water solution again, let it dwell for two to three minutes, and blot with a fresh microfiber cloth. The reason for drying between rounds is simple: you need to see what's actually left before deciding whether to escalate. Many stains that look stubborn after one pass disappear entirely after three or four patient rounds.
- Switch to a commercial carpet cleaner formulated for automotive salt stains. If vinegar has pulled out most of the residue but a ghostly outline remains, a dedicated salt remover for car interiors is the logical next step. Spray the product evenly over the affected area, agitate gently with a soft-bristle brush to work the formula into the fibers, then extract with a wet/dry vacuum. The combination of stronger surfactants and mechanical extraction pulls dissolved salt out of the carpet's lower pile layers — the zone vinegar and blotting alone struggle to reach. As interior care specialists note, allowing the cleaner adequate dwell time before agitation enhances its ability to break down mineral residue bonded to fibers, reducing the need for aggressive scrubbing.
- Use a steam cleaner to break deep mineral bonds without chemicals. Steam combines two things that dissolve salt effectively — heat and moisture — and delivers them directly into the carpet pile under pressure. The high temperature loosens crystallized deposits that chemical solutions alone can't fully reach, while the moisture flushes them toward the surface for extraction. If you don't own a steam cleaner, many hardware stores and auto parts retailers offer rental units. Run the steamer slowly across the stained area, then immediately follow with a wet/dry vacuum pass to remove salt from car carpet before the contaminated moisture has a chance to resettle.
- Bring the mats to a professional auto detailer. When home methods have reduced the salt in carpet but visible discoloration or a rough texture remains, professional equipment makes the difference. Detailers use heated carpet extractors that spray cleaning solution deep into the pile and vacuum it back out in a single pass — a level of extraction power that consumer-grade tools can't match. A single detailing session for floor mats and footwell carpet typically runs between $50 and $150 depending on severity and your location, which is significantly less than replacing a full set of quality carpet mats. For vehicles that have endured an entire winter without cleaning, professional detailing resources recommend running two full cleaning passes — the first to dissolve and remove surface and mid-pile deposits, the second to reach the deeper layers that the first pass rehydrated but didn't fully extract.
A quick word on patience between these steps: jumping from vinegar straight to a steam cleaner skips the intermediate options that might have solved the problem at lower cost and effort. Give each rung two to three attempts before climbing to the next one. Most moderate salt stains surrender somewhere between repeated vinegar treatments and a single pass with a commercial cleaner.
When Professional Detailing or Mat Replacement Makes More Sense
There's a point where continued cleaning delivers diminishing returns — and recognizing it saves you both time and money. Remove salt from car carpet as thoroughly as you can, but know when the damage has crossed from a cleaning problem into a replacement situation.
Consider replacing your mats instead of continuing to clean them if you notice any of these signs:
- Carpet fibers are visibly degraded. If the pile feels thin, brittle, or matted down permanently in high-traffic areas — especially the driver's heel pad — salt and abrasion have caused physical damage that no cleaning method can reverse. The fibers themselves are worn, not just stained.
- Discoloration persists after multiple deep cleans. Salt itself is white, but road salt arrives mixed with petroleum residue, mud, and chemical additives. If grayish or brownish discoloration remains after you've removed the mineral deposits, the accompanying grime has dyed the fibers. At that point, you're fighting a color change rather than a salt stain.
- Musty odor returns within days of cleaning. A persistent smell indicates moisture trapped deep in the carpet backing or padding — a zone that surface cleaning and even extraction can't fully dry. That trapped dampness will continue cycling salt and breeding mildew no matter how many times you treat the surface.
- The mat's rubber backing is cracking or separating. Salt accelerates rubber degradation. If the backing crumbles when you flex the mat or has separated from the carpet layer, the mat has reached the end of its usable life.
Replacement doesn't have to mean spending a fortune. A new set of quality carpet mats typically costs less than two professional detailing sessions, and you start fresh with fibers that haven't been weakened by months of mineral exposure. For owners facing recurring winter salt issues, switching to all-weather mats during cold months is an even smarter long-term play — but that's a prevention strategy worth its own discussion.
Whether you've fully eliminated the stain or decided it's time for new mats, the work isn't finished until everything is completely dry. Reinstalling a mat that feels "mostly dry" is one of the fastest ways to undo all the effort you just put in — and the drying step has a few more pitfalls than most people realize.
Step 6 – Dry and Inspect Your Mats Before Reinstalling
Here's the frustrating irony most car owners don't see coming: you can do everything right — vacuum thoroughly, spray the perfect vinegar solution, blot patiently through multiple rounds — and still end up with salt rings reappearing a day later. The culprit? Putting the mats back in the car before they're fully dry. Moisture trapped inside carpet fibers or sandwiched between a rubber mat and the vehicle floor dissolves any residual salt you didn't quite reach, and as that moisture slowly evaporates in the warm cabin, it redeposits those minerals right back onto the surface. It's the same crystallization cycle that created the stains in the first place — just starting over from scratch.
Proper drying isn't a bonus step. It's the difference between a clean mat that stays clean and a clean mat that develops ghostly white outlines within 48 hours.
The Right Way to Dry Every Mat Type
Rubber and carpet mats behave very differently when wet, so they need separate drying strategies. Rushing the process for either type invites problems — but carpet mats are far less forgiving.
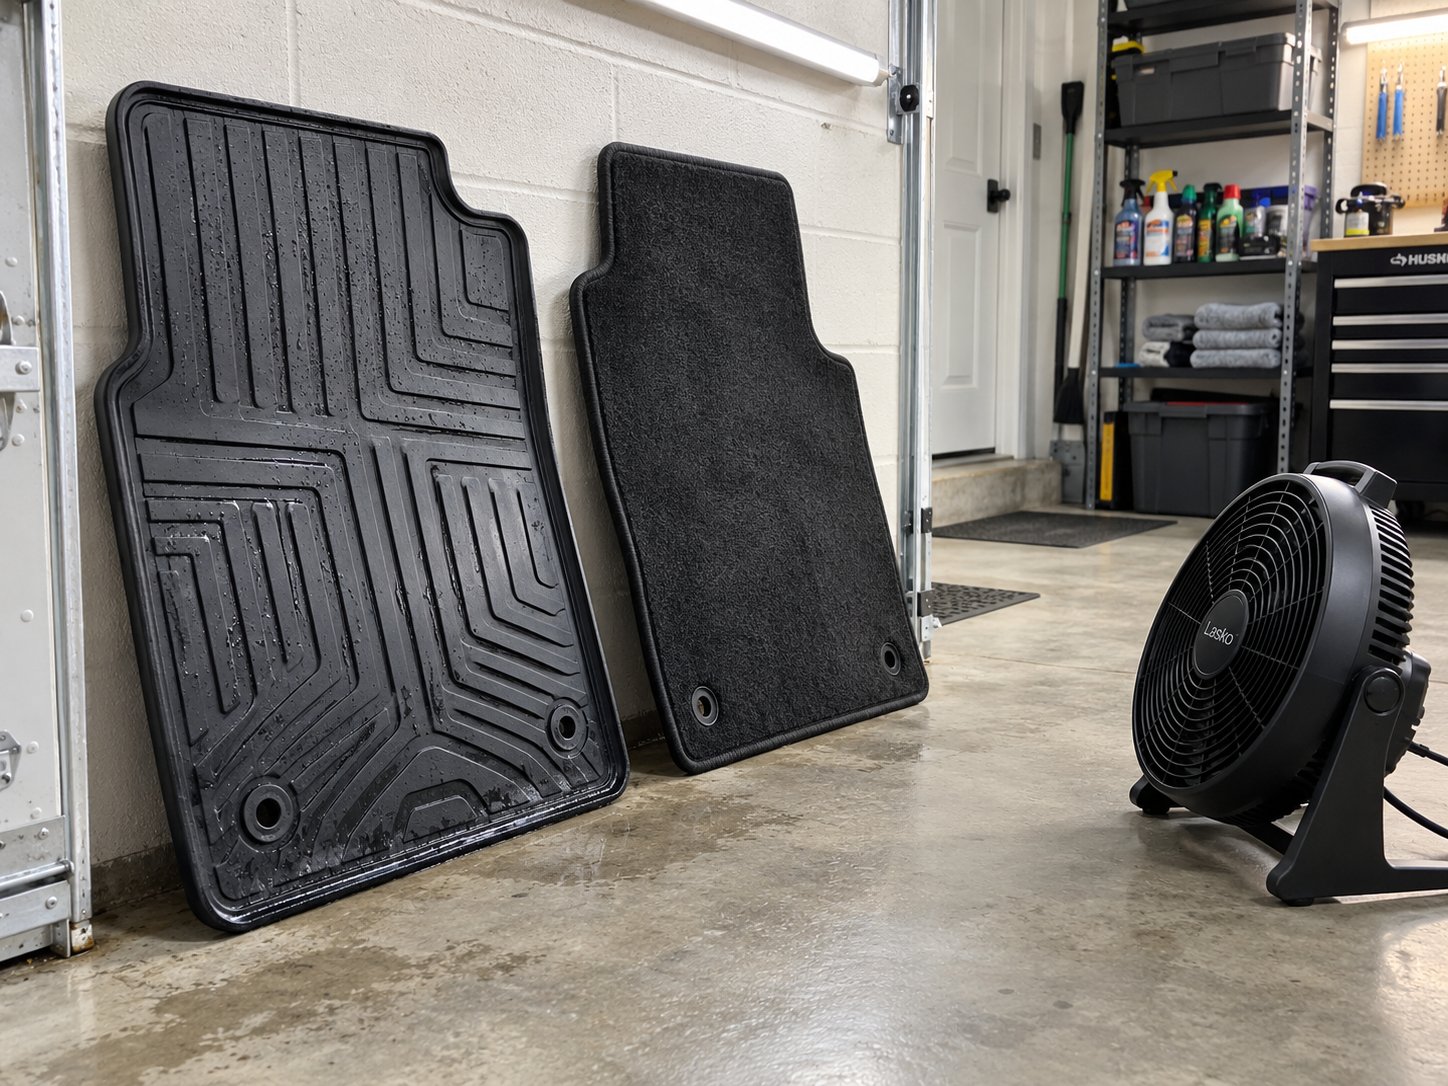
Rubber and all-weather mats dry quickly because they don't absorb moisture. After your final rinse, wipe both sides with a clean, dry microfiber towel. Pay attention to grooves and raised-edge channels where water pools — tilt the mat at an angle and run the towel along each channel to catch hidden moisture. In most conditions, rubber mats are ready to reinstall within 30 minutes to an hour of air drying. Prop them upright against a wall in a garage or lean them on a railing outdoors so air circulates on both sides. Laying them flat on concrete traps moisture underneath and slows the process.
Carpet and fabric mats demand significantly more patience. After your final blot, press a fresh, dry microfiber towel firmly into the carpet — don't rub, just apply steady downward pressure and hold for a few seconds to wick moisture from deep in the pile. Refold to a dry section and repeat across the entire surface until the towel barely picks up any dampness. Then hang the mat or prop it in a well-ventilated area where air can reach both sides. Outdoors on a dry, breezy day is ideal. In a garage, position a fan to blow directly across the carpet surface. Expect carpet mats to need several hours — and heavily saturated mats may take overnight to dry completely. As professional detailers advise, drying time depends on moisture levels, ventilation, and ambient temperature, with typical car interior drying ranging from 2 to 12 hours depending on conditions.
One critical warning: do not reinstall damp carpet mats. Even if they feel "almost dry" to the touch, residual moisture in the backing and lower fibers gets sealed against the vehicle floor the moment you drop the mat back in. That trapped layer can't evaporate with a mat sitting on top of it, so it lingers for days — breeding mildew, producing musty odors, and giving any remaining salt traces exactly the moisture they need to wick back up and recreate those white stains you just spent an hour removing. If you need to drive before the mats are fully dry, drive without them temporarily or lay a clean towel on the bare floor as a stopgap.
Post-Clean Inspection Checklist
Before the mats go back into the vehicle, run through a quick three-point check. Catching lingering issues now takes seconds; discovering them later means repeating the entire cleaning process. How do i get salt stains out of car carpet for good? The answer lives in this final quality-control step as much as in the cleaning itself.
- Visual check under bright light. Take the mat outside into direct sunlight or hold it under a strong overhead light. Tilt it at different angles. Salt residue often hides in shadows and only becomes visible when light rakes across the surface. Look for faint white hazing, thin outlines where puddles dried, or dusty streaks along fiber ridges. If you spot anything, a quick targeted pass with the vinegar spray-and-blot method catches it before reinstallation.
- Tactile check for rough or stiff spots. Run your fingertips firmly across the cleaned areas. Clean carpet fibers should feel soft and uniform. Any patches that feel gritty, crunchy, or stiffer than the surrounding fabric indicate mineral deposits still locked in the pile. These hidden pockets are especially common along mat edges and in high-traffic zones where salt buildup was heaviest. If you know how to remove salt stains from car carpet using the methods from earlier steps, one more targeted spray-dwell-blot cycle on these stiff patches usually resolves them.
- Smell check for musty or sour odors. Press your nose close to the mat — especially the backing side — and inhale. A fresh, neutral scent (or a faint vinegar trace that fades quickly) means the rinse was thorough. A musty, damp, or sour smell signals that moisture and dissolved contaminants are still trapped deeper in the fibers or backing. Don't reinstall a mat that smells off. Let it dry longer, or repeat a light vinegar spray-and-blot round followed by extended air drying to flush whatever is causing the odor.
Pass all three checks and you can confidently drop the mats back into the vehicle, knowing the salt is gone and the conditions for its return have been eliminated. Fail even one, and a few extra minutes of treatment now prevents a full redo later.
Clean, dry, and salt-free mats feel like a win — and they should. But even a perfectly executed cleaning job only fixes the current damage. Without a few deliberate habit changes, the same white crust will be back after the next snowfall, and so will the scrubbing. A smarter approach targets the problem before it reaches your mats at all.
Step 7 – Avoid These Common Salt-Cleaning Mistakes
Even with the right supplies and a solid game plan, a single misstep during cleaning can leave your mats looking worse than when you started. The methods covered in the previous steps work — but only when you avoid a handful of common errors that quietly undo your progress or outright damage the material. If you've ever wondered how do i remove salt stains from car carpet without making things worse, this section is your safeguard.
Most of these mistakes seem logical in the moment. Hotter water should dissolve salt faster, right? More liquid should flush out more residue? Harder scrubbing should lift deeper deposits? Each of those instincts leads you in exactly the wrong direction. Here's what to watch for — and what to do instead.
Five Cleaning Mistakes That Make Salt Stains Worse
- Using hot water on carpet mats. It feels intuitive — hot water dissolves things faster. But carpet mats aren't just dealing with pure salt. Road slush carries mud, organic debris, and protein-based grime from boots and shoes. Hot water can set those protein-based stains into fibers permanently, similar to how hot water sets a food stain on clothing. It can also shrink certain carpet backings, causing the mat to curl at the edges or no longer sit flat in the footwell. The fix: Always use warm or cool water. Warm water dissolves salt effectively without the risk of setting stains or warping the backing. As cleaning guides for car mats caution, even rubber mats can warp under hot water, so lukewarm is the safe ceiling for every mat material.
- Over-saturating carpet by pouring liquid directly onto the surface. When how do you get salt stains out of carpet seems like a volume problem — just add more solution — it's tempting to pour or squeeze cleaning liquid straight onto the mat. Excess moisture doesn't just sit on the surface, though. It pushes dissolved salt through the carpet pile, past the fibers, and deep into the padding or backing where no amount of blotting can reach it. On glued-down footwell carpet, the problem is even worse: runoff seeps through to the metal floor pan and creates hidden rust and mildew zones. The fix: Always apply cleaning solution with a spray bottle set to a fine mist. Spray enough to dampen the fibers, not drench them. Blot immediately after each application, and work in small sections rather than treating the entire mat at once.
- Scrubbing too aggressively with stiff-bristle brushes. Stubborn salt deposits tempt you to press harder and use coarser brushes. The result? Shredded, pilled, and frayed carpet fibers that look worse than the stain you were trying to remove. Aggressive scrubbing doesn't just damage the surface — it opens up the fiber structure, making the carpet more porous and more vulnerable to absorbing salt and dirt in the future. The fix: Use a soft-bristle brush — a nylon dish brush or a dedicated detailing brush — and let the cleaning solution do the heavy lifting. Light, circular motions agitate the liquid into the fibers without tearing them. If the stain isn't responding to gentle scrubbing, escalate to a stronger cleaning product or a steam cleaner rather than increasing physical force.
- Skipping the rinse or blot-dry step after using vinegar. Vinegar is an excellent salt remover carpet owners can rely on, but it's still an acid. Leaving vinegar residue in the fibers after cleaning creates a slightly tacky surface that attracts dirt and dust faster than untreated carpet. You might remove the salt successfully only to notice your mats getting dirty again within days — not because of new salt, but because the leftover vinegar is acting like a magnet for everyday grime. The fix: After your final vinegar spray-and-blot cycle, do one more pass with a cloth dampened in plain water. This rinse blot neutralizes the remaining acidity and leaves fibers clean without any residue that accelerates resoiling.
- Using bleach or harsh chemical solvents. When standard methods struggle, some car owners reach for bleach, ammonia-based cleaners, or industrial solvents — products that were never designed for automotive interiors. Bleach strips dye from carpet fibers in minutes, leaving permanent discolored patches that are far more visible than the original salt stain. On rubber and TPE mats, harsh chemicals degrade the surface, causing cracking, chalking, and a brittle texture that shortens the mat's life dramatically. The fix: Stick to pH-neutral or mildly acidic cleaners — white vinegar, mild dish soap, or commercial products specifically labeled safe for automotive carpet and rubber. If you need to remove salt from auto carpet that resists these gentler options, escalate to steam cleaning or professional extraction rather than harsher chemicals.
Choosing the Right Brush and Water Temperature
These two variables — brush stiffness and water temperature — come up in nearly every mistake on the list, so they deserve a direct call-out. Think of them as the two dials you control during every cleaning session. Set them wrong and you amplify damage; set them right and the cleaning products handle the rest.
For brushes, match stiffness to material. Rubber and all-weather mats can tolerate medium-bristle brushes because the surface is solid and non-porous. Carpet and fabric mats need soft bristles exclusively — anything stiffer risks pulling fibers loose, especially on mats that have already been weakened by months of salt exposure. A nifty interior detailing brush with firm but flexible bristles is ideal because it reaches deep into the pile without shredding the surface.
For water temperature, warm is the sweet spot across every mat type. Cool water works but dissolves salt more slowly, extending your cleaning time. Hot water dissolves salt quickly but introduces the shrinking, stain-setting, and warping risks outlined above. Aim for water that feels comfortably warm to the touch — roughly the temperature you'd use to wash your hands. That range gives you effective salt dissolution with zero material risk.
Avoiding these five mistakes keeps your mats intact and ensures that the cleaning methods from earlier steps deliver lasting results. With technique dialed in and mats restored, the final piece of the puzzle is making sure salt never gets this foothold again — a matter of simple daily habits and one smart seasonal swap.

Step 8 – Prevent Salt Stains Before They Start
A perfectly cleaned mat is satisfying — but doing it every other week all winter long? Not so much. The real win isn't a better cleaning routine; it's reducing how much salt reaches your mats in the first place. Prevention doesn't require expensive products or complicated systems. It comes down to a handful of daily habits, one smart seasonal decision, and paying attention to a few overlooked areas where salt quietly migrates.
Daily and Weekly Habits That Stop Salt Buildup
The single most effective thing you can do costs nothing and takes about ten seconds: knock your boots together before you swing your legs into the cabin. It sounds almost too simple, but a real-world comparison between two identical vehicles found that the driver who consistently brushed boots before entering needed only $45 in cleaning supplies over an entire winter — while the driver who skipped that step spent $285 on new mats and professional carpet cleaning. That ten-second habit removed an estimated 70–80% of contamination before it ever touched the interior.
Build a small routine around it and cleaning salt stains from car carpet becomes a rare event rather than a recurring chore:
- Knock or stomp boots on pavement before stepping into the vehicle — dislodge the biggest chunks of slush and caked salt from treads and soles.
- Keep a small towel or brush in the door pocket. A quick wipe across your shoe soles catches the fine, gritty layer that stomping misses. This is especially useful with sneakers or shoes that have deep tread patterns where packed ice and salt hide.
- Brush or shake loose salt off mats weekly. Every Sunday — or whatever day fits your schedule — pull your mats out, shake them vigorously, and brush away any visible crystals. Salt that sits on mats all week gets walked on repeatedly, grinding deeper into fibers or into rubber grooves where it hardens. A quick weekly shake prevents that accumulation cycle entirely.
- Wipe mats down with a damp cloth during heavy salt weeks. When road crews are salting aggressively after a storm, a 60-second wipe with a damp microfiber cloth every few days catches dissolved residue before it dries and bonds. This is arguably the best way to clean salt off car mats on an ongoing basis — minimal effort, maximum prevention.
- Vacuum footwells biweekly. Even with diligent boot-brushing, fine salt dust settles into carpet fibers over time. A quick pass with a vacuum's crevice attachment along edges, under seats, and around pedals keeps that invisible buildup from reaching the point where it becomes a visible stain.
None of these steps take more than a few minutes. Combined, they dramatically reduce the amount of salt that ever gets a chance to bond with your mats — which means your deep-cleaning sessions become shorter, less frequent, and far less frustrating.
Seasonal Mat Swaps and Material Upgrades for Winter Protection
Here's the single most effective prevention strategy experienced car owners swear by: swap your carpet mats out entirely during salt season and switch to all-weather or TPE (thermoplastic elastomer) mats from November through March.
The logic is straightforward. Carpet mats absorb salt-laden moisture like a sponge, pulling dissolved minerals deep into fibers where they crystallize and bond through repeated wet-dry cycles. All-weather mats — especially those made from TPE — don't absorb anything. Salt slurry sits on the surface or collects in raised-edge channels, contained and visible, ready to be rinsed away with a garden hose in under five minutes. You're not fighting embedded deposits; you're just washing off a surface layer. That fundamental difference is why the best way to clean salt off car interiors during winter often starts with choosing the right mat material before the first snowfall.
TPE mats in particular offer several advantages over traditional rubber:
- No salt absorption. TPE is non-porous, so dissolved de-icing chemicals can't penetrate the surface. White residue wipes or rinses away completely every time.
- Temperature resilience. Unlike some rubber compounds that stiffen and crack in extreme cold, TPE remains flexible even in freezing temperatures, maintaining its shape and fit throughout winter without warping or curling.
- Raised-edge containment. Most TPE all-weather mats feature molded perimeter walls that trap slush and prevent runoff from spilling onto the vehicle's original carpet. Those channels hold the mess until you're ready to pull the mats out and dump them.
- Lightweight and easy to clean. TPE mats are lighter than traditional rubber, making them easier to remove, shake out, and hose off during your weekly maintenance routine.
When spring arrives and road salt season ends, swap back to your carpet mats for a cleaner look and softer feel. Store your all-weather mats in the garage until the next winter. This seasonal rotation keeps your carpet mats looking fresh year after year because they're never exposed to the harshest conditions.
If you're shopping for all-weather replacements — particularly for a Tesla — owners comparing generation-specific fitment and TPE options can explore collections like CUTIM's Tesla Floor Mats & Cargo Liners, which include TPE and layered mat designs with raised edges suited for containing winter slush. Model 3 owners, in particular, benefit from checking generation-specific coverage since floor pan dimensions can differ between production years. Regardless of brand, prioritize custom-fit mats over universal ones — a mat that doesn't match your vehicle's floor contours shifts while driving, lets slush spill onto exposed carpet at the edges, and defeats the purpose of the upgrade.
Protecting Door Sills and Under-Mat Carpet
Most people focus on how to get salt stains out of car carpet on the mats themselves and forget the surrounding zones where salt quietly migrates. These secondary areas don't get walked on directly, but they collect residue through dripping boots, splashing slush, and salt dust that drifts during driving.
Three spots deserve regular attention:
- Door sills and threshold plates. Every time you step in or out, your boots drag across the door sill. Salt accumulates in the gap between the sill plate and the weather stripping, where it corrodes metal and degrades the rubber seal. Wipe sills down with a damp microfiber cloth weekly — the same vinegar-water solution you use on mats works perfectly here. Pull back the weather stripping occasionally and clean underneath it, since trapped salt accelerates seal deterioration and can eventually cause water leaks.
- Pedal area and heel pad zone. The carpet directly under the brake and accelerator pedals takes constant abuse from salty boot soles. This area is almost always glued-down carpet, so you can't remove it for cleaning. Vacuum it regularly and spot-treat any white residue with a light vinegar spray-and-blot — the same cautious technique described for fixed footwell carpet in earlier steps. Left untreated, salt in this zone works through the carpet backing and can reach the metal floor pan, where it promotes rust from the inside out. One Subaru owner discovered a rust hole in the driver's floor pan after just four winters of skipping interior cleaning — a repair that cost $890.
- Carpet underneath removable mats. Even the best all-weather mats with raised edges don't create a perfect seal. Over weeks of winter driving, some moisture and dissolved salt inevitably seep under the edges or get introduced when you remove the mats for cleaning. Every time you pull your mats out for their weekly shake-down, glance at the carpet underneath. Vacuum any grit or crystals you see, and wipe away white residue before it has time to bond. This 30-second check prevents the slow, invisible buildup that leads to how to get road salt out of car carpet emergencies come spring.
A fabric-safe water-repellent spray adds one more layer of defense to carpet surfaces. Products labeled as fabric protectants create an invisible barrier that slows moisture absorption, giving you more time to wipe away salt before it soaks in and bonds. Apply the protectant to clean, dry carpet mats at the start of winter and reapply mid-season if you notice water no longer beading on the surface. It won't make carpet waterproof, but it buys you a meaningful window to catch spills and slush before they become stains.
Winter salt is relentless — but it's also predictable. You know exactly when it's coming, what it does, and where it ends up. A few small habits, one seasonal mat swap, and periodic attention to the spots everyone else ignores keep your car's interior clean, odor-free, and protected from the cumulative damage that turns a simple cleaning task into an expensive restoration project.
Frequently Asked Questions About Removing Salt Stains from Car Mats
1. Does vinegar really remove salt stains from car mats?
Yes, white vinegar is one of the most effective household solutions for salt stain removal. Road salt deposits are alkaline, and the mild acetic acid in vinegar chemically breaks down those mineral crystals so they can be blotted or wiped away. Mix equal parts distilled white vinegar and warm water in a spray bottle, mist the stained area, let it sit for two to three minutes, then blot with a clean microfiber cloth. For heavier buildup, you can combine one teaspoon of vinegar with one teaspoon of mild dish soap in a pint of lukewarm water. Always do a spot test on a hidden corner first, since vinegar can shift dye color on certain sensitive carpet fabrics.
2. How do you get deep-set salt stains out of car carpet?
Deep-set salt stains that have gone through multiple moisture cycles require an escalated approach. Start by repeating the vinegar spray-and-blot method three to four times, allowing the carpet to dry fully between rounds so you can see remaining residue. If white marks persist, switch to a commercial automotive salt remover and extract with a wet/dry vacuum. A steam cleaner is the next step up, using heat and pressurized moisture to loosen mineral bonds without chemicals. For stains that resist all home methods, professional auto detailing with a heated carpet extractor typically costs $50 to $150 and is more economical than replacing quality carpet mats.
3. Can salt stains permanently damage car mats?
Salt damage is cumulative and can become permanent if left untreated. Road de-icers like sodium chloride and calcium chloride are hygroscopic, meaning they continuously draw moisture from the air. On carpet mats, this constant moisture cycling stiffens and frays fibers, pulls out color, and weakens the backing material over time. Even rubber mats experience surface dulling and discoloration with prolonged salt exposure. The key is acting quickly — fresh salt residue within a day or two responds easily to basic cleaning, while deposits left for weeks bond tightly to fibers and may cause irreversible discoloration or structural degradation.
4. What is the best way to prevent salt stains on car mats during winter?
The most effective prevention strategy is swapping carpet mats for all-weather or TPE (thermoplastic elastomer) mats from November through March. TPE mats are non-porous, so salt slurry sits on the surface and rinses off in minutes rather than soaking into fibers. Daily habits also make a major difference: knock or stomp boots before entering the vehicle, keep a small towel in the door pocket for quick shoe wipes, and brush loose salt off mats weekly. Collections like CUTIM's Tesla Floor Mats and Cargo Liners offer TPE options with raised edges designed to contain winter slush, which is especially useful for owners seeking generation-specific fitment for models like the Tesla Model 3.
5. Should I use hot water to clean salt off car mats?
No, hot water should be avoided on both carpet and rubber mats. On carpet, hot water can set protein-based stains from mud and boot grime into the fibers permanently, and it may shrink certain carpet backings, causing the mat to curl or no longer sit flat. On rubber and TPE mats, excessive heat can cause warping and surface degradation. Warm or lukewarm water — roughly the temperature you would use to wash your hands — is the ideal choice. It dissolves salt effectively without any of the risks that come with high temperatures, and it pairs well with vinegar or mild dish soap solutions for thorough cleaning.