
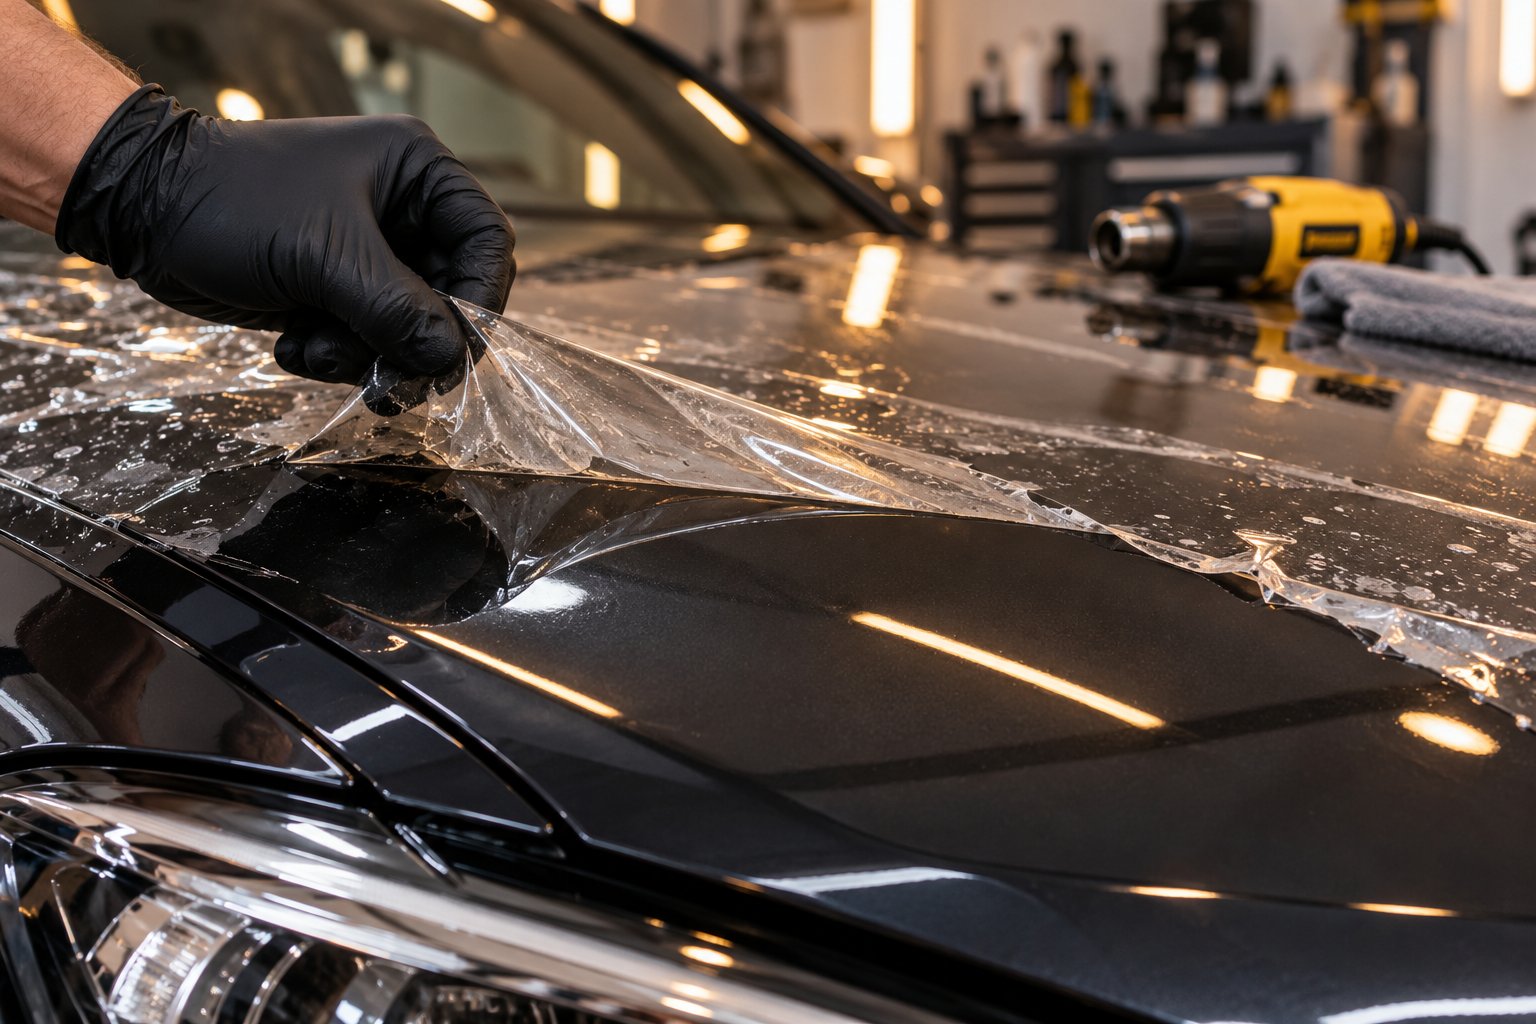
Assess Your Film Before Starting Removal
Imagine peeling a sticker off a laptop. A fresh one lifts cleanly. One that has baked in the sun for five years? It shreds into tiny pieces and leaves a gummy mess behind. Removing paint protection film from a car works on the same principle, except the stakes involve thousands of dollars in paint rather than a scratched laptop lid. Before you pick up a heat gun or plastic scraper, the smartest move you can make is diagnosing exactly what you are dealing with.
Three variables dictate whether your removal will be a smooth weekend project or a paint-threatening ordeal: the age of the film, the brand and adhesive chemistry underneath it, and the condition of the paint it is stuck to. Getting a clear read on all three gives you realistic expectations for heat requirements, residue volume, and the overall risk of damaging your clear coat.
Always assess before you start. A five-minute diagnosis of film age, brand, and paint condition saves hours of frustration and prevents costly mistakes that no amount of polishing can undo.
Why Film Age and Brand Affect Removal Difficulty
PPF adhesive does not age gracefully. In the first two to three years, the thermoplastic polyurethane layer retains its elasticity and the adhesive releases cooperatively when heated. You can often remove PPF from a car in clean, satisfying sheets during this window. Between years three and seven, UV exposure depletes the film's stabilizers, the TPU stiffens, and the adhesive begins to harden. Per-panel removal time can climb from 15-30 minutes to 30-60 minutes, and the film increasingly tears into fragments instead of peeling smoothly.
Beyond year seven, many technicians describe the film entering a "shatter zone" where it crumbles into small, stubborn pieces rather than lifting at all. At that stage, removal time per panel can stretch to one or two hours.
Brand matters just as much as age. XPEL, 3M, SunTek, and Llumar each use different adhesive formulations with varying peel resistance and residue profiles. Automotive-grade adhesives from suppliers like Ashland are engineered to release cleanly even after years of service, with initial peel strength typically ranging from 8-15 N/25mm. Budget films using industrial-grade adhesives can start at 20-30 N/25mm and climb past 40 N/25mm after aging, well into the range where the adhesive bond can overpower the clear coat's cohesion. If you do not know which brand is on your vehicle, assume a harder removal and plan accordingly.
How Your Paint Condition Changes the Risk
Factory clear coat, cured and bonded since the day the car rolled off the assembly line, is the ideal surface for a clean release. The film's adhesive grip is the weaker of the two bonds by a wide margin, which is exactly why the film lets go and the paint stays put.
Repainted panels flip that equation. A respray that was not fully cured before the film went down, or one with subpar adhesion to the base layer, can actually bond less strongly to the car than the PPF adhesive bonds to it. When you peel, the paint comes with the film. Aftermarket finishes and thin factory clear coats on certain economy models carry similar risks. If any panel on your car has been refinished, that panel needs a cautious test lift in an inconspicuous corner before you commit to a full pull.
Estimate Your Removal Time Before You Begin
Time is the cost most people underestimate when removing paint protection film. A single hood panel sounds quick until you factor in heating, peeling, reheating torn sections, and cleaning adhesive residue afterward. Here is a realistic reference to help you plan your day:
| Scenario | Estimated DIY Time | Difficulty Level |
|---|---|---|
| Single panel (hood or fender) | 30-90 minutes | Moderate |
| Partial coverage (full front kit) | 3-6 hours | Moderate to High |
| Full vehicle wrap | 8-20 hours | High |
These ranges assume film in average condition, roughly three to six years old. Newer film in good shape will land on the shorter end. Aged, brittle film from an unknown brand can push you well past the upper limit, especially on vehicles with complex panel geometry like bumper sensor cutouts and tight mirror caps. A sports coupe with long, flat panels may actually strip faster than a compact crossover covered in short panels, roof rails, and plastic cladding.
With your film diagnosed and a time estimate in hand, the next question is whether the film actually needs to come off right now, or whether you still have usable life left in it.
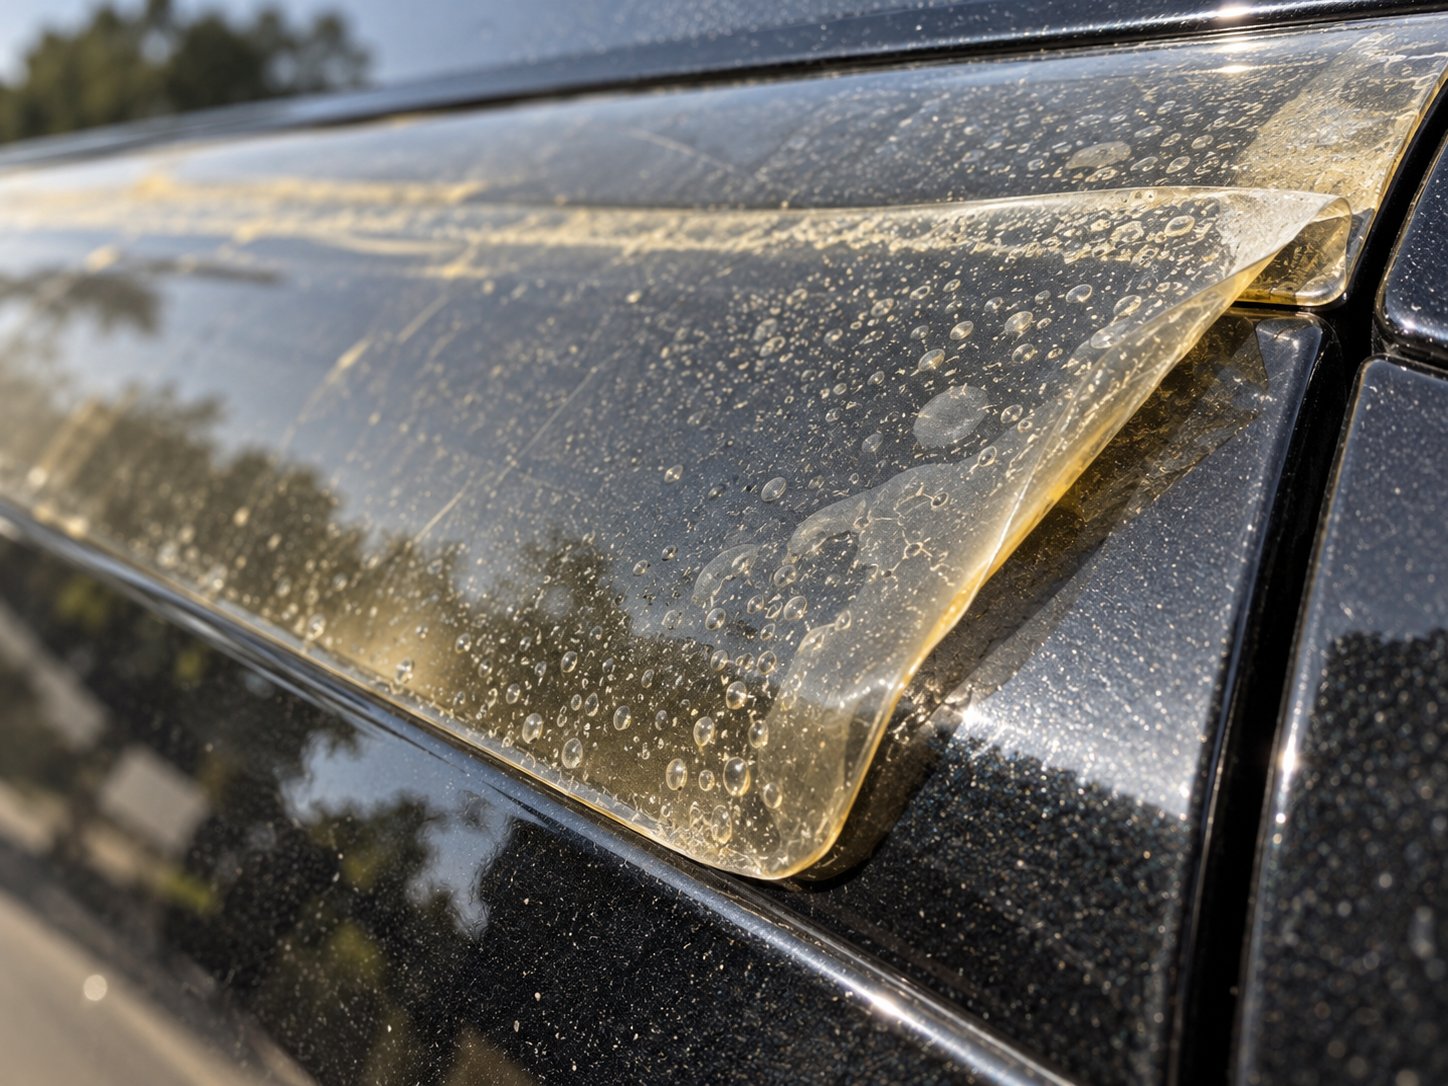
Step 1 - Recognize the Warning Signs Your PPF Must Go
Some films announce their failure loudly. Others quietly deteriorate for months before you notice anything wrong. Knowing which signs demand immediate action and which ones signal a slow decline is the difference between a clean peel and a nightmare removal. Here is your complete checklist, starting with the obvious and moving into the indicators most car owners miss entirely:
- Yellowing or amber discoloration across the film surface
- Edges lifting or peeling away from the paint
- Visible cracking, especially along hood creases and bumper curves
- Heavy staining that no longer responds to washing
- Micro-bubbling that does not flatten over time
- Edge shrinkage where the film pulls inward from panel borders
- Adhesive migration appearing as a sticky haze beyond the film's edges
- Loss of self-healing response to light scratches
Catching even one of these early gives you a major advantage. The longer a failing film sits on the paint, the more aggressively its adhesive bonds to the clear coat, and the harder your eventual removal becomes.
Obvious Warning Signs Most Owners Notice
Yellowing is usually the first red flag. UV radiation breaks down the film's stabilizers over time, turning what was once an invisible shield into an amber-tinted eyesore. Economy PPF is especially prone to this, sometimes showing discoloration within three to five years, while premium films may hold off yellowing for seven years or more.
Lifting edges are the second hard-to-miss signal. You'll notice corners of the film curling up along the hood line, fender edges, or bumper seams. Run your fingertip along every panel edge during a monthly wash. Lifted edges are often easier to feel than to see, especially on dark paint under garage lighting. Once an edge lifts, dirt and moisture creep underneath, accelerating adhesive breakdown and creating a contamination pocket that makes future removal messier.
Cracking follows a similar pattern. Stiff, aged film loses its elasticity and starts fracturing along stress points, particularly on curved surfaces that flex slightly with temperature changes. Heavy staining that refuses to come out with a pH-neutral wash is also a clear indicator. When contaminants penetrate deep enough that no cleaning product can extract them, the film's protective function is spent.
Subtle Indicators That Signal Film Failure
These are the signs that separate an informed owner from one who waits too long. Micro-bubbling is a common early clue. Small bubbles can appear when the adhesive starts to degas or lose its bond in isolated spots. Fresh, high-quality film sometimes develops tiny bubbles during installation that flatten within a couple of weeks as the adhesive cures. Bubbles that appear years into the film's life and refuse to disappear are a different story. They signal adhesive failure, not a temporary settling issue.
Edge shrinkage is even sneakier. Instead of lifting up, the film contracts inward, pulling away from panel edges by a millimeter or two. You may not see it unless you look closely, but the exposed paint strip at the border collects wax, polish, and road grime, leaving a visible line that marks where the film used to end.
Adhesive migration shows up as a sticky, hazy residue creeping beyond the film's borders. Touch the paint just outside the film's edge. If it feels tacky or slightly gummy, the adhesive is migrating outward, a sure sign that the adhesive chemistry is breaking down beneath the film as well.
The self-healing test is the most telling diagnostic of all. Premium PPF features an elastomeric topcoat that allows light scratches and wash swirls to disappear when warmed. Independent testing suggests that films in later years recover less effectively as the topcoat degrades. Try this: make a light fingernail scratch on the film's surface, then pour warm water over it. On healthy film, the mark fades within a minute or two. If the scratch stays visible after repeated warming, the self-healing layer is exhausted and the film is past its functional life.
What Happens If You Wait Too Long
Procrastination is the most expensive mistake in PPF removal. Every month a failing film remains on the car, its adhesive continues to change. In the early stages of failure, the adhesive is still pliable enough to release with moderate heat. Wait a year or two past the first warning signs, and that same adhesive can harden into a brittle, cement-like bond or, in some cases, over-bond to the clear coat so aggressively that forceful removal leads to paint peeling.
Hardened adhesive does not respond cooperatively to a heat gun. Instead of softening and letting go, it fragments into thousands of tiny residue patches that each need individual attention with solvents and careful scraping. A removal that might have taken 30 minutes per panel at the first sign of failure can balloon to two hours or more per panel after years of neglect.
Clear-coat damage is the worst-case outcome. When the adhesive bond exceeds the cohesive strength of the paint itself, pulling the film literally pulls the clear coat with it. Repainted panels and thin factory finishes are especially vulnerable to this scenario. The repair bill for professional paint correction or a respray dwarfs whatever time or money you saved by delaying.
The takeaway is straightforward: the moment you spot even one of the warning signs above, start planning your removal. You do not have to act that day, but you should act that month. A prompt response keeps the adhesive cooperative and your paint intact, which matters far more than squeezing a few extra weeks out of a dying film.
Knowing when to remove PPF is only half the battle. The other half is having the right ppf removal tool and supplies on hand before you start heating and peeling, because improvising mid-project is how scratches happen.
Step 2 - Gather Your Complete Removal Toolkit
Starting a ppf removal project with the wrong tools, or worse, grabbing whatever is handy mid-peel, is one of the fastest ways to gouge your clear coat. Every item on this list exists for a specific reason, and the substitutes most people reach for are exactly what cause the damage they were trying to avoid. Lay everything out on a workbench before you touch the car. If a single item is missing, get it first. A five-dollar plastic scraper is a lot cheaper than a thousand-dollar paint correction.
Here is the full toolkit, along with what each item does and which common substitutes you should avoid:
| Tool / Material | Purpose | What to Avoid as a Substitute |
|---|---|---|
| Heat gun with adjustable temperature | Softens adhesive for controlled peeling | Propane torch or heat gun without temperature dial |
| Plastic razor blades or plastic scraper | Lifts film edges and scrapes residue without scratching | Metal razor blades, putty knives, or flathead screwdrivers |
| 70% isopropyl alcohol | Dissolves light adhesive haze after peeling | Higher concentrations (90%+) that evaporate too fast to dwell |
| Citrus-based adhesive remover | Breaks down stubborn residue safely on automotive paint | Acetone, lacquer thinner, or generic hardware-store solvents |
| Microfiber towels (6-10 minimum) | Wipes residue and solvent without scratching | Paper towels, bath towels, or old rags with loose fibers |
| Automotive masking tape | Protects rubber seals, chrome trim, and adjacent panels | Duct tape or electrical tape that leaves its own residue |
| Spray bottle with soapy water | Lubricates the film surface during peeling to reduce friction | Dry peeling with no lubrication |
Heating Tools and Why Temperature Control Matters
A heat gun with an adjustable temperature dial is the single most important tool for removing ppf safely. You need to deliver consistent, targeted heat in the 160-180 degree Fahrenheit range to soften the adhesive beneath the film without baking the paint. Adjustable models let you dial the output up or down based on how the adhesive responds, and that precision is what prevents overheating.
Can you use a hair dryer instead? Technically, yes, but you'll notice a significant difference in performance. Most household hair dryers max out around 140 degrees Fahrenheit, which is barely warm enough to soften fresh adhesive and often insufficient for aged film. A hair dryer can work on newer wraps, but the lower heat output means you'll spend much more time on each section, and stubborn spots may not soften at all. If a heat gun is not an option, a garment steamer is actually a better alternative than a hair dryer. Steamers combine heat and moisture, which helps loosen hardened adhesive more effectively. The moisture penetrates the film's edges and weakens the bond from multiple angles simultaneously.
Regardless of which heating tool you choose, never hold it in one spot for more than a few seconds. Constant movement prevents hot spots that can blister the clear coat or warp plastic trim pieces.
Scraping and Peeling Supplies
Plastic razor blades and plastic scrapers are your primary contact tools, the things that actually touch your paint. This is not the place to improvise. A metal razor blade might seem like a faster option for lifting stubborn edges, but even a slight angle change can dig into the clear coat and leave a scratch that only wet sanding can fix. Does ppf damage paint when removed? Not if the film is peeled properly, but a metal blade in the wrong hands absolutely will.
Look for dedicated automotive plastic blades, often sold in packs of ten or more. They come in single-edge and double-edge styles, and some are designed to fit into standard razor-blade holders for better grip. The plastic edge is firm enough to slide under a film corner and lift it, yet soft enough that it yields before your clear coat does. Plan on going through several blades during a full-vehicle project because they dull and nick with use. A worn plastic blade can develop burrs that scratch just like a metal one, so swap in a fresh blade whenever the edge feels rough.
A squeegee-style scraper with a wide, flat edge is also useful for pushing loosened film away from the surface on large flat panels, reducing the chance of tearing.
Solvents, Cleaners, and Finishing Supplies
Even a textbook peel leaves some adhesive residue behind, and removing ppf residue demands the right chemistry. Start with 70% isopropyl alcohol. The 70% concentration is ideal because the 30% water content slows evaporation, giving the alcohol more dwell time to dissolve light adhesive haze. Higher concentrations like 90% or 99% flash off too quickly to do much work, and you end up using twice as much product.
For heavier residue, step up to a citrus-based adhesive remover. Products in this category use citrus-fruit extract to break down the molecular bonds in adhesive without attacking automotive clear coat. They are a significant step up from isopropyl alcohol on stubborn spots, yet far safer than generic hardware-store solvents. Avoid acetone, lacquer thinner, mineral spirits, and any product not explicitly labeled safe for automotive paint. These aggressive solvents can soften, cloud, or permanently dull clear coat in a matter of seconds.
Finally, stock up on microfiber towels. You'll want a minimum of six to ten clean towels on hand before you begin. Using the same towel repeatedly just redistributes dissolved adhesive back onto the paint, creating a smeared haze that is harder to remove with each pass. Dedicate separate towels for solvent application and for buffing dry. Once a towel feels tacky or loaded with residue, retire it to the dirty pile and grab a fresh one.
A spray bottle filled with soapy water rounds out the kit. A few spritzes on the film surface ahead of your peel adds lubrication that reduces friction between the film and the scraper, lowers the chance of tearing, and keeps loosened adhesive from immediately re-bonding to the paint. Simple dish soap diluted in warm water works perfectly.
With every tool and material staged within arm's reach, the next priority is setting up a workspace where temperature and cleanliness work in your favor rather than against you.
Step 3 - Prepare Your Workspace and Vehicle
You could own the best heat gun on the market and a drawer full of fresh plastic blades, but removing ppf from a car in the wrong environment undermines every tool on your bench. Ambient temperature, lighting, surface cleanliness, and even the direction of the breeze all influence how the adhesive behaves and whether the film peels off cooperatively or fights you every inch of the way. Spending fifteen minutes on workspace and vehicle prep saves you an hour of frustration once the real work begins.
Temperature and Climate Considerations
Think of PPF adhesive like honey. Warm it up and it flows, loosens, and lets go of whatever it is clinging to. Chill it down and it stiffens into a rigid, stubborn mass that would rather snap than stretch. That analogy plays out on every panel of your car, and the ambient temperature of your workspace is the starting point for how much extra heat your gun needs to supply.
In cold conditions below 60 degrees Fahrenheit, the adhesive hardens significantly. The film itself becomes brittle, losing the elasticity it needs to peel in long, clean sheets. Instead, it tears into small fragments that each leave their own patch of residue behind. You end up doubling your heat-gun time and tripling your cleanup effort. On the opposite end, conditions above 90 degrees Fahrenheit can make the adhesive overly gooey and the film so soft it stretches like warm taffy rather than releasing from the paint. Direct sunlight compounds this problem by heating some areas of a panel far more than others, creating unpredictable hot spots where the film may overstretch while adjacent shaded sections remain stiff.
The sweet spot sits between 70 and 85 degrees Fahrenheit. In that range, the adhesive is pliable enough to release with moderate heat-gun assistance, and the film retains enough structure to peel without shredding. Here is a quick reference to help you plan around conditions:
| Temperature Range | Adhesive Behavior | Recommended Adjustment |
|---|---|---|
| Below 60°F (15°C) | Stiff and brittle; film tears easily, heavy residue likely | Work indoors in a heated garage; pre-warm panels before peeling |
| 60-70°F (15-21°C) | Firm but manageable; moderate heat-gun input needed | Increase heat-gun dwell time slightly; work in smaller sections |
| 70-85°F (21-29°C) | Ideal pliability; adhesive releases cooperatively | Standard technique; minimal extra heating required |
| Above 85°F (29°C) | Overly soft; film stretches and adhesive becomes gummy | Reduce heat-gun temperature; work in shade, avoid direct sun |
A climate-controlled garage is the gold standard. You set the thermostat, close the door, and every panel stays at a consistent temperature throughout the project. If a garage is not available, choose a warm but overcast day or work under a carport where shade is guaranteed. Avoid starting in the morning sun with plans to finish in the afternoon shadow. Shifting light and temperature mid-project means constantly adjusting your heat-gun settings and technique, which invites inconsistency and mistakes.
Wash and Prep the Vehicle Surface
This step feels counterintuitive. You are about to remove a protective film remover and strip adhesive off the paint, so why bother washing the car first? Because every grain of road grit, dried bug splatter, and mineral deposit sitting on top of that film is a potential scratch waiting to happen. When you press a plastic scraper against the surface or drag a microfiber towel across the panel, anything trapped between the tool and the paint acts like sandpaper.
Give the entire vehicle a thorough hand wash with a pH-neutral car shampoo and a clean wash mitt. Pay extra attention to the edges of the film where dirt accumulates in the gap between the film border and the paint. A gentle blast from a pressure washer can dislodge debris lodged under lifted edges, though keep the nozzle at least twelve inches away to avoid forcing water deeper beneath the film.
After washing, dry the car completely with a dedicated drying towel or a filtered blower. Moisture trapped under the film or sitting on the surface interferes with heat transfer from your gun, meaning the adhesive underneath takes longer to soften. Wet film also tends to slip under your fingers, making it harder to maintain a steady peel angle. A fully dry surface gives you consistent grip and predictable adhesive response from the first panel to the last.
Mask and Protect Adjacent Panels and Trim
Removing PPF is inherently a messy, hands-on process. Adhesive remover drips. Soapy water runs. Warm, freshly peeled film has a tendency to flop against adjacent panels and stick to surfaces you never intended to touch. A few minutes of strategic masking prevents cosmetic damage that would be annoying to fix later.
Start with the rubber gaskets and weatherstripping around doors, windows, and trunk openings. These materials absorb solvents quickly and can swell, discolor, or lose their seal if soaked with isopropyl alcohol or citrus-based adhesive remover. Lay a strip of automotive masking tape along any rubber seal that borders the film you are about to remove. Tape is cheap. Replacing a warped door gasket is not.
Chrome and gloss-black trim pieces deserve the same treatment. A stray swipe of a plastic scraper across a chrome window surround can leave a visible scuff, and adhesive remover pooling on gloss-black B-pillar trim can dull the finish. Run tape along the trim edges closest to the film, creating a clear boundary between your work zone and everything you want to keep pristine.
If you are removing film from only certain panels, for example stripping the hood while leaving the fenders wrapped, tape a border along the seam where the two panels meet. This keeps your scraper from accidentally catching the edge of the adjacent film and starting a peel you did not intend. It also stops solvent from wicking under the neighboring film's edge and weakening its adhesive bond prematurely.
With the workspace dialed to the right temperature, the car scrubbed clean, and every vulnerable edge taped off, your vehicle is ready for the main event. The real technique, how to heat, angle, and pace your peel across flat panels, tight curves, and complex geometry, is where patience pays off most.
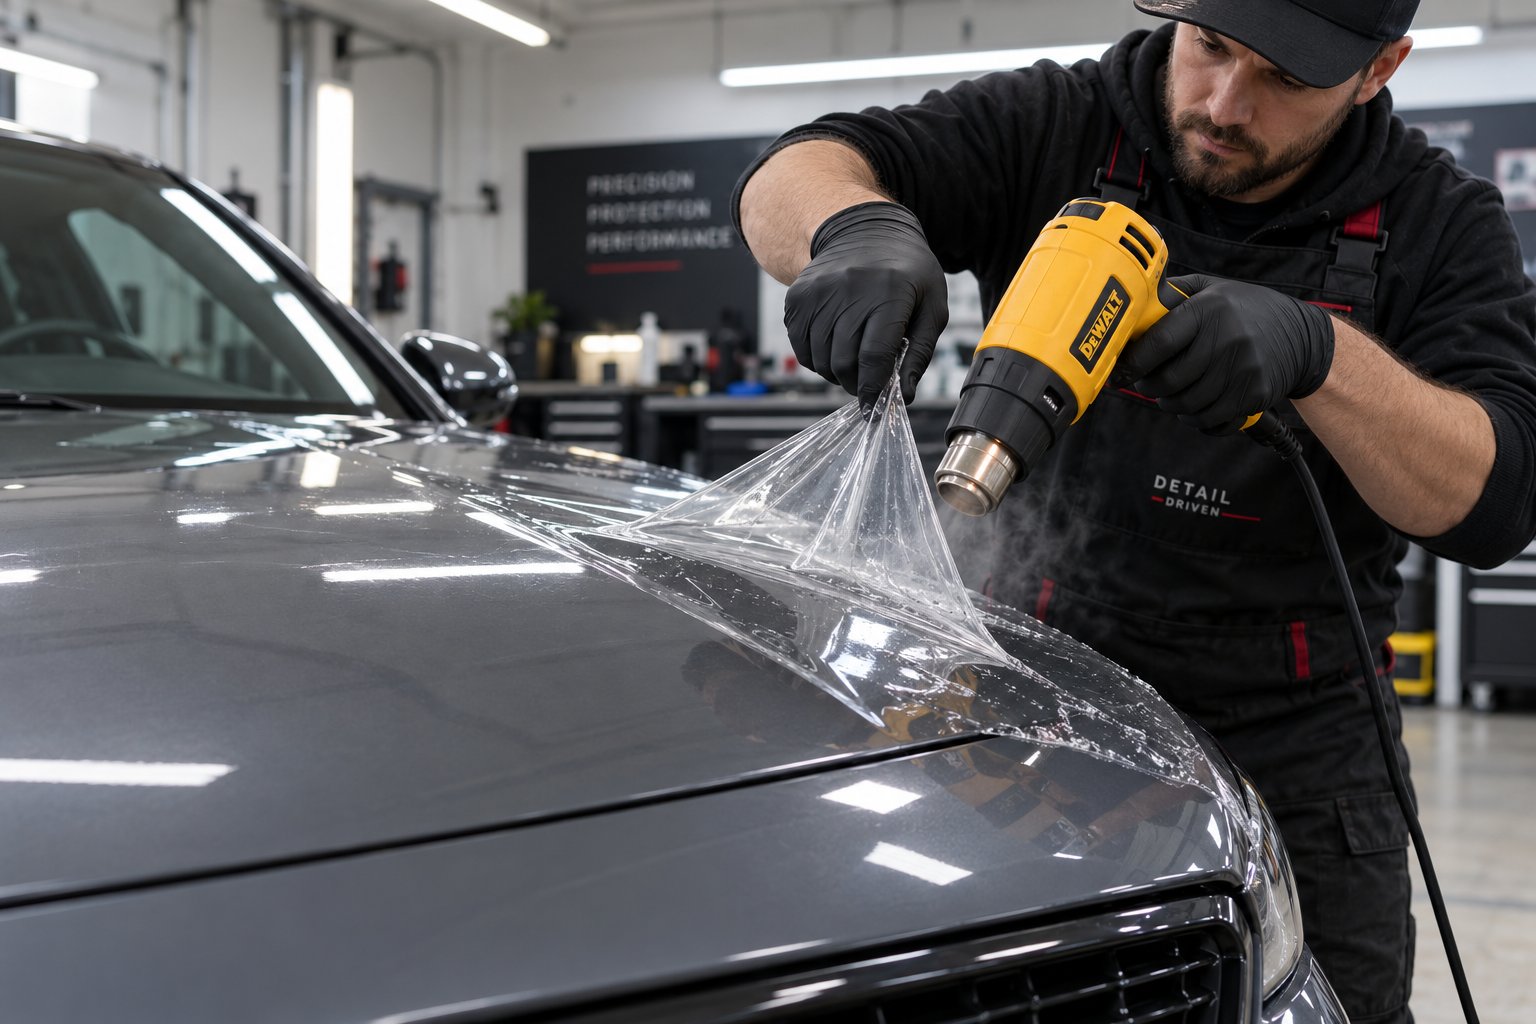
Step 4 - Heat and Peel the Film Panel by Panel
Every panel on your car has a personality. A flat hood behaves nothing like a curved fender, and a tight mirror cap is a different challenge entirely. The underlying technique stays the same across all of them, but the rhythm, the pull length, and how often you reach for the heat gun change dramatically based on the shape you are working on. Mastering the universal method first, then adapting it to each surface type, is how professionals learn to remove paint protection film from car panels without leaving damage behind.
The Universal Heat-and-Peel Technique
Regardless of panel shape, every successful peel follows the same sequence: heat, lift, angle, pull, repeat. Here is the step-by-step walkthrough you can apply to any section of film on the vehicle:
- Set your heat gun to medium output, targeting a surface temperature of roughly 160-180 degrees Fahrenheit (70-80 degrees Celsius). If your gun has a digital readout, dial it to this range directly. If it uses a low-medium-high toggle, start on medium and adjust based on how the adhesive responds.
- Hold the heat gun 6-8 inches from the film surface and move it in slow, overlapping passes across a section about 12 inches wide. Keep the gun moving at all times. Parking it in one spot for even a few extra seconds can overheat the clear coat underneath or melt the film into a gummy mess that is far harder to remove.
- Lift a corner or edge using a plastic razor blade. Slide the blade under the film at a shallow angle, just enough to create a tab you can grip with your fingers. If the film was already lifting at an edge, that is your natural starting point. If not, the lower corner closest to you is usually the easiest to access.
- Peel at a consistent 30-45 degree angle, pulling the film back over itself rather than straight up. This angle distributes the pulling force across the adhesive bond evenly, which dramatically reduces the chance of tearing. Pulling straight up at 90 degrees concentrates all the force on a narrow line and almost guarantees the film will rip.
- Pull slowly and steadily. Imagine pulling packing tape off a cardboard box at a speed of roughly one inch per second. That is roughly the pace you want. Rushing to three or four inches per second is where tearing happens and where large patches of adhesive get left behind instead of releasing with the film.
- Reheat every 8-12 inches, or anytime you feel the resistance increase. If the film starts to stiffen or the pulling force climbs noticeably, stop, reheat the next section ahead of your peel line, and resume once the adhesive softens again.
Patience is the invisible tool that separates a clean removal from a frustrating one. Ripping the film off quickly leads to smaller pieces being left behind and multiplies the cleanup work that follows. A slow, consistent pace costs you a few extra minutes per panel but saves significant time on residue removal later.
Flat Panels vs. Curved and Complex Surfaces
The universal method above works on every panel, but you'll need to adjust your rhythm and expectations depending on the geometry you are dealing with. Flat surfaces reward long, satisfying pulls. Curves demand shorter strokes and more reheating. Complex shapes may require you to abandon the single-sheet approach altogether and work in small sections. Here is a comparison of what to expect:
| Panel Type | Technique Adjustment | Common Pitfalls |
|---|---|---|
| Hood / Roof (flat) | Long, continuous pulls of 12-24 inches between reheats; maintain steady 30-degree angle across the full width | Letting the loose film flop onto adjacent panels and stick; pulling too fast on wide sections causing a split down the middle |
| Bumper / Fender (curved) | Shorter pulls of 4-8 inches; reheat more frequently; follow the contour with your pull direction rather than fighting it | Pulling against the curve, which concentrates stress and tears the film; neglecting to heat the recessed areas behind bumper edges |
| Mirror Cap / Door Handle (complex) | Score the film into small sections with a plastic blade; remove each piece individually; expect more residue | Trying to peel a single sheet around tight compound curves; using metal tools in tight spaces out of frustration |
Starting with a flat panel builds your confidence and gives you a feel for how the adhesive on your specific film responds to heat before you tackle anything more demanding. Save the bumpers and mirror caps for after you have a few successful flat-panel pulls under your belt.
Removing Film From the Hood and Other Large Panels
The hood is the most common panel for DIY ppf replacement and removal because it takes the most abuse from road debris and is often the first section owners want to refresh. It is also the friendliest surface to learn on. Broad, relatively flat, and easily accessible from both sides, the hood lets you practice the heat-and-peel rhythm without fighting awkward angles or tight recesses.
Begin at one of the lower corners near the bumper edge. Lift the film with your plastic blade, establish a finger grip, and start your pull toward the windshield. As you draw the film back, use your free hand to keep the heat gun warming the area roughly 6-8 inches ahead of the peel line. This leapfrog pattern, heat ahead and peel behind, keeps a continuous strip of softened adhesive waiting for you and prevents the film from cooling mid-pull.
On a large hood, the sheet of film you are pulling back can become unwieldy. Once you have 12-18 inches of loose film hanging, gently roll it into a loose cylinder to keep it from flopping onto the fender or sticking to itself. Film that sticks to itself is extremely difficult to separate without tearing and often has to be discarded, forcing you to restart from the next available edge.
If the film tears despite steady speed and proper heat, do not panic. Simply reheat the area around the tear, lift a new edge with your plastic blade, and continue from that point. Multiple-piece removals take longer but cause no additional risk to the paint as long as you keep heating before every pull. Some aged films simply will not come off in a single sheet regardless of technique, and accepting that early prevents the frustration that leads to rushing.
For roof panels, the technique is identical, but access is trickier. A step stool or small platform keeps you at a comfortable height so you can maintain the correct pull angle without reaching overhead and losing leverage. Doors and fenders fall between the hood and the bumper in difficulty: they have mild curves but enough flat real estate to allow pulls in the 8-12 inch range before reheating.
Across every panel, the goal is the same: get as much film off as cleanly as possible, leaving the minimum amount of adhesive behind. Regardless of how careful you are, though, some residue is virtually guaranteed, especially on film older than three years. The strategy for tackling that sticky aftermath without scratching the freshly exposed paint is an entirely separate skill set.
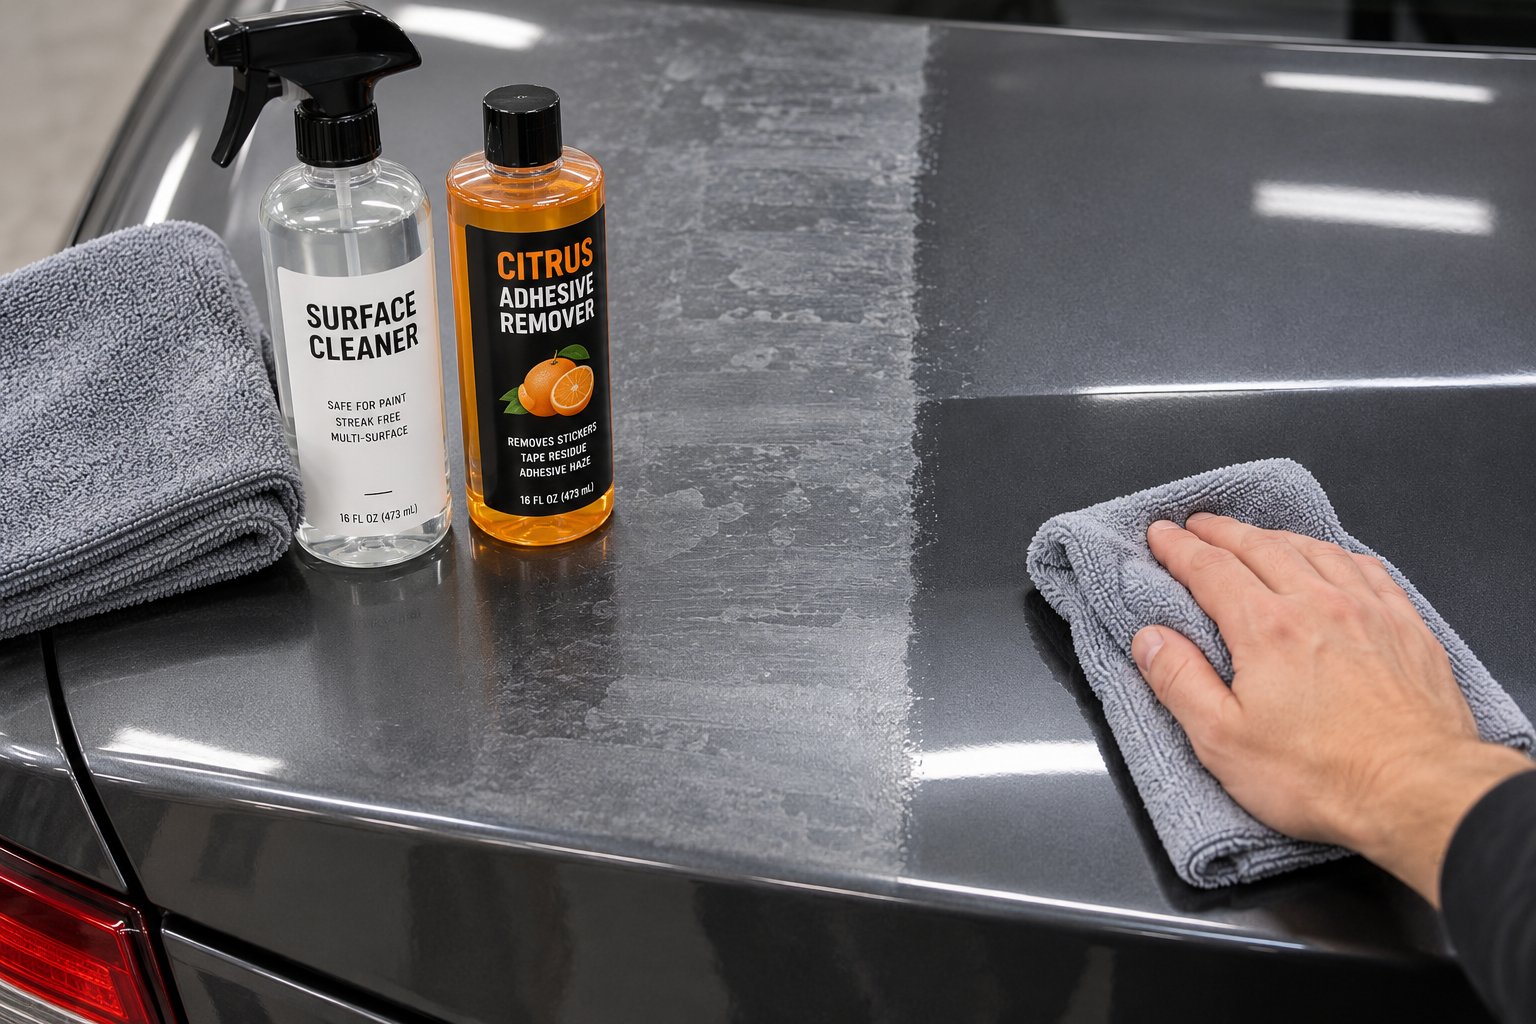
Step 5 - Clean Adhesive Residue Safely
Sticky, cloudy patches of leftover adhesive staring back at you from a freshly stripped panel can feel demoralizing. You just spent an hour carefully heating and peeling, and the paint still looks worse than it did with the old film on it. Take a breath. Residue after paint protection film removal is not a sign that something went wrong. It is a normal part of the process, especially when the film has been on the car for more than three years. The adhesive chemistry changes with age, and older films almost always leave behind more residue than newer ones.
The good news is that adhesive residue responds well to a simple tiered approach: start gentle, escalate only as needed, and never jump straight to the strongest solvent in the garage. Each escalation level targets a different degree of stubbornness, and matching the right product to the right residue keeps your clear coat safe while getting the surface genuinely clean.
Light Residue Removal With Common Household Products
Your first pass should always be the mildest option available. Fill a spray bottle with warm water and a few drops of dish soap, the same soapy water solution you used for lubrication during peeling. Spray the residue generously, let the solution sit on the surface for about 30 seconds, and then wipe with a clean microfiber towel in a single direction. Do not scrub in circles. Circular scrubbing traps tiny particles of adhesive under the towel and drags them across the paint, creating micro-scratches that are invisible in the garage but glaringly obvious in direct sunlight. Always wipe in straight, overlapping strokes, lifting the towel at the end of each pass and repositioning it to a clean section before the next stroke.
On film that was relatively young and well-maintained, soapy water alone can handle most of the haze. You'll notice the surface going from cloudy and tacky to smooth and clean within just a few passes. Flip or swap your towel frequently. A towel loaded with dissolved adhesive stops absorbing and starts smearing, which defeats the purpose entirely.
When soapy water leaves behind a thin, stubborn film that still feels slightly sticky to the touch, step up to 70% isopropyl alcohol. Dampen a fresh microfiber towel with the alcohol, lay it over the residue patch, and let it dwell for 30 to 60 seconds. That dwell time is critical. The alcohol needs a moment to penetrate and soften the adhesive layer before you wipe. Rushing the wipe just pushes undissolved residue around. After dwelling, wipe in straight lines again, one direction only, and follow up with a dry microfiber towel to buff off any remaining haze. The 70% concentration works best because the 30% water content slows evaporation and gives the alcohol more working time on the surface compared to 90% or 99% formulations that flash off almost instantly.
Tackling Stubborn Adhesive Without Damaging Clear Coat
Some adhesive patches, particularly on film older than five years or budget brands with industrial-grade adhesive, simply will not budge with alcohol alone. This is where a citrus-based adhesive remover earns its place in your toolkit. These products use d-limonene, a solvent extracted from citrus-fruit peels, to break down the polymer chains in adhesive without attacking the resins in automotive clear coat. The result is a product strong enough to dissolve what isopropyl alcohol cannot, yet gentle enough that it will not cloud or soften the paint underneath.
Here is the technique for stubborn protective film removal residue:
- Saturate the residue patch by spraying or dabbing the citrus-based remover directly onto the adhesive. Use enough product that the entire area looks wet, not just damp.
- Let the remover dwell for 60 seconds. On heavily aged residue, you can extend this to 90 seconds, but do not let any solvent dry on the paint. If it starts to evaporate before you wipe, reapply a light mist to keep the surface wet.
- Wipe in one direction using a clean microfiber towel. Apply moderate, even pressure. The adhesive should lift off in a soft, gummy ribbon rather than smearing across the panel. If it smears, the dwell time was too short. Reapply and wait longer.
- Buff the area dry with a separate clean towel, then run your fingertips across the surface. The paint should feel glass-smooth. Any remaining tackiness means a second application is needed.
For patches that resist even citrus-based remover on the first attempt, try reheating the residue gently with your heat gun before reapplying the solvent. Warming the adhesive to around 120-140 degrees Fahrenheit softens its structure just enough for the citrus solvent to penetrate deeper. This combination of mild heat plus chemical action handles even the most stubborn old ppf residue without resorting to aggressive scraping that risks the clear coat.
If isolated spots still refuse to release, a plastic razor blade with a fresh edge can carefully shave the thickest residue deposits. Keep the blade nearly flat against the surface, apply minimal downward pressure, and let the sharp edge do the work. Follow immediately with another citrus-remover application to clean whatever thin layer remains.
Solvents and Chemicals You Should Never Use on Paint
When adhesive is being stubborn, frustration tempts you to reach for something stronger. Resist that urge. Several common solvents that are excellent at dissolving adhesive are equally excellent at destroying your car's finish. Acetone, for example, can strip away protective coatings, leading to discoloration, peeling, and even cracking if it contacts the paint for more than a few seconds. It does not distinguish between adhesive residue and clear coat. Here is what to keep far away from your panels:
- Acetone (nail polish remover) - Dissolves clear coat rapidly, causing clouding, whitening, and permanent dullness. Even brief contact can leave visible marks on dark-colored paint.
- Lacquer thinner - Designed to dissolve lacquer-based finishes, which means it will attack modern urethane clear coats with similar aggression. Leaves soft, hazy patches that require professional wet sanding to repair.
- Mineral spirits (paint thinner) - Less aggressive than acetone but still capable of softening clear coat with prolonged contact. Leaves an oily film that attracts dirt and interferes with any sealant applied afterward.
- WD-40 and similar petroleum-based lubricants - Often recommended in DIY forums, but the petroleum distillates can stain certain paint types and degrade wax or sealant layers. Effective on adhesive but leaves behind its own residue that needs additional cleaning.
- Brake cleaner - Extremely aggressive solvent blend that dissolves adhesive almost instantly but also attacks paint, plastics, and rubber trim on contact. One accidental overspray onto a fender can cause irreversible damage.
- Goo Gone (original formula) - While the automotive-specific version is generally paint-safe, the standard household formula contains petroleum distillates that can leave stains on certain finishes. Always verify you are using the automotive variant if you go this route.
The common thread is clear: any solvent not explicitly formulated for automotive paint surfaces carries a real risk of doing more damage than the adhesive residue itself. A five-dollar bottle of citrus-based automotive adhesive remover and a bit of patience will always be safer than a shortcut with whatever happens to be on the garage shelf.
With every trace of adhesive finally gone and the bare paint feeling glass-smooth under your fingertips, you might expect the surface to look perfect. The reality is usually a little different. Paint that spent years hidden under a UV-blocking film tells its own story once exposed, and understanding what you are seeing is essential before reaching for a polisher.
Step 6 - Inspect and Restore Your Paint Surface
You stripped the film. You cleaned every last trace of adhesive. The panel feels glass-smooth under your fingertips. So why does the paint look... off? Maybe the hood appears slightly brighter or more saturated than the fenders. Maybe there is a faint outline where the film used to end. Maybe the finish under the old PPF looks almost too good compared to the rest of the car. None of this means you did something wrong. In fact, it means the film did exactly what it was supposed to do.
Why Your Paint Looks Different After Film Removal
Paint protection film blocks a significant portion of ultraviolet radiation. For three, five, or even seven-plus years, the panels beneath that film have been living in a UV-shielded bubble while the surrounding exposed panels endured daily sun bombardment. UV light gradually breaks down the molecular bonds in clear coat and pigment, causing subtle fading, oxidation, and gloss reduction over time. The result is a visible mismatch: the protected paint retained its original depth and color, while the unprotected areas aged naturally.
On white and silver cars, this difference can be surprisingly subtle, sometimes just a slight warmth or coolness in tone. On darker colors like black, deep blue, or red, the contrast is often much more obvious. You might see a clear "ghost line" tracing the exact border where the film ended, with richer color on one side and slightly duller paint on the other. As detailing professionals note, after five to seven years you may notice a color difference between protected and unprotected panels, and a paint correction on the exposed panels can usually bring them back in line.
This UV differential is not paint damage. It is simply the natural consequence of one area aging while the other did not. Setting that expectation before you ever pick up a polisher prevents the panic of thinking you somehow harmed the finish during removal.
Inspect for Swirl Marks, Haze, and Oxidation Lines
Before you attempt any correction, you need to know exactly what you are working with. Grab a focused LED inspection light, a bright work lamp, or simply park the car in direct sunlight at an angle that lets light rake across the panels. You are looking for surface-level imperfections that fall into four categories:
- Installation swirl marks - When the original film was applied, the installer likely used a squeegee to press the film into place. Aggressive squeegee work, especially on softer paint, can leave fine circular or linear marks beneath the film that were invisible while covered but now sit exposed on bare paint.
- Adhesive haze - Even after a thorough residue cleanup, an ultra-thin adhesive ghost layer can remain. It is too thin to feel with your fingers but visible as a slightly cloudy or milky sheen under bright, directional light. This is particularly common on dark-colored vehicles where any surface imperfection shows more readily.
- Oxidation lines at film edges - Where the film border met bare paint, the exposed strip often collected wax buildup, road grime, and UV damage over the years. This creates a narrow line of discolored or slightly rough paint that traces the old film boundary like a tan line on skin.
- Clear-coat thinning or marring - Rare on factory paint with a quality film, but worth checking. Run your fingertip across the surface and feel for any spots that seem softer, rougher, or less glossy than the surrounding area. On repainted panels or thin factory clear coats, the removal process itself can sometimes leave behind faint marks that need attention.
Inspect every panel you stripped, not just the largest or most visible ones. Mirror caps, fender edges, and bumper returns are easy to overlook but often carry the most pronounced haze or oxidation lines because their complex curves made both installation and removal more aggressive.
Polish and Seal the Paint to Restore Uniformity
A targeted polish-and-seal sequence addresses every issue on the checklist above and leaves the paint looking uniform across the entire vehicle. You do not need professional-grade equipment for this. A dual-action polisher speeds things up considerably, but even a hand polish with the right product delivers noticeable improvement. Follow these steps in order:
- Decontaminate the bare surface. Before any polishing compound touches the paint, wipe the stripped panels with an iron-removing spray or run a clay bar across them. Embedded iron particles from brake dust and rail transport can sit invisibly on the surface. Polishing over them grinds the particles into the clear coat, creating new scratches you are trying to eliminate. A quick decontamination pass takes five minutes and prevents this entirely.
- Apply a light cutting compound or all-in-one polish. For most post-removal situations, a single-stage polish is sufficient. Swirl marks from the original installation, adhesive haze, and mild oxidation lines all respond well to a medium-cut compound applied with a soft foam pad on a dual-action polisher at moderate speed. Work in two-foot-square sections, keeping the pad flat and moving in slow, overlapping passes. If you are polishing by hand, use a foam applicator pad and apply firm, even pressure in straight back-and-forth strokes rather than circular motions.
- Buff off polish residue and inspect under light. Use a clean, plush microfiber towel to remove the polish haze, then check the panel again under your inspection light. The swirl marks, haze, and oxidation lines should be gone or dramatically reduced. If a faint trace remains, a second polish pass on just that spot usually finishes the job. Avoid the temptation to keep compounding the same area repeatedly. Each pass removes a thin layer of clear coat, and over-polishing is a real risk on panels that may have already lost some thickness during years of UV exposure on unprotected sections.
- Blend the UV color differential. The surrounding panels that were never under film are the ones that faded. A light polish on those exposed panels brings back some of the gloss and depth that UV radiation stole, narrowing the visual gap between the freshly revealed paint and the rest of the car. On vehicles where the mismatch is significant, a more aggressive two-stage correction, starting with a cutting compound and finishing with a fine polish, may be necessary on the exposed panels to achieve a convincing match.
- Apply a paint sealant or carnauba wax. Freshly polished paint is clean, smooth, and completely unprotected. Within days, environmental contaminants, UV rays, and water spots will begin degrading the surface you just restored. A synthetic paint sealant provides durable protection lasting three to six months, while a carnauba wax delivers a rich, warm gloss but typically needs reapplication every four to eight weeks. Apply your chosen product to every polished panel, both the ones you stripped and the surrounding areas you blended, so the entire vehicle shares the same level of protection and sheen.
- Step back and evaluate in natural light. Move the car outdoors and walk around it at different angles. Look for any remaining ghost lines, gloss inconsistencies, or haze you might have missed under garage lighting. Sunlight at a low angle is the most revealing. If everything looks uniform, you are done. If isolated spots still stand out, a quick spot-polish followed by another sealant application handles it without redoing the entire car.
Most DIY owners can complete the polish-and-seal process on a full vehicle in three to five hours, or under an hour for a single panel like the hood. The effort pays for itself immediately: paint that looked patchy and tired after film removal transforms into a surface with consistent color, depth, and gloss across every panel.
Of course, that beautifully restored surface raises an important practical question. You just invested real time and energy getting the paint back to factory-level condition. How much will it cost to keep it that way, and does it make more sense to do the work yourself or hand the entire process to a professional next time? The answer depends on more variables than most guides admit.
Step 7 - Compare DIY and Professional PPF Removal Costs
Money is only half the equation. The real cost of removing paint protection film includes the tools you buy, the hours you spend, and the risk you assume if something goes wrong. A DIY removal that saves you $400 in labor but results in a clear-coat scratch requiring a $600 respray is not a bargain. Conversely, paying a professional $1,500 to strip a two-year-old film that you could have peeled off yourself in an afternoon is money you did not need to spend. Understanding the full cost picture for both routes lets you make a decision based on facts rather than guesswork.
What DIY Removal Actually Costs in Tools and Time
The upfront tool investment for a DIY project is surprisingly modest. A quality heat gun with adjustable temperature runs about $30 to $50. A pack of plastic razor blades costs $10 to $15. A bottle of citrus-based automotive adhesive remover sits in the $15 to $25 range. Isopropyl alcohol is under $10. Add a bundle of microfiber towels for another $15 to $20, a roll of automotive masking tape for $5, and a spray bottle you probably already own. All told, you can assemble the complete toolkit described earlier in this guide for roughly $80 to $130, and most of those tools are reusable for future projects.
The hidden cost is time, and it is substantial. A single hood panel in average condition takes 30 to 90 minutes including residue cleanup. A full front-end kit with hood, fenders, bumper, and mirror caps can consume an entire Saturday. A full-vehicle strip on aged film can stretch across two full days when you factor in the post-removal polish and sealant steps. If your weekends are valuable or your patience is limited, that time investment deserves as much weight in your budget as the dollar figure on the receipt.
There is also the risk cost. DIY removal on straightforward, newer film carries minimal danger. Aged, brittle film on a repainted panel is a different story entirely. One aggressive pull on compromised clear coat can leave damage that only a professional respray can fix, turning your $100 DIY project into a $500-plus repair bill. Honest self-assessment of your film's condition and your own comfort level matters more than the desire to save a few hundred dollars.
Professional Removal Pricing and What Is Included
Professional ppf removal cost varies widely depending on your location, the size of the vehicle, the amount of film being removed, and how degraded that film has become. Industry pricing typically ranges from $500 to $2,000 for a full-vehicle strip, with partial jobs like a single bumper or hood falling in the $150 to $450 range. Larger vehicles, older film, and brittle or heavily yellowed material push costs toward the upper end because they demand significantly more labor time and care.
What justifies that price? Professional shops bring several advantages that a garage DIY setup cannot replicate. Experienced technicians have stripped hundreds of vehicles and can read adhesive behavior in real time, adjusting heat, angle, and speed instinctively. They use commercial-grade steamers and infrared heating panels that deliver more consistent, uniform heat than a consumer heat gun. Most reputable shops also bundle adhesive cleanup, paint decontamination, and at least a light paint correction into their quoted price, meaning you get the car back with clean, polished, ready-to-protect paint rather than a sticky, hazy surface you still need to address yourself. Film disposal, which involves handling large sheets of adhesive-coated material, is also handled for you.
Some shops offer package deals that combine removal with fresh film installation or ceramic coating application, which can reduce the overall cost compared to booking each service separately. If you already know you want new protection applied after stripping the old film, asking about bundled pricing before committing is worth the phone call.
Here is how the numbers compare side by side across common scenarios:
| Removal Method | Estimated Cost Range | Estimated Time | Best Suited For |
|---|---|---|---|
| DIY - Single panel | $80 - $130 (tool kit, one-time purchase) | 30 - 90 minutes | Newer film (under 3 years), confident DIYers, factory paint in good condition |
| DIY - Full vehicle | $80 - $130 (same toolkit) | 8 - 20 hours across 1-2 days | Budget-conscious owners with average-condition film and ample free time |
| Professional - Single panel | $150 - $450 | 1 - 2 hours (drop-off) | Aged or degraded film on one section, repainted panels, or limited DIY confidence |
| Professional - Full vehicle | $500 - $2,000 | 3 - 8 hours (drop-off) | Heavily aged film, high-value vehicles, full paint correction desired, or owners wanting guaranteed results |
When to DIY and When to Hire a Professional
The decision is not purely financial. A car with three-year-old premium film on factory paint, parked in a climate-controlled garage, is an ideal DIY candidate. The adhesive will still be cooperative, the clear coat is robust, and the risk of anything going wrong is low. You spend a Saturday, save several hundred dollars, and gain a useful skill you can repeat.
On the other hand, a vehicle with seven-year-old film of unknown brand on panels that include at least one respray is a professional job. The adhesive has likely hardened or over-bonded, the repainted panel carries real clear-coat risk, and the time commitment could easily exceed two full days. Professional removal in that scenario is not a luxury. It is insurance against a repair bill that would dwarf the service cost.
How much does ppf removal cost in the big picture? That depends on whether you measure in dollars alone or in dollars plus time plus risk. The paint protection film removal cost at a shop may look steep on a quote sheet, but it includes expertise, commercial equipment, cleanup, and a damage-free guarantee that DIY simply cannot offer on difficult jobs.
If the film is under five years old, the paint is factory original, and you are comfortable using a heat gun, DIY removal is a smart, money-saving choice. If the film is older than five years, the brand is unknown, or any panel has been repainted, professional removal pays for itself in avoided risk.
Whichever route you choose, the job does not truly end when the last piece of film hits the trash bag. Bare, freshly exposed paint is vulnerable from the moment you strip away its old shield, and what you do in the days that follow determines whether that surface stays pristine or starts collecting new damage immediately.
Protect Vulnerable Areas After PPF Removal
Picture this: you just spent an entire day stripping old film, scrubbing adhesive, polishing out ghost lines, and sealing every panel to a uniform shine. The paint looks better than it has in years. And right now, at this exact moment, it is also more exposed than it has been since the day the original film went on. Every rock chip, bird dropping, UV ray, and parking-lot door ding that the old PPF absorbed for years now has a direct line to your bare clear coat. What you do after removing ppf in the next few days determines whether that freshly restored surface stays showroom-quality or starts accumulating damage all over again.
Why Freshly Stripped Paint Needs Immediate Protection
Clear coat is not designed to sit unprotected indefinitely. The sealant or wax you applied during the restore step provides a temporary barrier, but those products wear down within weeks to months depending on exposure. Meanwhile, the UV differential you just corrected begins creeping back the moment unshielded sunlight hits the paint. Environmental contaminants like tree sap, industrial fallout, and acidic bird droppings bond to uncoated clear coat far more aggressively than they would to a filmed or ceramic-coated surface.
The paint beneath your old PPF was essentially frozen in time. It avoided the oxidation, micro-scratching, and chemical etching that bare panels endure every day. Leaving it unprotected after all the effort you invested in removal and correction is like restoring a hardwood floor and then skipping the polyurethane topcoat. The surface looks perfect for a week, then slowly deteriorates under normal use. Whether you choose new film, a ceramic coating, or a combination of both, getting something onto that paint promptly is the smart final step in any paint protection film replacement project.
Targeted Partial-Coverage PPF for High-Impact Zones
Here is a pattern many owners discover after living through a full-body strip: the panels that actually collected real damage during the film's lifetime were not evenly distributed. The hood caught rock chips. The bumper took the brunt of highway debris. But the doors, roof, and trunk? Often those panels come off looking nearly as clean as the day the film was installed. That realization leads a lot of people to rethink their next round of protection.
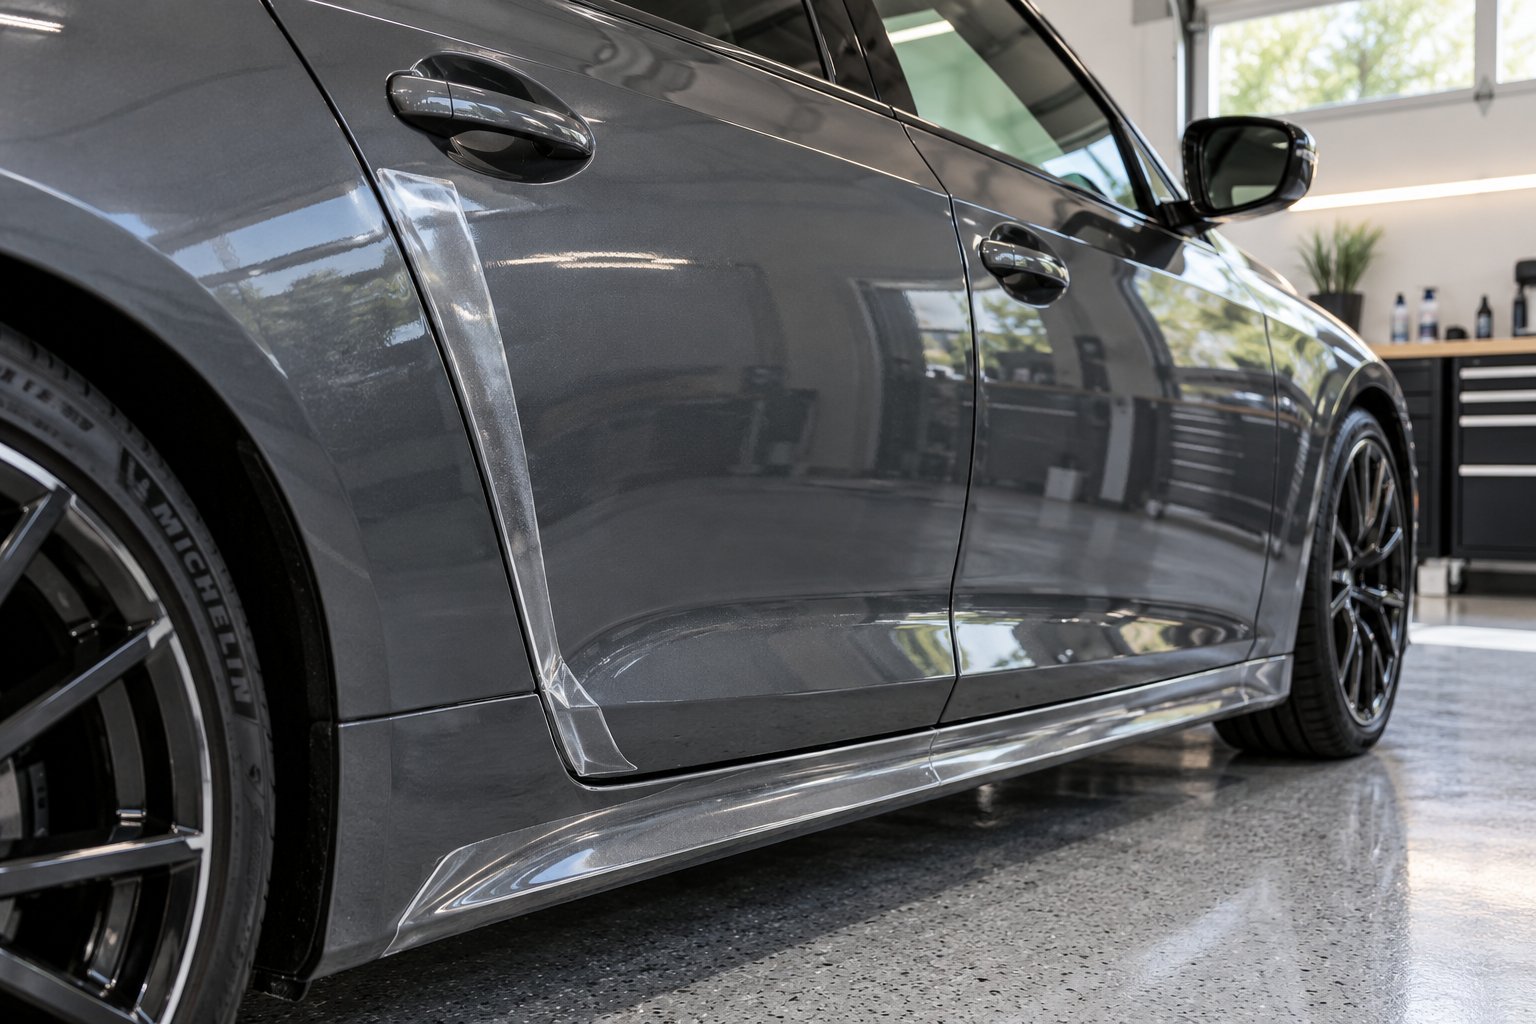
Instead of committing to another full-body wrap, partial ppf coverage targeting only the highest-impact zones delivers the majority of the protection at a fraction of the cost and installation time. Door corners, side skirts, rocker panels, and bumper edges absorb the most frequent real-world contact from parking lots, road debris kicked up at rocker height, and everyday door-opening clearance misjudgments. Protecting just those areas keeps the most vulnerable paint safe while leaving lower-risk panels under a ceramic coating or quality sealant.
Pre-cut kits make this approach even more accessible for DIY owners. Rather than buying bulk film and hand-trimming pieces to fit, a pre-cut kit arrives shaped to your specific vehicle's panel geometry. For Tesla Model 3 and Model Y owners, for example, CUTIM's Door Corner and Side Skirt TPU Paint Protection Film includes four door-corner pieces and two side-skirt pieces in transparent TPU, covering exactly the zones that take the most abuse in daily driving. It is a practical option if you removed full-body film and want focused protection on vulnerable areas without the cost or complexity of another complete wrap. Just confirm exact model-year fitment before ordering any pre-cut kit, as panel dimensions can shift between production years.
The broader point applies regardless of which vehicle you drive: partial coverage on high-impact zones paired with a coating on everything else is the strategy that delivers the best value for most daily drivers after a full ppf replacement cycle.
Choosing Between New PPF, Ceramic Coating, or Both
Three distinct protection strategies are worth evaluating once the old film is gone. Each one suits a different budget, maintenance tolerance, and risk profile. Here is how they compare:
- Targeted partial-coverage PPF - Covers door corners, side skirts, rocker panels, bumper edges, and other high-impact zones with film while leaving lower-risk panels under a coating or sealant. Best balance of cost and real-world protection for daily-driven vehicles.
- Full-body PPF replacement - Wraps every painted surface in new film for maximum physical protection against chips, scratches, and abrasion. Ideal for high-value vehicles, exotic paint colors, or owners who want zero exposed panels. The highest upfront investment but the most comprehensive coverage.
- Ceramic coating only - A liquid polymer that bonds to the clear coat, providing UV resistance, hydrophobic water repellency, and chemical protection without any physical film layer. Lower cost and virtually invisible, but it does not stop rock chips or deep scratches the way PPF does.
Many owners land on a hybrid approach, and industry experts widely recommend combining both for layered defense. Film handles what hits your paint. Ceramic handles what lands on it and lingers. The table below lays out the key differences to help you match the right strategy to your situation:
| Protection Type | Coverage Level | Durability | Cost Tier | Best For |
|---|---|---|---|---|
| Partial PPF (pre-cut kits) | High-impact zones only (door corners, side skirts, bumper edges) | 5 - 7 years | Low to moderate | Daily drivers wanting focused physical protection on vulnerable areas |
| Full-body PPF | All painted exterior surfaces | 7 - 10 years | High | Exotic or high-value vehicles, long-term ownership, maximum coverage |
| Ceramic coating | Entire vehicle (paint, glass, trim) | 1 - 5 years depending on product tier | Low to moderate | Owners prioritizing UV defense, gloss enhancement, and easy maintenance |
| Partial PPF + ceramic coating | Film on impact zones, ceramic everywhere else | Film: 5 - 7 years; Ceramic: 1 - 5 years | Moderate | Best-value layered protection for daily-driven vehicles |
If budget is the primary concern, a quality ceramic coating applied across the entire vehicle gives you UV defense, hydrophobic performance, and contamination resistance at a fraction of full-body film cost. If physical protection matters most, even a small partial PPF kit on the highest-risk panels provides peace of mind that no coating alone can match. And if you want the best of both worlds, film the impact zones and coat everything else. That combination addresses virtually every threat your paint will face on the road, and it costs significantly less than wrapping the entire car in new film from bumper to bumper.
Whatever route you choose, the key takeaway from this entire process is the same principle you started with: assess first, act second. Diagnose your film before removal, follow a methodical heat-and-peel technique, clean residue with patience instead of harsh chemicals, restore the paint to a uniform finish, and protect it again before the elements get a head start. Your paint survived under that old film for years. With the right next step, it will look even better for years to come.
Frequently Asked Questions About Removing Paint Protection Film
1. Does removing PPF damage car paint?
Removing PPF generally does not damage factory paint when done correctly with proper heat and a slow peel at a 30-45 degree angle. The risk increases significantly on repainted panels, thin aftermarket clear coats, or film that has aged beyond seven years where the adhesive may have over-bonded. Using a heat gun at 160-180°F, plastic scrapers instead of metal blades, and automotive-safe citrus-based adhesive removers keeps the clear coat intact throughout the process.
2. How much does professional PPF removal cost?
Professional PPF removal typically costs between $150 and $450 for a single panel and $500 to $2,000 for a full vehicle. Pricing depends on vehicle size, film age, brand, and condition. Most professional quotes include adhesive cleanup, paint decontamination, and a light polish. Older, brittle film or unknown brands push costs toward the higher end because they require significantly more labor time and careful handling to avoid clear-coat damage.
3. Can I use a hair dryer instead of a heat gun to remove PPF?
A hair dryer can work on newer films under three years old, but most household models max out around 140°F, which is often insufficient for aged adhesive. A heat gun with adjustable temperature control reaching 160-180°F is far more effective and efficient. If a heat gun is unavailable, a garment steamer is actually a better alternative than a hair dryer because it combines heat with moisture, helping loosen hardened adhesive from multiple angles simultaneously.
4. How do I remove adhesive residue left behind after peeling PPF?
Use a tiered approach starting with warm soapy water for light haze, then 70% isopropyl alcohol for moderate residue, and a citrus-based automotive adhesive remover for stubborn spots. Saturate the residue, let the product dwell for 30-60 seconds, then wipe in straight, single-direction strokes with a clean microfiber towel. Never scrub in circles and avoid acetone, lacquer thinner, or brake cleaner, as these solvents can permanently damage automotive clear coat.
5. What should I do to protect my car's paint after removing PPF?
Freshly stripped paint is immediately vulnerable to UV rays, contaminants, and physical damage. Apply a paint sealant or wax right after polishing to provide a temporary barrier. For longer-term protection, consider targeted partial-coverage PPF on high-impact zones like door corners, side skirts, and bumper edges, a ceramic coating for UV and chemical defense across the entire vehicle, or a combination of both for layered protection that covers every type of threat your paint faces daily.