
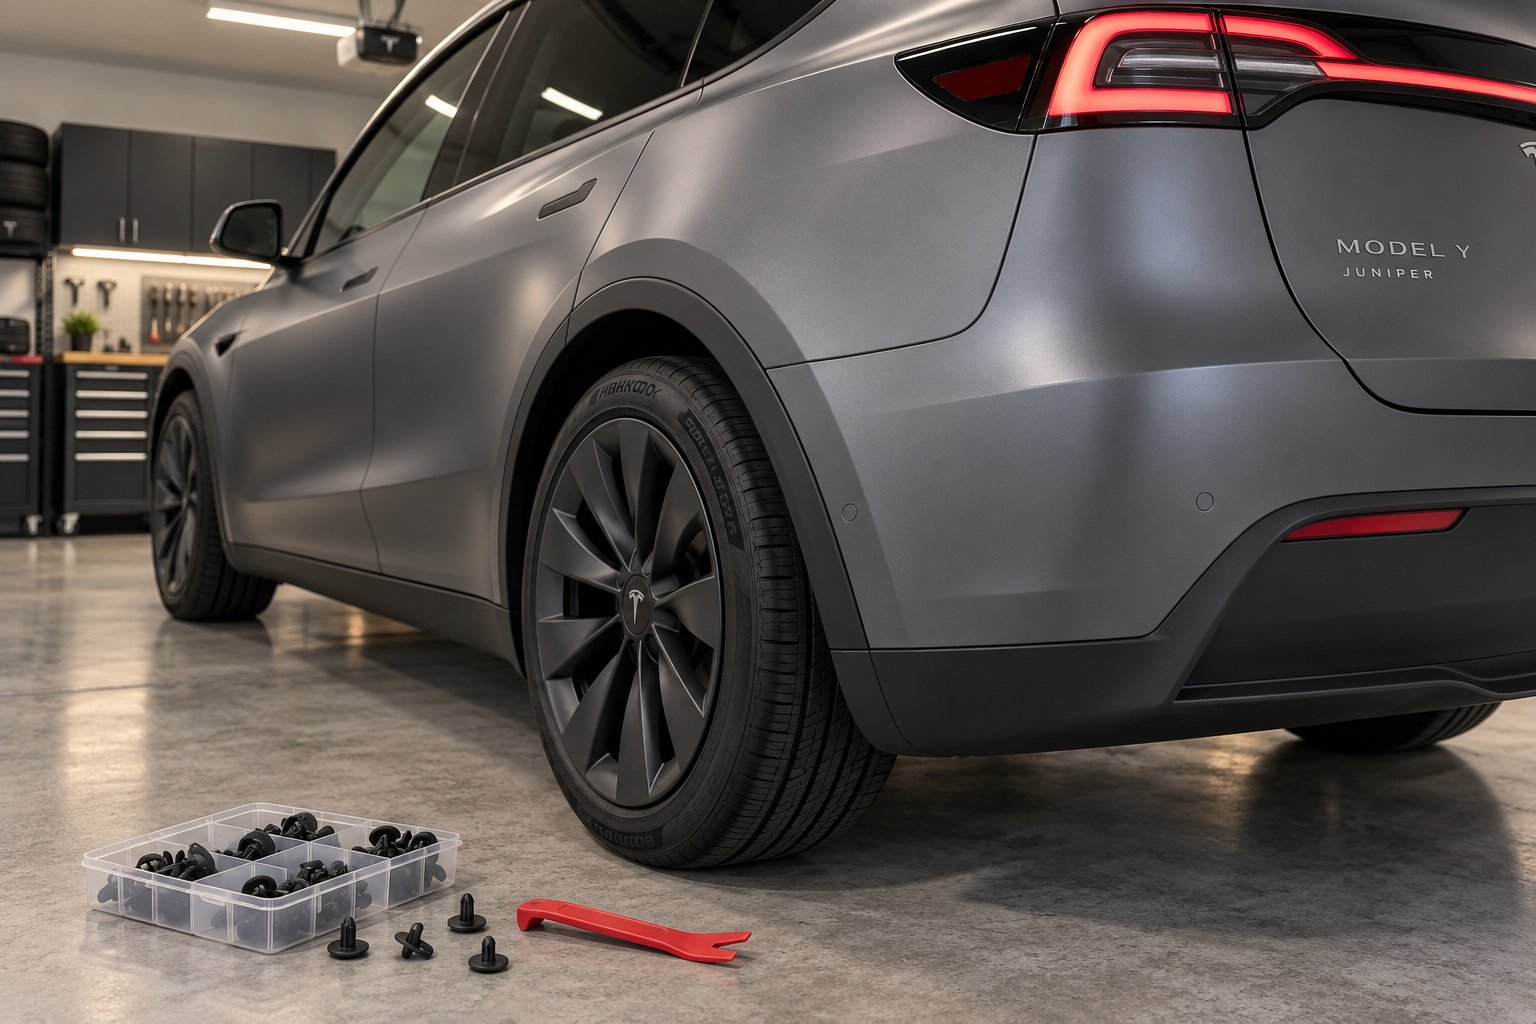
Why Your Tesla Model Y Juniper Needs Mud Flaps
Imagine walking out to your brand-new Model Y Juniper after a rainy commute and noticing a fine layer of road grime coating the lower body panels. A few weeks later, tiny stone chips start appearing along the rear quarter panels and rocker panels. That sinking feeling? Almost every Juniper owner experiences it. The sleek, low-profile design that makes the refresh so visually striking also leaves those lower surfaces exposed to everything the road throws at them — salt spray, gravel, mud, and water mist kicked up by the tires.
Why Mud Flaps Matter More on the Juniper Refresh
The Model Y Juniper refresh did not just update the headlights and interior. Tesla redesigned the lower body lines and updated the wheel arch geometry, creating a noticeably different profile compared to the pre-refresh Model Y. This matters because mud flaps designed for the older Model Y simply will not align with the Juniper's revised fender liner shape and mounting points. It is a critical distinction that many owners miss, often resulting in ill-fitting accessories, gaps in coverage, and wasted money. If you are shopping for protection, Juniper-specific fitment is non-negotiable.
What This Guide Covers and Who It Is For
This walkthrough is built specifically for the Juniper variant and written for complete beginners. You do not need prior Tesla modification experience, specialty automotive tools, or a trip to the service center. Whether you live in a salt-belt state where winter brine eats away at paint, a region with loose gravel roads, or a rainy climate where constant water spray accelerates paint deterioration, mud flaps deliver outsized value for a minimal investment.
Mud flaps are one of the simplest, most cost-effective ways to preserve your Juniper's resale value and keep the lower body looking factory-fresh for years.
Installation Difficulty and Time Estimate
Here is the best part: this is a true beginner-friendly project. The entire installation — all four flaps — takes roughly 20 to 30 minutes. No wheel removal is required, and you will not need a jack or lift. A flat driveway or garage floor, a handful of basic tools, and a little patience are all it takes. The process relies on push-pin clips and existing mounting points in the fender liner, so you are not drilling into your vehicle or making any permanent modifications.
The real question is not whether you need mud flaps — it is making sure you pick the right ones and install them correctly on the Juniper's unique body lines. That starts with gathering the proper tools and selecting a kit engineered for this specific refresh.
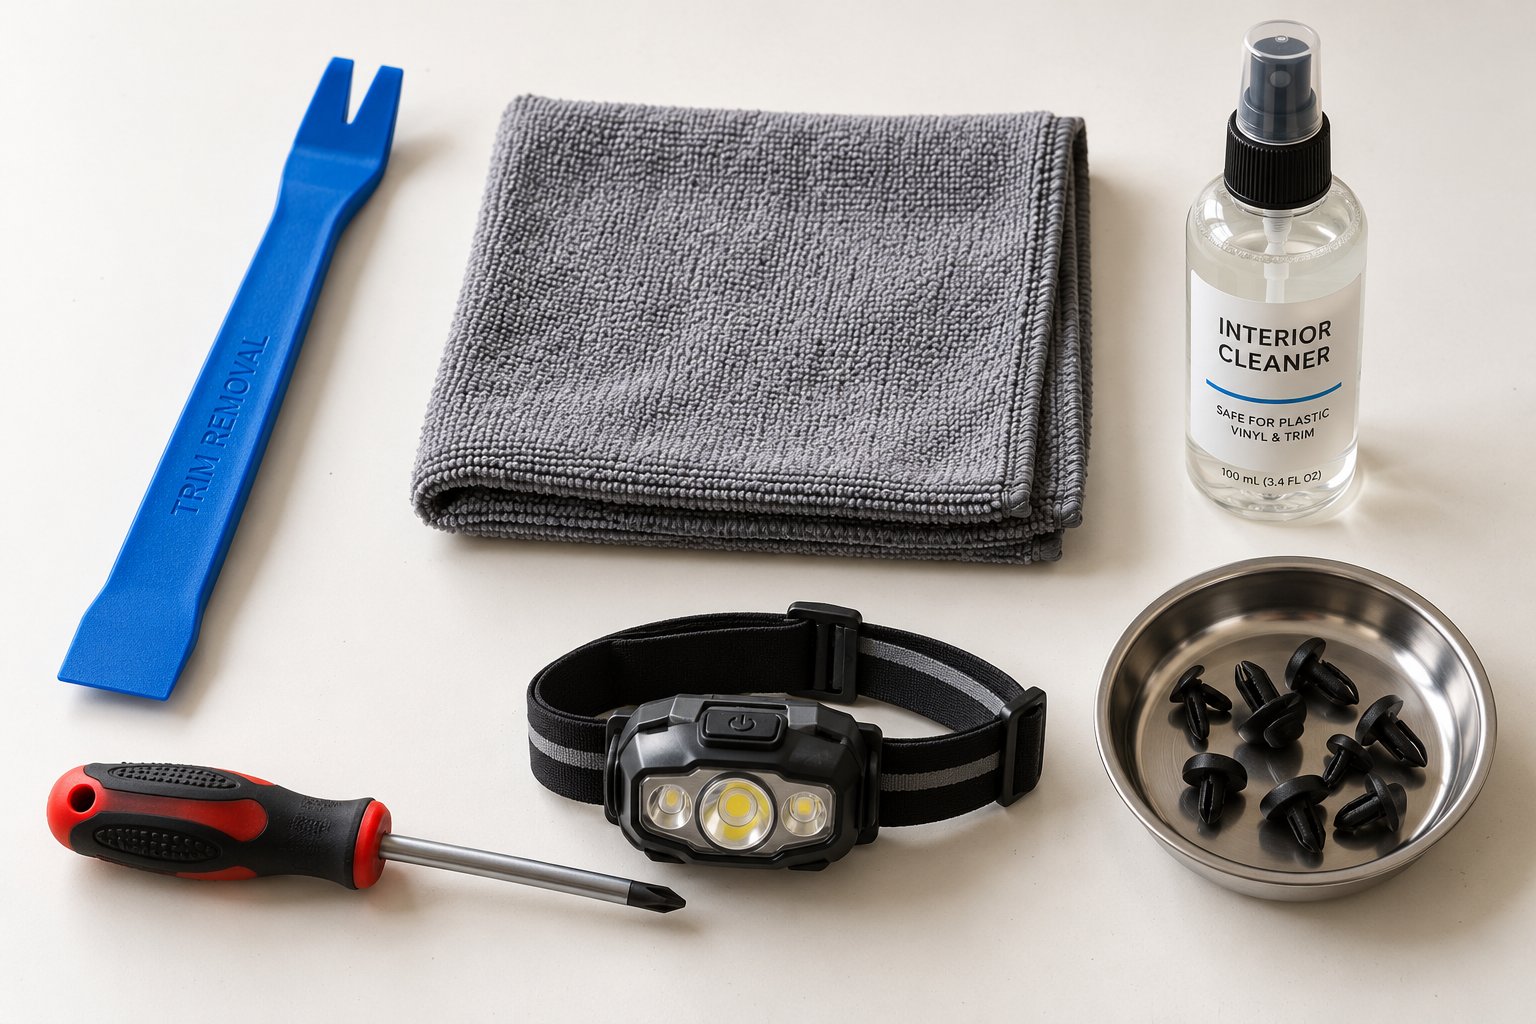
Step 1 – Gather Your Tools and Choose the Right Mud Flaps
A smooth installation starts long before you crouch next to the wheel well. Having every tool within arm's reach and — more importantly — the correct mud flap kit in hand eliminates the mid-project scramble that turns a 25-minute job into an hour-long headache. Let's break down exactly what you need on the workbench and how to avoid the single most expensive mistake Juniper owners make when shopping for mud flaps.
Essential Tools You Will Need
The good news? You probably own most of these already. Here is the complete checklist:
- Plastic trim removal tool (pry tool) — This is the most important item on the list. You will use it to pop out factory push-pin clips without scratching paint or cracking the fender liner. Never substitute a metal flathead screwdriver.
- Microfiber cloth — A clean, lint-free cloth for wiping down mounting surfaces inside the wheel well before you attach anything.
- Isopropyl alcohol or quick detailer spray — Pair this with the microfiber cloth to dissolve road film, brake dust, and grime from the areas where clips and flaps will seat.
- Phillips-head screwdriver — Some kits include self-tapping screws for additional security along the bumper edge. If your kit is purely clip-based, you can skip this one.
- Flashlight or headlamp (optional but recommended) — The inside of a wheel well is dark, even in a well-lit garage. A headlamp keeps both hands free while you locate clip holes and alignment marks.
- Small bowl or magnetic tray — Drop a push-pin clip on a garage floor and you will understand why. Keep all fasteners corralled in one place.
That is the entire toolkit. No power tools, no specialty sockets, and nothing you would need to order from a Tesla parts catalog. Gather everything on a clean surface next to the vehicle so you are not hunting through drawers mid-install.
Choosing Mud Flaps That Actually Fit the Juniper
This is where many owners stumble — and where the wrong choice costs real money. The Juniper refresh changed the fender liner contours, the lower bumper fascia profile, and the spacing of factory clip mounting points. A mud flap kit designed for the 2020–2024 pre-refresh Model Y will not line up correctly. Holes will be off by millimeters, edges will gap away from the body, and coverage will fall short of the areas that actually need protection.
When you are browsing options, you will generally encounter three categories: Juniper-specific engineered kits, universal-fit mud flaps marketed for "all Model Y years," and brand-name weathertech mud flaps or similar molded-style accessories designed for broader vehicle compatibility. Universal-fit products might physically attach, but the compromises in alignment and coverage defeat the purpose. Think of it like buying a phone case labeled "fits most smartphones" — it technically works, but the cutouts never quite line up.
If you want to design your own mud flaps from a raw sheet of flexible material, that is technically possible, but the precision required for the Juniper's tight tolerances makes it impractical for most owners. Purpose-built kits save hours of trimming and test-fitting.
Product Comparison for Juniper-Specific Mud Flaps
To make the selection process easier, here is a side-by-side comparison of the main mud flap categories available for the Juniper variant:
| Product Type | Juniper-Specific Fit | Mounting Method | Visual Profile | Paint Protection Coverage |
|---|---|---|---|---|
| CUTIM Hidden Mud Flaps | Yes | Push-pin clips using factory mounting points | Low-profile, hidden behind wheel arch | Full coverage on lower panels, rocker panels, and rear bumper edge |
| Generic Universal-Fit Flaps | No | Self-tapping screws or adhesive tape | Visible, often bulky | Partial — gaps due to misaligned geometry |
| WeatherTech-Style Molded Flaps | No (pre-refresh molds) | Combination of clips and screws | Semi-visible, contoured | Moderate — designed for older body lines |
The difference in visual profile deserves special attention. Many Juniper owners chose this vehicle partly for its refined, clean exterior lines. Bulky mud flaps that jut out from the wheel arch undermine that aesthetic. CUTIM's Tesla Model Y Juniper Hidden Mud Flaps are engineered specifically around the refreshed body lines, tucking behind the wheel arch so they protect against road grime, water spray, and debris without visually announcing their presence. The hidden design preserves the factory look while still delivering the stone-chip and salt-spray defense that makes mud flaps worth installing in the first place.
Whichever product you choose, confirm the listing explicitly states compatibility with the Juniper refresh — not just "Model Y." That single detail separates a kit that clicks into place in minutes from one that ends up back in the return box.
With the right tools staged and a Juniper-specific kit in hand, you are ready to open the box and make sure every component is accounted for before you touch the vehicle.
Step 2 – Unbox and Verify Every Component in Your Kit
Tearing open the box and immediately heading to the wheel well is tempting — but resist that urge. A five-minute unboxing and parts check on your workbench saves you from the uniquely frustrating experience of discovering a missing clip or wrong-sized flap while you are crouched on a garage floor with the fender liner half-disassembled. Whether you purchased a Juniper-specific kit or a set of weather tech mud flaps for a different application like a Jeep Wrangler, the principle is universal: verify first, install second.
What Is Inside a Typical Juniper Mud Flap Kit
Lay everything out on a clean, flat surface — a workbench, a folding table, or even a clean section of garage floor covered with a towel. Most Juniper-specific kits include the following components:
- Front mud flap panels (left and right) — These are the shaped panels that mount along the rear edge of each front wheel arch. They deflect road spray and gravel before it reaches the lower doors and rocker panels.
- Rear mud flap panels (left and right) — Designed for the trailing edge of each rear wheel arch, these panels shield the rear bumper fascia and lower quarter panels from debris kicked up by the back tires.
- Push-pin retainer clips — Small two-piece plastic fasteners that lock the flap panels into the fender liner's existing factory holes. Each clip typically has an outer housing and a center pin — you insert the housing first, then press the pin to expand and lock it in place. Tesla's own installation documentation specifically notes that you should discard the original factory push clips and use only the new ones included in your kit.
- Self-tapping screws (if applicable) — Some kits include short screws for supplemental attachment points along the bumper edge. Not every kit uses them, so do not be alarmed if yours has clips only.
- Alignment guides or templates — A few premium kits provide paper or plastic templates that help you position the flap precisely before inserting any fasteners. Think of them like the alignment stickers on a screen protector — they take the guesswork out of placement.
- Instruction card or manual — Even if you are following this walkthrough, keep the manufacturer's card handy. It often includes part numbers and a diagram that makes matching pieces faster.
Each component has a specific job in the finished installation. Understanding what you are holding — rather than just grabbing pieces at random — makes the actual mounting process feel intuitive instead of confusing.
How to Identify Front Versus Rear Flaps
Here is where beginners most often mix things up. Front and rear flaps are not interchangeable, even though they might look similar at a glance. Pick up one panel from each pair and hold them side by side. You will notice a few key differences:
- Size and width — Rear flaps are typically wider and may extend further downward. The rear tires on the Model Y Juniper throw a broader spray pattern because they sit closer to the open bumper edge, so the flap needs more surface area.
- Mounting tab shape — Front flaps often have tabs designed to hook onto the backside of the front fender garnish, while rear flaps feature tabs shaped to tuck along the rear bumper fascia. These contours will only match their intended wheel arch.
- Labeling — Most kits stamp or sticker each panel with "FL" (front left), "FR" (front right), "RL" (rear left), and "RR" (rear right). If your kit uses color-coded stickers instead of letters, the instruction card will decode them.
If you accidentally mount a front flap on the rear — or vice versa — the clip holes will not line up, the coverage area will be wrong, and you will waste time removing and restarting. A quick visual comparison now eliminates that risk entirely.
Verifying Your Kit Is Complete Before Starting
Grab the included parts list or instruction card and physically match every item on the table against it. Count each push-pin clip individually — kits often include one or two spares, so your count might be slightly higher than the listed minimum, which is perfectly normal. Inspect each flap panel for cracks, warping, or rough edges from the molding process. Check that every clip's center pin moves freely and has not been pre-compressed during shipping.
If anything is missing or damaged, contact the manufacturer right away rather than improvising with generic hardware-store fasteners. Mismatched clips can fail to seat properly, leading to rattling or flap loss at highway speed. A short wait for a replacement part beats a sloppy installation every time.
One last tip: drop all your clips and screws into that small bowl or magnetic tray you staged earlier. Push-pin clips are small, dark-colored, and practically invisible once they roll under a tire or workbench. Corralling them in one spot keeps the process frustration-free.
With every piece accounted for and organized, the kit is ready — but your vehicle needs a little attention before any of these parts go near the wheel wells.
Step 3 – Prepare Your Vehicle and Work Area
A verified kit and a clean workbench are great — but the vehicle itself needs a few minutes of attention before you start pressing clips into place. This preparation step is one that nearly every other installation guide glosses over, yet it directly determines whether your mud flaps sit flush, stay rattle-free, and hold up through thousands of miles of real-world driving. Skipping it is like applying a screen protector on a dusty phone — the result looks fine for about five minutes.
Choosing the Right Workspace and Conditions
You do not need a professional shop or a lift. A flat, level surface is the only real requirement — your garage floor or a paved driveway works perfectly. Park the Juniper on level ground so the vehicle sits evenly and the wheel wells are equally accessible on both sides. Grass or gravel driveways introduce dirt and uneven footing, so stick to a hard, clean surface whenever possible.
Before you settle in, shift the vehicle into Park and engage the parking brake. This sounds obvious, but when you are pressing push-pin clips with firm hand pressure against the fender liner, you do not want the car creeping on even the slightest incline. With the vehicle secured, pop the frunk or crack a window so you can reach the cabin later to turn the steering wheel without opening the door each time.
One more consideration: lighting. Even midday sunlight barely penetrates the inner wheel well. If you are working in a garage, position a floor lamp or clip light near the front and rear wheel arches. That headlamp you staged earlier? Now is the time to strap it on. Being able to clearly see the factory clip holes and fender liner edges saves you from fumbling and misaligning parts in the shadows.
Cold Weather Installation Precautions
Ambient temperature matters more than most owners realize. If you are tackling this project on a chilly morning — anything below roughly 50°F (10°C) — the plastic push-pin clips and the mud flap material itself become noticeably stiffer and more brittle. Forcing a cold clip into a mounting hole is a fast way to snap its center pin, and stiff flap panels resist bending into the contour of the wheel arch.
The fix is simple: bring the vehicle into a heated garage and let everything — the car's fender liners, the flap panels, and the clips — warm to room temperature for 15 to 20 minutes. If a heated garage is not an option, you can bring just the mud flap kit and clips indoors to warm up while you handle the outdoor cleaning steps. Flexible plastic seats cleanly; brittle plastic cracks. That single temperature variable can be the difference between a flawless install and a broken clip that halts the entire project.
Live in a region where winter temperatures regularly drop below freezing? You are likely in exactly the kind of salt-belt climate where mud flaps deliver the most value. Just plan to install them on a milder day or during a warmer part of the afternoon rather than first thing on a frigid Saturday morning.
Cleaning the Mounting Areas for a Secure Fit
This is the step that separates a rattle-free, long-lasting installation from one that loosens within the first few highway drives. Grab your microfiber cloth and isopropyl alcohol or quick detailer spray, then crouch next to the first wheel well.
Wipe down three specific areas on each wheel arch:
- The inner fender liner edge — where the push-pin clips will seat into the factory holes. Road film and brake dust accumulate here quickly, and even a thin layer of grime prevents a clip from clicking fully into place.
- The lower body panel surface — the painted area directly behind and below the wheel opening where the flap will rest against the vehicle. Trapped grit between the flap and the paint acts like sandpaper every time the flap flexes over a bump.
- The clip holes themselves — use a corner of the cloth or a cotton swab dipped in isopropyl alcohol to clear any packed dirt from inside the mounting holes. A clogged hole forces you to push harder on the clip, increasing the risk of cracking the liner.
You do not need to make these surfaces operating-room sterile. The goal is simply to remove loose debris, road salt residue, and oily film so that plastic meets plastic cleanly and paint stays scratch-free under the flap.
Never skip the cleaning step — dirt trapped under a clip or mounting point causes rattling and premature loosening that will send you back to square one within weeks.
One final preparation trick for the front wheel wells: hop into the driver's seat and turn the steering wheel fully toward the side you plan to work on first. Cranking the wheel to full lock swings the front tire out of the way and exposes the inner fender liner mounting points that would otherwise be hidden behind the tire. This gives you dramatically more room to see, reach, and align the front mud flaps without contorting your arm into an awkward angle. You will repeat this on the opposite side when you move to the other front wheel.
With the workspace set, the plastic warmed, and the mounting surfaces clean, the vehicle is genuinely ready for hardware. The next move is getting those front flaps aligned and locked into the Juniper's fender liner — a process that goes surprisingly fast when the prep work is done right.
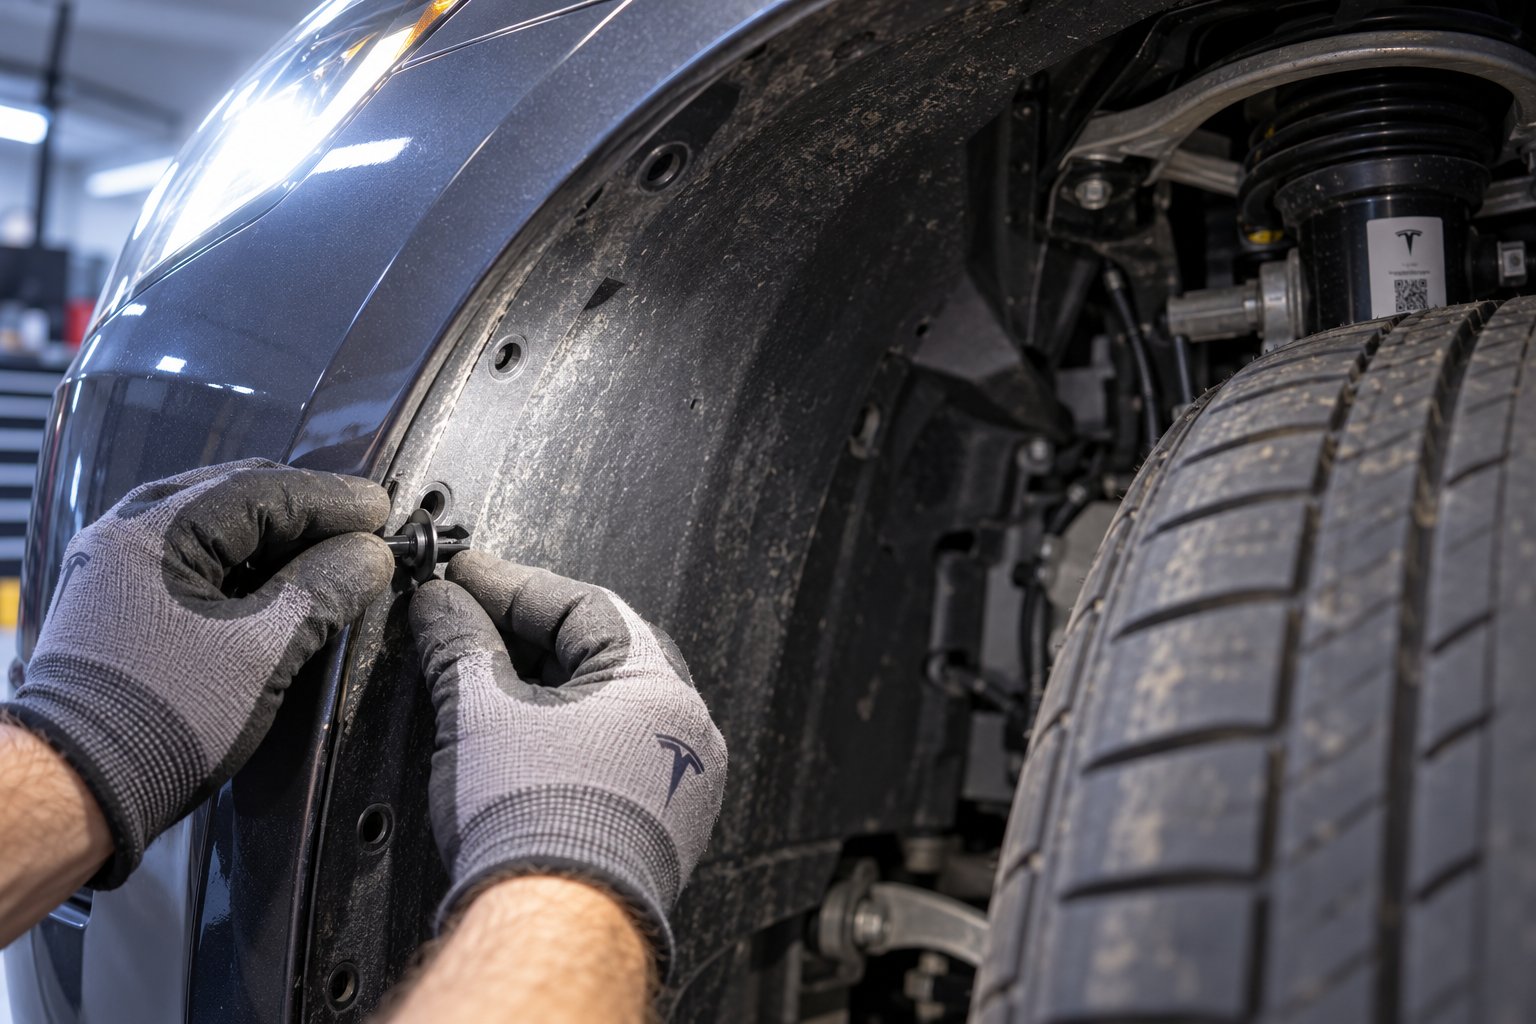
Step 4 – Install the Front Mud Flaps
Your workspace is prepped, the mounting surfaces are spotless, and the steering wheel is already cranked to full lock on your starting side. This is the part of the project that feels the most rewarding — you are actually attaching hardware to the vehicle. Front mud flaps on the Juniper mount along the rear edge of each front wheel arch, tucking behind the existing fender liner so the visible portion blends into the body line rather than hanging below it. The whole process relies on factory mounting points that Tesla built into the liner, which means you are not creating any new holes or making permanent modifications to the vehicle.
Accessing the Front Wheel Well Mounting Points
With the steering wheel turned fully toward the side you are working on, the front tire swings outward and exposes a generous section of the inner fender liner. Crouch down or kneel beside the wheel opening and shine your flashlight or headlamp along the rear edge of the arch — the curved section closest to the front door. You will see a series of factory push-pin clip positions running along the lower portion of the liner. On the Juniper, these clip points sit slightly higher and further inboard compared to the pre-refresh Model Y, which is one of the key reasons older mud flap kits fail to align properly on this variant.
Identify the specific clip holes your kit references in its instruction card. Most Juniper-specific kits reuse two or three of these factory positions. If a factory push-pin clip currently occupies a hole you need, use your plastic trim removal tool to carefully pop it out. Slide the flat edge of the tool under the clip's outer flange, gently lever it upward, and pull the clip straight out. Set the removed clip aside — your kit likely includes replacement clips designed to pass through the mud flap panel and the liner simultaneously, so the originals become spares rather than trash.
Take a moment to visually confirm that the exposed holes are clean and free of debris. A quick pass with the corner of your microfiber cloth handles any remaining dust. Clean holes mean smooth clip insertion, and smooth clip insertion means no cracked center pins.
Aligning and Securing the Front Flaps
Grab the correct front flap panel — remember the "FL" or "FR" label you identified during unboxing — and hold it up against the wheel arch to get a feel for the positioning before inserting any fasteners. The flap's mounting tabs should line up with the open clip holes, and the lower edge of the panel should sit flush against the body without bowing outward or curling inward. If your kit includes an alignment guide or template, position it first and use it as a reference.
Here is the full installation sequence, step by step:
- Turn the steering wheel fully toward the side you are working on to expose the inner fender liner. If you already did this during prep, confirm the wheel is still at full lock.
- Locate the existing factory push-pin clip positions along the lower fender liner. Most Juniper-specific kits reuse one or more of these mounting points, and your instruction card will indicate exactly which ones.
- Remove any factory push-pin clips that occupy the holes you need. Use the plastic trim removal tool to carefully pry them out — wedge the flat tip under the clip head, lever gently, and pull straight out. Avoid twisting or using metal tools, which can gouge the liner.
- Align the mud flap bracket or mounting tab with the exposed clip hole and the lower body panel edge. Hold the flap in its final position and visually confirm that the panel contour follows the body line. The top edge should tuck behind the fender liner, and the lower edge should rest against — or just barely off — the painted surface.
- Insert the new push-pin clips through the mud flap and into the fender liner holes. Start with the topmost clip to anchor the flap in position, then work downward. Press each clip firmly until you feel and hear a distinct click — that click confirms the center pin has expanded and locked the clip flush against the liner.
- If your kit includes self-tapping screws for supplemental attachment, pre-align the flap at the screw location and drive the screw gently using your Phillips-head screwdriver. Turn slowly and stop the moment the screw head sits snug against the flap surface. Overtightening cracks the fender liner plastic or strips the hole, turning a secure attachment point into a loose one.
- Confirm the flap sits flush against the body with no gaps, warping, or bowing. Run your fingers along the top edge where the flap meets the liner — it should feel smooth and tight, not raised or uneven.
Repeat this entire sequence on the opposite front wheel. Turn the steering wheel to full lock in the other direction, locate the mounting points, and secure the second front flap using the same method. Consistency matters — if one side required three clips, the other side should use the same three corresponding positions.
Checking Tire Clearance at Full Steering Lock
This step is non-negotiable, and it is the one that protects you from a costly mistake. A mud flap that looks perfectly positioned while the wheels point straight ahead can contact the tire when the steering wheel hits full lock — especially on a vehicle like the Juniper, where the tight wheel arch geometry leaves minimal margin between the tire sidewall and the fender liner.
Hop into the driver's seat and slowly turn the steering wheel all the way to the left. Get out and inspect the gap between the front left tire and the newly installed flap. You are looking for at least a finger's width of clearance between the tire sidewall and the closest edge of the mud flap. Then turn the wheel all the way to the right and check the same tire-to-flap gap on the right side. The principle mirrors what automotive fitment experts recommend when testing for tire rubbing on any aftermarket wheel or accessory: check clearance at full lock in both directions, because that is when components sit closest together.
If a flap contacts the tire at any point during lock-to-lock rotation, do not simply leave it and hope for the best. A rubbing mud flap wears the tire sidewall, generates a rhythmic scraping noise on every turn, and can eventually work itself loose from the vibration. Instead, remove the flap, slightly adjust its position — usually shifting it a few millimeters rearward or upward is enough — and reseat the clips. Test again. The goal is confident, zero-contact clearance in every steering position.
With both front flaps locked in, verified flush, and cleared for full steering range, the front half of the installation is complete. The rear flaps follow a similar logic but attach at different points along the wheel arch — and the mounting technique has a few nuances worth understanding before you reach for the next pair of panels.
Step 5 – Install the Rear Mud Flaps
The front flaps are secured and cleared for full steering range — nice work. Reaching for the rear pair might feel like repeating the same routine, but the rear wheel arches on the Juniper present a different mounting scenario. The attachment points sit in different positions, the flap panels themselves are shaped differently, and the relationship between the fender liner and the bumper fascia creates a unique installation dynamic that deserves its own walkthrough.
How Rear Installation Differs From the Front
On the front, you worked with the fender liner's rear edge and used the steering wheel trick to swing the tire out of your way. The rear wheels do not steer, so there is no shortcut for creating extra elbow room — what you see when you crouch behind the rear wheel is the space you have to work with. Fortunately, the Juniper's rear wheel arch opening is generous enough for comfortable hand access, especially when you position yourself at a slight angle behind the tire rather than directly beside it.
The bigger difference is where the flaps attach. Rear tesla mud flaps mount along the trailing edge of the rear wheel arch — the curved section that sweeps downward toward the rear bumper. On the Juniper specifically, the mounting points are located where the fender liner meets the rear bumper fascia, a junction that sits lower and further outboard compared to the front attachment points. Rear flaps also tend to extend further toward the ground because the rear tires throw a wider, more aggressive spray pattern that would otherwise coat the bumper, lower quarter panel, and even the vehicle behind you in wet conditions.
Because the rear flap panels are wider and longer than the fronts — a detail you confirmed during unboxing — double-check that you are holding the correct piece before you begin. Mounting a front panel on the rear arch means misaligned holes, inadequate coverage, and an immediate do-over.
Mounting the Rear Flaps Along the Bumper Edge
With the correct rear panel in hand, here is the step-by-step process:
- Position yourself behind the rear wheel and identify the mounting points along the rear fender liner. On the Juniper, look for the factory clip holes where the liner meets the rear bumper fascia — they are typically visible along the lower inner curve of the arch. A flashlight aimed upward into the wheel well makes them easy to spot.
- Clean the mounting area one more time. Even if you wiped everything down during the prep stage, road dust and brake particulate settle quickly. A fast pass with your microfiber cloth and isopropyl alcohol ensures the clip seats are debris-free.
- Remove any existing factory clips if the kit requires their positions. Use your plastic trim removal tool to gently pry each clip out — slide the flat edge under the flange, lever upward, and pull straight. Work slowly to avoid cracking the liner or scratching the bumper fascia edge. Set removed clips aside as spares.
- Align the rear mud flap panel with the mounting holes. Hold the flap in its intended position and confirm the mounting tabs line up cleanly with every clip hole before inserting any fasteners. The lower edge of the panel should follow the bumper's contour without bowing outward or leaving a visible gap against the body. Rear flaps often have a slight pre-curve molded into the panel to match the Juniper's bumper radius — let that curve guide your placement rather than forcing the panel flat.
- Seat the mounting tabs into the fender liner holes and press each push-pin clip until it clicks securely. Start with the uppermost clip to anchor the flap in position, then work your way down. Each click confirms the center pin has expanded and locked. If a clip does not press in smoothly, pull it back out, realign the flap slightly, and try again — forcing a misaligned clip risks snapping the pin or cracking the liner.
- For kits that include additional self-tapping screws along the bumper edge, pre-align the flap at the screw location and drive each screw in slowly with your Phillips-head screwdriver. Stop turning the moment the screw head sits snug against the flap surface. Watch the panel as you drive each screw — if the flap begins to warp or bow outward, back the screw out a quarter turn and reposition. A warped flap creates a gap that funnels debris behind the panel instead of deflecting it.
- Gently tug the installed flap — pull downward and outward with moderate force. The panel should feel solid and stationary with no wiggle, rotation, or looseness. If any clip shifts or pops partially out under the tug test, press it back in firmly or remove and reseat it entirely.
Repeat the entire process on the opposite rear wheel. Consistency between left and right matters for both symmetry and even protection — if the driver-side rear flap used three clips, the passenger side should mirror that exactly.
Ensuring a Flush Hidden Fit on the Rear
One of the standout advantages of Juniper-specific mud flap designs — especially hidden-profile kits — is how the rear panels tuck almost entirely behind the wheel arch. Unlike bulky universal-fit options you might see on trucks or even atv mud flaps designed for off-road vehicles, a properly fitted Juniper rear flap follows the body line so closely that it virtually disappears when viewed from a normal standing distance. The panel sits recessed against the bumper fascia, with only its lower deflection edge extending enough to catch spray and debris.
After both rear flaps are installed, step back about six feet and look at the rear quarter from the side. You should see a clean, continuous body line with no visible hardware, no protruding edges, and no awkward gaps between the flap and the bumper. If a corner lifts away from the body or an edge sticks out noticeably, a clip likely is not fully seated — crouch back down, identify the culprit, and press it home until you hear that confirming click.
All four flaps are physically attached to the vehicle, but the job is not finished yet. A structured verification routine and a short test drive separate a "probably fine" installation from one you can genuinely trust at highway speed, through car washes, and across every season of driving ahead.
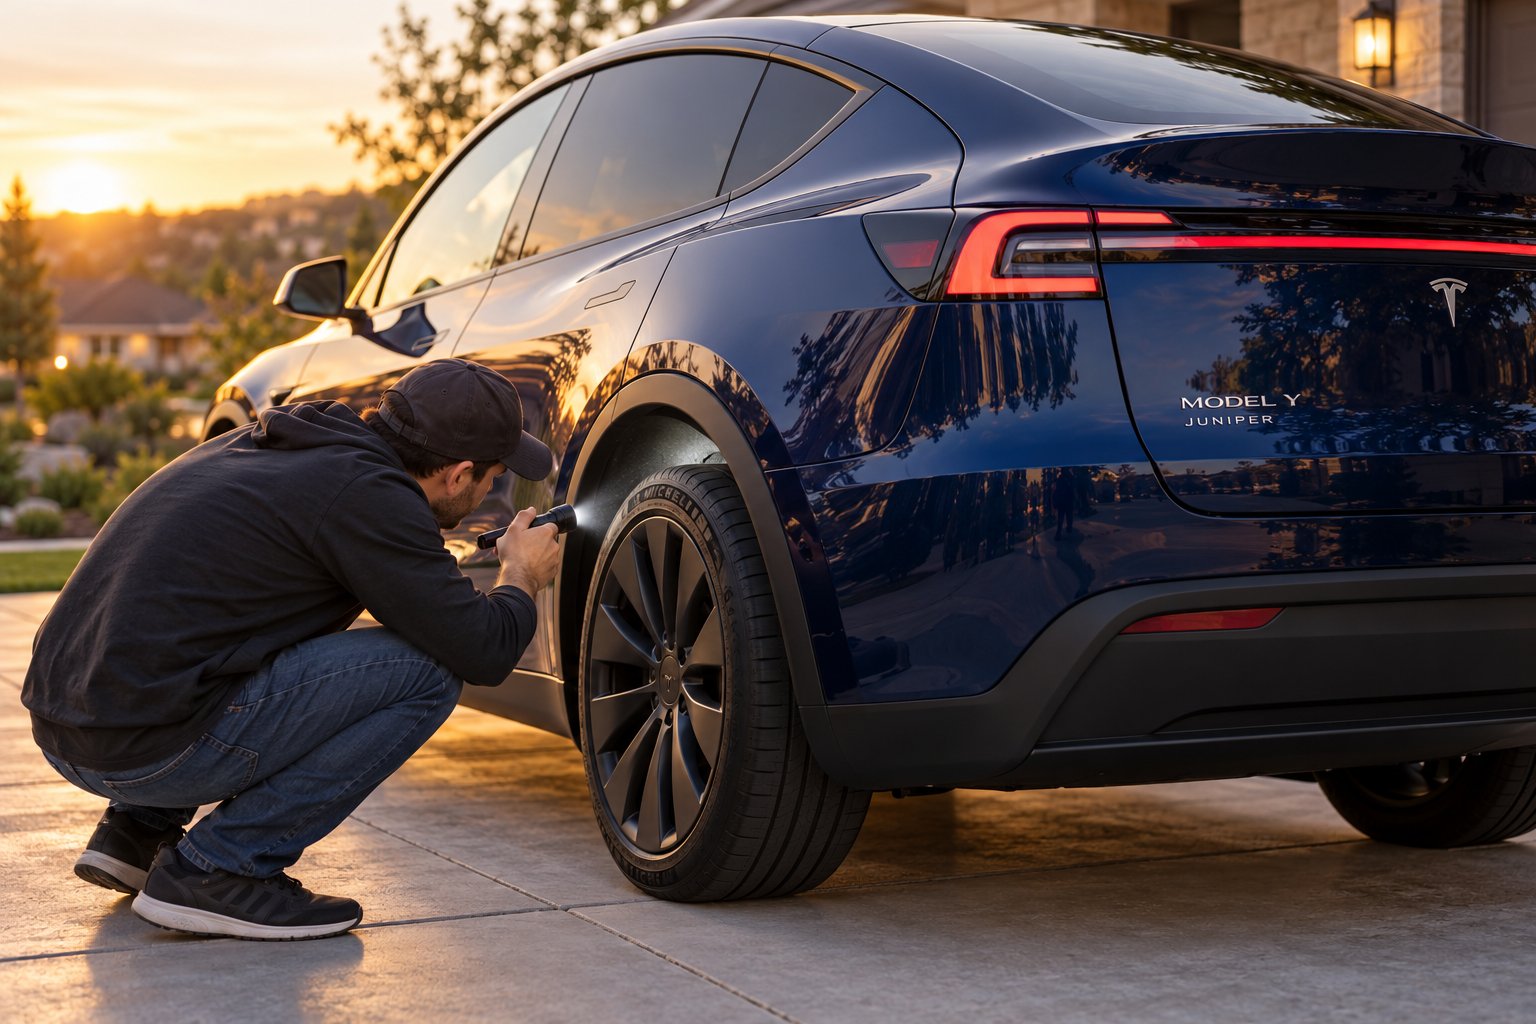
Step 6 – Verify the Installation and Complete a Test Drive
Four flaps are mounted, every clip felt like it clicked, and the whole project took less time than a coffee shop drive-through on a Saturday morning. Tempting as it is to call the job done and move on with your day, this is the exact moment where a little discipline separates a rock-solid installation from one that develops a mysterious rattle two days later. A structured post-installation check catches the subtle issues — a clip that is 90% seated, a flap edge that barely grazes the tire at full lock — before they turn into real problems on the road.
Visual and Physical Inspection Checklist
Grab your flashlight one more time and walk a slow loop around the entire vehicle. You are looking at the installation with fresh eyes now, not the task-focused tunnel vision of someone mid-install. Run through this checklist methodically, one item at a time:
- Walk around the vehicle and visually inspect all four flaps for consistent alignment. Stand at each corner and confirm the mud flap sits flush against the body panel. Both front flaps should mirror each other in height, angle, and how far the lower edge extends. Same for the rears. Asymmetry usually means one side has a clip that did not fully seat or a mounting tab that slipped during installation.
- Press each flap firmly with your hand. Push it inward toward the body, pull it gently outward, and wiggle it side to side. A properly secured flap feels solid — no movement, no play, no rattling. If a flap shifts even slightly under moderate hand pressure, at least one clip needs to be reseated. Better to catch it here than at 65 mph.
- Turn the steering wheel to full lock in both directions. Get into the driver's seat, turn the wheel all the way left, then get out and inspect the front left flap's clearance against the tire sidewall. Repeat for the right side with the wheel turned fully right. You already checked this during the front flap installation, but clips can shift fractionally during the rear install process as you leaned against the vehicle or bumped the front arch. A second clearance check takes thirty seconds and eliminates any doubt.
- Crouch down and confirm no clips are partially seated or protruding. A clip that looks fine from a standing angle can reveal itself as half-popped when you get eye-level with the wheel well. Shine your flashlight along every clip head — each one should sit perfectly flush against the fender liner surface with its center pin fully depressed. A protruding clip is a clip that will vibrate loose under road conditions.
If every item on this checklist passes, the physical installation looks solid. The real-world validation, though, happens in motion.
The Critical First Drive Test
Clip a set of mud flaps onto any vehicle in a quiet garage and everything seems perfect. Road vibration, wind buffeting, speed bumps, and hard turns introduce forces that a stationary inspection simply cannot replicate. That is why a short shakedown drive is an essential part of the mud flap installation process — not an optional victory lap.
Keep it simple: a 5- to 10-minute loop at moderate speed that includes a mix of real driving conditions. Hit a few turns — both gentle sweeps and tighter corners — so the front flaps experience lateral loading. Roll over a speed bump or two at normal residential speed to jolt the clips with vertical impact. Merge onto a highway on-ramp and hold cruising speed briefly to expose the flaps to sustained wind pressure and road vibration. During the drive, listen carefully with the radio off. Any new tapping, buzzing, or scraping sound that was not there before the install points directly to a flap or clip that needs attention.
Pull back into your driveway or garage and shut the vehicle off. The test drive itself is only half the step — the re-inspection that follows is where it pays off.
Re-Inspection After Your First Drive and Wash
Walk the same loop around the vehicle and repeat the physical checks from your pre-drive inspection. Press each flap, wiggle it, and verify zero movement. Crouch down and eyeball every clip head for flush seating. Pay special attention to any flap that is closest to a speed bump impact zone or a hard turn — these are the spots most likely to reveal a clip that was secure enough to pass a hand check but not quite locked in enough to survive real-world forces.
A post-drive re-check is essential — road vibration during the first drive can reveal clips that felt secure in the garage but need one more firm press to fully seat.
If a clip has shifted or partially popped, do not panic. Simply press the center pin back in until it clicks, or remove the clip entirely, realign the flap, and reseat it from scratch. This is a normal part of the process, not a sign of a defective product or a botched installation. Many experienced Tesla owners report reseating one or two clips after the initial shakedown, and those same clips never budge again once they have been given that final firm press under real load conditions.
Your first car wash after installation is another valuable checkpoint. Whether you prefer touchless or brush-style automatic washes, high-pressure water jets and spinning brushes test the flaps' grip in a way that driving alone does not. After the wash, do a quick walkaround and confirm every flap is still firmly in place with no edges peeling up and no clips dislodged by the water pressure. Properly installed, flush-fitting mud flaps handle car washes without snagging or loosening — but verifying it the first time through gives you peace of mind for every wash that follows.
With the installation verified in the garage, validated on the road, and confirmed through a wash cycle, your mud flaps are genuinely locked in for the long haul. The only thing that could undermine that confidence now is one of the common installation mistakes that trip up even careful DIYers — and knowing what those pitfalls look like makes them easy to avoid entirely.
Step 7 – Avoid These Common Mud Flap Installation Pitfalls
Even a straightforward project like this has a handful of traps that catch first-timers — and sometimes experienced DIYers who get overconfident. The difference between a flawless mud flap installation and one that rattles, scratches paint, or breaks a clip usually comes down to a single avoidable mistake. Knowing what these pitfalls look like before you encounter them is the fastest shortcut to a clean result. Every issue on this list has been reported by real Juniper owners in forums and owner groups, and every one of them has a simple fix.
The Seven Most Common Mud Flap Installation Mistakes
Think of this as a field guide to what can go wrong — and exactly how to prevent it from happening to you:
- Overtightening self-tapping screws. This is the number-one cause of cracked fender liners during mud flap installation. The Juniper's liner is made of relatively thin, flexible plastic. When you drive a self-tapping screw, it cuts its own threads into that material — and if you keep turning past snug, it either cracks the plastic around the hole or strips the newly formed threads entirely. Either way, the attachment point is ruined. The fix is simple: turn the screw slowly until the head sits flush against the flap surface and you feel noticeable resistance. Then stop. If the screw spins freely without gripping, you have already gone too far and will need to move to an adjacent mounting point or use a slightly larger-diameter screw if your kit includes one.
- Forcing push-pin clips that are misaligned. A properly aligned clip slides into its hole with firm but smooth hand pressure and rewards you with a clean click. If a clip resists, fights back, or requires you to hammer it with your palm, something is off — either the flap panel has shifted a few millimeters from its intended position, or the clip is slightly angled relative to the hole. Forcing it risks snapping the center pin or cracking the outer housing. Instead, pull the clip back out completely, reposition the flap, and try again. Patience here saves you from a broken fastener and a trip back to the manufacturer for replacements.
- Installing front flaps on the rear — or vice versa. They look deceptively similar when you are crouched on the garage floor with both pairs nearby. But as you confirmed during unboxing, front and rear panels differ in width, length, and mounting tab shape. Swapping them puts clip holes out of alignment and leaves coverage gaps exactly where you need protection most. Always verify the part label — FL, FR, RL, RR — or compare panel size before you press the first clip. A three-second label check eliminates a ten-minute redo.
- Skipping the cleaning step. Road grime, brake dust, and salt residue might seem harmless when they are just a thin film, but trapped grit between a mud flap and the body panel acts like fine sandpaper every time the flap flexes over a bump. Over weeks and months, that microscopic abrasion can dull or scratch the paint underneath — the exact damage mud flaps are supposed to prevent. Dirt inside a clip hole is equally problematic: it prevents the clip from seating fully, which leads to rattling and eventual loosening. A 60-second wipe-down with isopropyl alcohol and a microfiber cloth is all it takes to eliminate this risk entirely.
- Ignoring cold temperatures. Attempting the install when the ambient temperature dips below 50°F makes every plastic component stiffer and more brittle. Push-pin clips lose their flexibility, center pins resist expanding, and flap panels fight against conforming to the wheel arch contour. The result is cracked clips, broken mounting tabs, and a frustrating session that ends with damaged parts. If you cannot work in a heated garage, at minimum bring the kit and all clips indoors for 15 to 20 minutes before starting. Warm plastic bends; cold plastic snaps.
- Not checking tire clearance. A flap that looks perfectly positioned with the wheels pointed straight can contact the tire sidewall the moment you turn the steering wheel to full lock. That contact creates a rhythmic scraping noise, accelerates sidewall wear, and puts constant stress on the flap's mounting clips — all of which worsen over time. Always turn the wheel lock-to-lock after installing each front flap, visually confirming at least a finger's width of clearance at the closest point. If the flap brushes the tire, shift it a few millimeters rearward or upward and reseat the clips.
- Scratching paint with metal tools. Reaching for a flathead screwdriver to pop a stubborn clip feels instinctive, but metal edges and automotive paint are a terrible combination. A single slip gouges the clear coat or leaves a scratch line along the fender liner edge that is visible every time you look at the wheel well. Plastic trim removal tools exist specifically because they are softer than paint and trim surfaces — they provide the leverage you need without the damage risk. A quality set costs under ten dollars and lasts for years of DIY projects. There is no scenario where a metal screwdriver is the right choice for this job.
Every one of these mistakes shares a common thread: they happen when you rush. The entire installation takes 20 to 30 minutes when done correctly. Adding another five minutes of patience at each step costs you almost nothing and protects both the vehicle and the kit components from avoidable damage.
How to Safely Remove and Reinstall Flaps
Maybe you caught a mistake mid-install, or maybe the post-drive re-check revealed a flap that needs repositioning. Either way, removal is not something to stress about. When done with the proper tool, pulling the flaps off leaves no damage to the fender liner, body panel, or paint.
Here is the correct removal technique for push-pin clips: start by prying the center pin upward first. Use the tip of your plastic trim removal tool to gently lift the center pin until it pops up a few millimeters — this collapses the clip's expanding barbs and releases the grip inside the liner hole. With the center pin raised, slide the flat edge of the pry tool under the outer housing flange and lever the entire clip out of the hole. Pull straight and steady; do not twist or yank sideways, which can widen the hole or tear the liner edge.
For kits that use self-tapping screws, simply back the screws out with your Phillips-head screwdriver and set them aside. The small screw holes left in the fender liner are hidden inside the wheel well and do not affect the vehicle's appearance or structural integrity.
Once all fasteners are removed, the flap panel lifts away cleanly. Inspect the clip holes in the liner — if any look stretched or damaged from a forced clip, you may want to choose an adjacent mounting point when you reinstall. Reinsert clips into fresh, undamaged holes whenever possible for the strongest hold.
A clean removal also matters if you ever decide to switch to a different mud flap style, sell the vehicle, or return to the stock look. Properly removed flaps leave the Juniper in factory condition with no visible evidence that accessories were ever installed — a detail that matters for resale value and lease-return inspections.
When to Contact the Manufacturer for Help
Most mud flap installation issues are solvable in your driveway with a little troubleshooting. But a few situations warrant reaching out to the kit manufacturer directly rather than improvising a fix:
- A clip's center pin snapped during installation and you have exhausted any spare clips included in the kit.
- A mounting tab on the flap panel cracked or broke off, making it impossible to achieve a flush fit.
- The clip holes on the flap panel do not align with any factory mounting point on the Juniper's fender liner, suggesting a possible manufacturing defect or incorrect product shipment.
- The flap panel warps or bows noticeably even when all clips are properly seated — this can indicate a molding issue from production.
Reputable manufacturers typically ship replacement clips or panels quickly once you describe the issue. Avoid the temptation to substitute generic hardware-store fasteners for broken kit-specific clips. Mismatched clips may hold initially but lack the precise barrel diameter and expansion profile needed for a rattle-free, long-term fit in the Juniper's liner holes.
Steering clear of these pitfalls keeps the installation clean and the hardware secure. With the flaps locked in and verified, the real payoff starts the moment you drive through your first rainstorm, gravel road, or salt-treated highway — and that is where the long-term performance story gets interesting.

What to Expect After Installation in Every Driving Condition
The flaps are mounted, verified, and shakedown-tested. So what actually changes about daily life with your Juniper? Mud flaps are one of those accessories where the real value reveals itself gradually — not in a single dramatic moment, but in all the damage that quietly never happens. That first rainstorm, that first gravel detour, that first salt-treated highway merge in January — each scenario puts the flaps to work in a slightly different way, and each one reinforces why the 25 minutes you spent in the garage was time well invested.
Real-World Performance in Rain, Snow, and Gravel
Rain is the most immediate and visible test. Without mud flaps, the Juniper's tires act like high-speed water pumps, launching a rooster tail of road spray directly onto the lower body panels, rocker panels, and the vehicle trailing behind you. You have probably been on the receiving end of this — following an unprotected car on a wet highway and watching your windshield get coated every few seconds. With properly fitted flaps, that spray gets intercepted at the source. Water and road film hit the flap's deflection surface instead of your paint. You will notice cleaner lower doors and significantly less grime buildup along the rocker panels after wet commutes. Passengers in the car behind you benefit too, which is a courtesy that costs you nothing.
Snow and salt create a more insidious problem. Road salt does not just sit on the surface — it dissolves into a brine that clings to every crevice and accelerates corrosion on exposed metal and degrades paint finishes over time. The lower body panels and wheel arches are ground zero for salt accumulation because tire rotation flings brine directly into these areas at high velocity. Mud flaps act as a physical barrier that catches the bulk of this salt-laden spray before it reaches the body. According to industry experts, mud flaps shield the undercarriage and body from flying rocks, road salt, water, and other debris — and that shielding effect compounds over an entire winter season. The difference becomes obvious at your first spring detail: panels behind the flaps stay noticeably cleaner and free of the white salt crust that coats unprotected areas.
Gravel roads present the most dramatic protection scenario. Loose stones launched by spinning tires strike lower body panels and rear bumpers with enough force to chip paint through the clear coat in a single hit. These chips are not just cosmetic — each one exposes bare metal or primer to moisture and opens the door for rust down the line. Mud flaps catch the majority of these projectiles mid-flight, absorbing the impact with flexible material instead of letting your Juniper's paint take the hit. If you regularly drive unpaved county roads, construction zones, or even poorly maintained parking lots with loose aggregate, the stone-chip prevention alone justifies the cost of a quality kit many times over.
Highway driving at sustained speed introduces aerodynamic considerations. Will the flaps create drag, flap in the wind, or generate noise? With properly fitted hidden-profile flaps that tuck behind the wheel arch, the answer across all three is effectively no. These designs sit recessed against the body line, leaving almost no exposed surface for wind to catch. You will not notice a change in range, hear any buffeting, or see the flaps vibrating in your mirror at cruising speed. Bulky universal-fit alternatives with large exposed surfaces can behave differently — flapping like wings in crosswinds or humming at certain speeds — which is another reason fitment and profile matter as much as the material itself.
Car Wash Compatibility and Long-Term Durability
Your first car wash after installation doubles as a durability checkpoint, but it also raises a practical question: will the flaps survive repeated washes without snagging, peeling, or getting torn off? The answer depends entirely on the flap's profile and how securely it is mounted.
Hidden-profile designs that sit flush against the body and tuck behind the wheel arch handle both touchless and brush-style automatic washes without issue. There is simply no protruding edge for spinning brushes to catch or high-pressure jets to pry underneath. The flaps ride through the wash cycle the same way any other flush body panel does — unnoticed. Bulky, externally mounted flaps with exposed lower edges carry more risk. Brush-style wash systems can snag a protruding flap corner, and high-pressure water aimed upward into the wheel well can work under a poorly seated edge and stress the clips. If you use automatic washes frequently, a flush fit is not just an aesthetic preference — it is a functional requirement.
Hand washing remains the safest option for any vehicle with aftermarket accessories. As car care experts note, hand washes let you hit all the nooks and crannies around flares, bumpers, and mud flaps that automated systems miss entirely. A hand wash also gives you a built-in opportunity to inspect each flap's condition and clip security every couple of weeks — catching any loosening or wear before it becomes a problem.
Long-term durability depends on material quality and UV exposure. Most Juniper-specific flaps use high-density thermoplastic or polyurethane blends that resist cracking, warping, and UV degradation. Expect years of service under normal driving conditions. Visible cracking, tearing, or warping are the clearest signs that a flap has reached the end of its lifespan and needs replacement — but with quality materials, that timeline stretches well beyond the typical ownership period for most drivers.
Protecting Your Juniper Investment Season After Season
The value equation shifts depending on where you live and how you drive, but mud flaps deliver measurable protection in virtually every climate. Here is how the seasonal math breaks down:
- Northern and salt-belt climates — Mud flaps pay for themselves in paint protection over a single winter season. The reduction in salt spray on rocker panels, lower doors, and rear bumper fascia translates directly into preserved paint condition and lower detailing costs each spring. If you plan to sell or trade the Juniper within a few years, clean lower panels with no salt-etching or stone chips meaningfully support resale value.
- Rainy and coastal climates — Constant moisture accelerates the effects of road grime and micro-debris on painted surfaces. Flaps reduce the frequency and intensity of lower-body cleaning needed to maintain the finish, and they keep water spray from coating the rear windshield and trailing vehicles during every wet drive.
- Southern and dry climates — Even without snow or heavy rain, loose gravel, sand, and construction debris are common road hazards. Desert and rural roads kick up fine particulate that sandblasts lower panels over time. Mud flaps provide a year-round debris shield that is especially valuable on unpaved roads or during dust-season driving.
- Mixed-use and highway commuters — Daily interstate driving exposes the Juniper to a constant stream of small debris launched by surrounding traffic. Flaps quietly absorb impacts that would otherwise accumulate as micro-chips across the lower body over tens of thousands of miles.
Across every one of these scenarios, the common thread is passive, maintenance-free protection. Once installed, mud flaps require no adjustment, no cleaning routine, and no seasonal swaps. They simply work — deflecting spray, catching stones, and keeping the lower body cleaner than it would be without them.
For Juniper owners who want that protection without any visual compromise, CUTIM's Tesla Model Y Juniper Hidden Mud Flaps represent a purpose-built solution that checks every box discussed throughout this guide. The hidden-profile design maintains the Juniper's sleek factory lines while delivering year-round defense against road grime, water spray, and debris. The flush fit minimizes car wash snag risk, eliminates wind noise at highway speed, and preserves the clean aesthetic that drew most owners to the Juniper refresh in the first place. It is the kind of upgrade that disappears into the vehicle's design — and that is exactly the point.
Twenty to thirty minutes of your time, a handful of push-pin clips, and zero trips to the service center. That is all it takes to add one of the most practical protective accessories available for the Model Y Juniper. Your lower body panels will thank you the next time it rains, the next time you hit a gravel patch, and especially the next time you check your trade-in value and find paint that still looks the way it did the day you drove off the lot.
Frequently Asked Questions About Installing Mud Flaps on Tesla Model Y Juniper
1. Do pre-refresh Model Y mud flaps fit the Juniper?
No, pre-refresh Model Y mud flaps will not fit the Juniper correctly. Tesla redesigned the lower body lines, wheel arch geometry, and fender liner clip positions on the Juniper refresh, so older kits leave gaps, misaligned holes, and incomplete coverage. Always confirm that any mud flap product explicitly states compatibility with the Juniper variant before purchasing. Purpose-built options like CUTIM's Tesla Model Y Juniper Hidden Mud Flaps are engineered around the refreshed body lines and use the updated factory mounting points for a precise, flush fit.
2. Do I need to remove the wheels to install mud flaps on a Model Y Juniper?
No wheel removal is required. The Juniper's factory clip mounting points along the fender liner are accessible from outside the wheel well. For the front flaps, turning the steering wheel to full lock on the side you are working on swings the tire outward and exposes the inner liner. Rear wheel wells provide enough clearance to reach all mounting points by positioning yourself at a slight angle behind the tire. The entire four-flap installation uses basic hand tools and takes roughly 20 to 30 minutes on a flat driveway or garage floor.
3. Will mud flaps affect my Tesla Model Y Juniper's range or cause wind noise?
Hidden-profile mud flaps that tuck behind the wheel arch have virtually no impact on range, aerodynamic drag, or cabin noise at highway speeds. These designs sit recessed against the body line with almost no exposed surface for wind to catch. Bulky universal-fit flaps with large protruding edges may flap or hum in crosswinds, which is why choosing a low-profile, Juniper-specific design matters for both aesthetics and real-world driving performance.
4. Can I take my Tesla through an automatic car wash after installing mud flaps?
Yes, but the flap profile matters. Flush, hidden-profile mud flaps that sit tight against the body handle both touchless and brush-style automatic washes without snagging or loosening. There is no protruding edge for brushes to catch. Externally mounted or bulky flaps with exposed corners carry a higher risk of being pulled by spinning brushes or pressured by upward-aimed water jets. After your first post-installation wash, do a quick walkaround to confirm all clips remain seated and no edges have lifted.
5. What should I do if a push-pin clip breaks during installation?
Most Juniper-specific mud flap kits include one or two spare clips for exactly this situation. If you exhaust all spares, contact the manufacturer directly for replacements rather than substituting generic hardware-store fasteners. Mismatched clips may lack the precise barrel diameter and expansion profile needed for a rattle-free, long-term hold in the Juniper's fender liner holes. To prevent breakage in the first place, ensure the ambient temperature is above 50 degrees Fahrenheit before installing, since cold plastic becomes brittle and snaps more easily under pressure.