
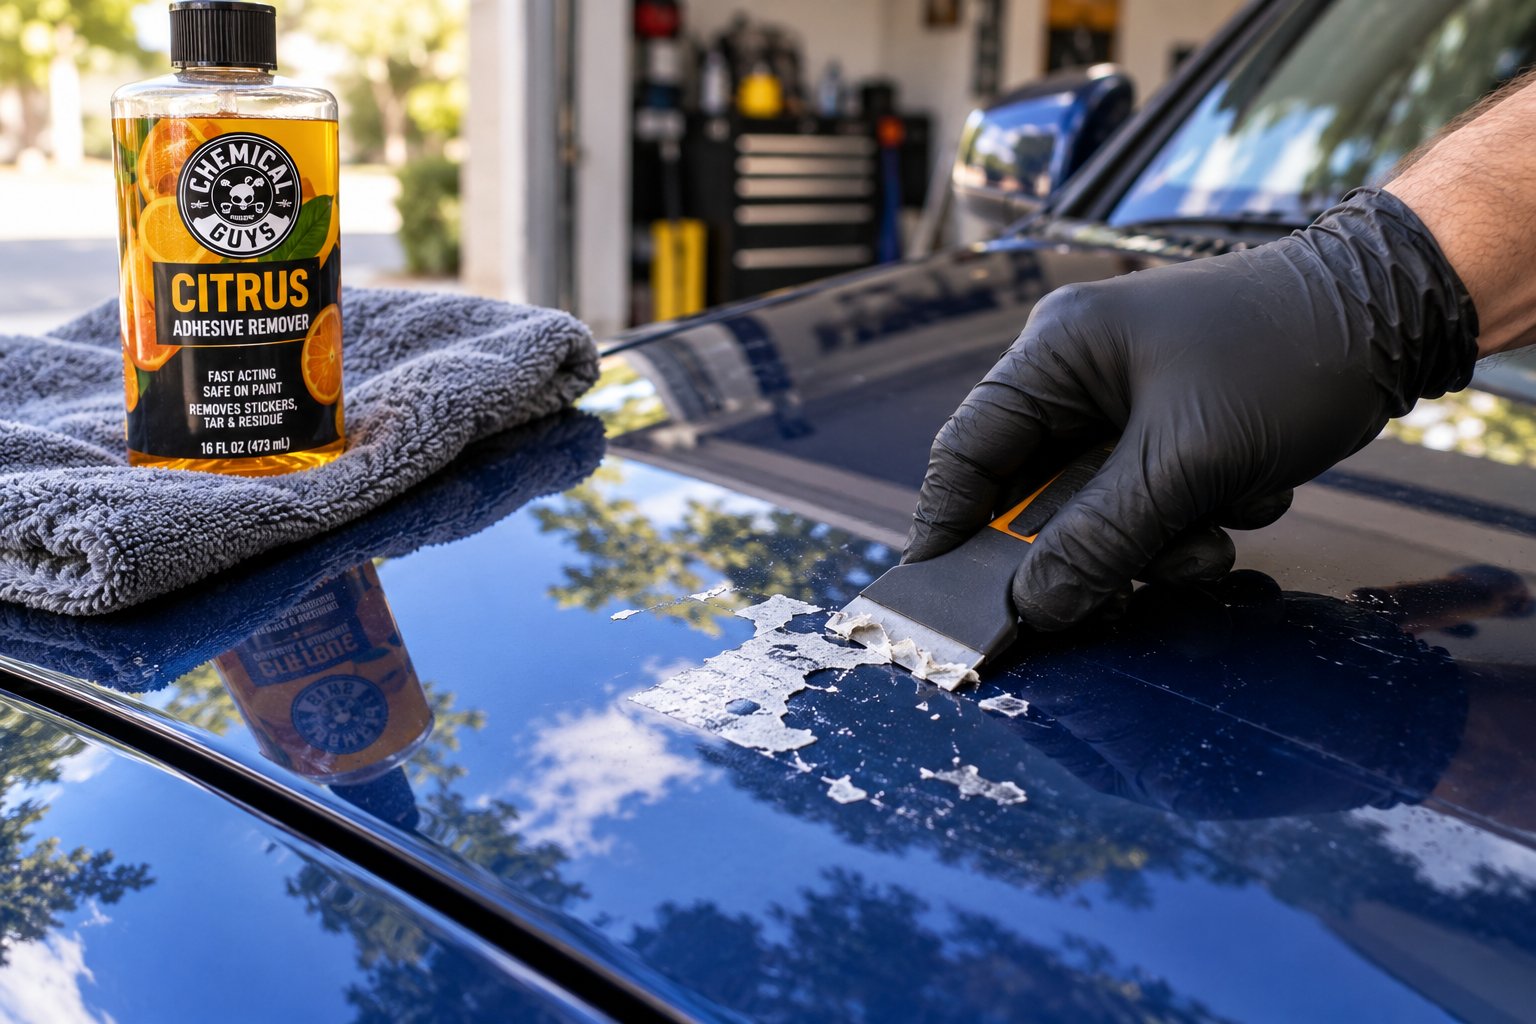
Identify the Adhesive Type and Paint Finish Before You Start
Imagine peeling off a dealer badge and watching a cloudy streak bloom across your hood. That damage did not come from the adhesive itself—it came from choosing the wrong removal method for the wrong surface. Figuring out how to remove adhesive from car paint safely begins well before you reach for a product or a scraper. It starts with two questions: what kind of adhesive are you dealing with, and what type of paint finish sits underneath it?
A technique that lifts bumper-sticker residue off a glossy clear coat in seconds can permanently alter a matte or satin finish. Thick foam tape left behind by a dealer badge demands heat and mechanical effort, while tree-sap spots respond best to targeted solvents. Treat them the same way and you are almost guaranteed to make the problem worse. Whether your vehicle is a sedan, truck or pickup, the adhesive-and-finish combination dictates every decision that follows.
Common Adhesive Types You Will Encounter
Not all sticky residue is created equal. Each adhesive family bonds differently and, as a result, releases differently. Pressure-sensitive adhesives (PSAs) form an instant bond with light contact and are the most common type you will find on vehicles—but they are far from the only one. Here are the adhesive categories you are most likely facing:
- Bumper-sticker residue — Pressure-sensitive adhesive that migrates deeper into clear-coat pores the longer the sticker stays in place. Fresh stickers peel cleanly; aged ones leave a stubborn film.
- Dealer-badge foam tape — Thick, double-sided foam tape with an aggressive acrylic or rubber-based adhesive. Heat-activated during application, making it far harder to remove than a simple sticker.
- Vinyl-wrap or decal adhesive — Designed for long-term outdoor durability with heat-activated, solvent-resistant bonding. Removal almost always requires sustained heat.
- Pinstripe tape — Thin, conformable tape with a pressure-sensitive adhesive that cures over years of sun exposure, often leaving a visible paint shadow underneath.
- Registration-sticker residue — Typically a light PSA, but because these stickers sit on glass or painted bumpers exposed to UV and rain, the adhesive can calcify into a brittle, flaky layer.
- Double-sided trim tape — High-strength acrylic adhesive engineered to hold body-side moldings and trim panels permanently. Among the toughest residues to remove without heat.
- Tree sap and tar — Not true adhesives but naturally occurring resins that chemically bond to paint surfaces. They require solvent dissolution rather than peeling or scraping.
Recognizing which category you are dealing with saves time and—more importantly—saves your paint from unnecessary chemical exposure.
Why Your Paint Finish Changes Everything
Two cars can wear the same color yet have radically different paint systems. The finish type determines how much solvent, heat, and abrasion the surface can safely tolerate. Skipping this assessment is like topping off fluids without knowing how to check oil level specifications for your engine—you might get lucky, or you might cause real harm. Five finish categories cover the vast majority of vehicles on the road:
- Standard clear coat (base coat/clear coat) — The most common modern system. A transparent protective layer sits over the color coat, offering solid resistance to mild solvents and light abrasion. Most adhesive-removal guides assume this finish, and most products labeled "paint safe" are tested against it.
- Single-stage paint — Color and gloss exist in one layer with no separate clear coat on top. Solvents and abrasion act directly on the pigmented paint, making aggressive chemicals and heavy scrubbing far riskier. Common on older vehicles and commercial fleets.
- Matte or satin finish — These finishes scatter light instead of reflecting it, producing their signature non-reflective appearance. Any polishing compound, wax, or aggressive clay-bar pass can create shiny spots that are essentially permanent without a full respray.
- Ceramic-coated surfaces — A ceramic coating adds a chemical-resistant sacrificial layer above the clear coat. It actually helps adhesive release more easily in many cases, but harsh solvents can degrade the coating itself, defeating the investment you made to protect the paint.
- Paint protection film (PPF) — A thermoplastic urethane film bonded over the clear coat. PPF often features a self-healing top layer that can be softened or damaged by strong solvents. Adhesive stuck to PPF usually responds well to warm water and gentle peeling alone.
Even well-intentioned car owners werecycling through product after product often miss this step entirely—grabbing whatever is under the sink without pausing to consider the surface beneath the residue. A quick finish check keeps you from turning a minor cosmetic issue into an expensive respray. You do not need a paint-depth gauge; simply knowing whether your vehicle has a standard gloss clear coat versus a matte wrap already narrows your safe options dramatically. If you recently opened a discount tire credit card to handle wheel upgrades, think of this identification step the same way—spending a moment on due diligence up front protects a much larger investment down the road.
With your adhesive type identified and your paint finish accounted for, the next logical move is assembling the right tools and products—and learning the one safety habit that matters more than any individual product choice.
Step 1 – Gather Your Supplies and Spot-Test Every Product
You know which adhesive you are facing and which paint finish sits underneath it. The temptation now is to grab the nearest bottle of solvent and start scrubbing. Resist that urge. The single most important safety habit in the entire removal process is not the product you choose—it is what you do before that product ever touches your paint. Gather everything you need first, then prove each product is safe on your specific finish through a simple spot test.
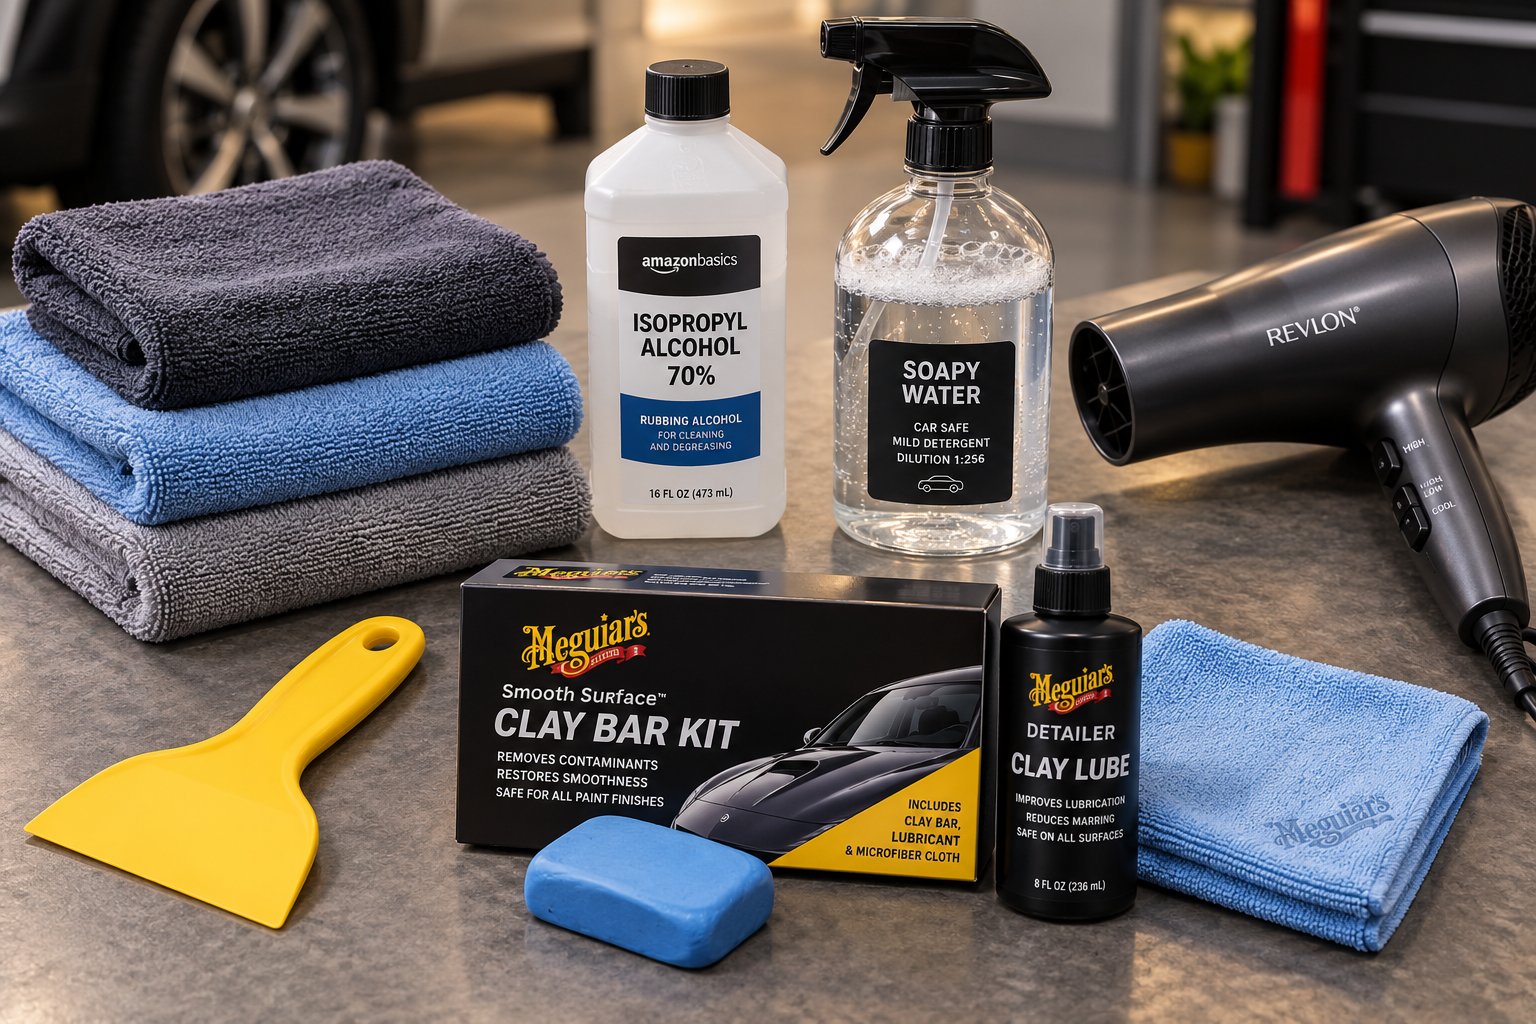
Essential Tools and Products Checklist
Having every item within arm's reach prevents mid-job scrambling that leads to shortcuts and mistakes. Here is what you should collect before you begin:
- Microfiber towels (at least four) — Dedicate separate towels for applying product, wiping residue, drying, and final buffing. Cross-contaminating a single towel spreads adhesive and grit back onto clean paint.
- Plastic scraper or old credit card — Your primary mechanical tool for lifting softened adhesive without scratching the finish.
- Heat gun or household hair dryer — Provides the controlled warmth needed to soften adhesive bonds before scraping. A hair dryer handles most sticker residue; a heat gun is necessary for thick foam tape and vinyl adhesive.
- Isopropyl alcohol (70 percent) — A low-risk solvent for light residue and an excellent surface prep agent after heavier products are used.
- Citrus-based adhesive remover such as Goo Gone — The go-to option for moderate residue on standard clear coat. Its d-limonene formula dissolves adhesive without the aggressive bite of acetone-based solvents.
- Detailing clay with lubricant — Catches the thin adhesive film that chemical removers often leave behind, restoring a glass-smooth surface.
- Car-wash soap (pH-neutral) — Used both for pre-cleaning the panel and for washing away solvent residue after removal.
- Spray bottle of water — Handy for quick rinses, diluting product if needed, and cooling a panel that has been under a heat gun too long.
You will notice one category conspicuously absent from this list: metal tools. Razor blades, putty knives, and flathead screwdrivers might seem like efficient scrapers, but they are a guaranteed way to gouge through your finish. The reason comes down to material hardness. Automotive clear coat registers roughly 2H to 4H on the pencil-hardness scale, while a plastic scraper or old credit card falls well below that threshold. Plastic flexes under pressure and glides over the surface; metal concentrates force into a fine edge and cuts through the clear coat like a chisel. Much like how you would inspect your braking system carefully before deciding how to check brake pads for wear, you want to evaluate your tools before pressing them against paint. The wrong choice causes damage that is invisible at first and expensive to fix later.
Quality matters here, but you do not need top-shelf milwaukee tools or specialty equipment. A hardware-store plastic scraper, a standard hair dryer, and a few clean microfiber towels will handle the vast majority of adhesive jobs on passenger vehicles.
How to Spot-Test Any Product Safely
Every adhesive remover—from a bottle of argos oil-based solvent to a citrus spray marketed as "paint safe"—deserves a spot test before it goes anywhere near a visible panel. Labels can be misleading, and paint systems vary. A product that performs flawlessly on a modern multi-layer steel body panel with fresh clear coat may react unpredictably on a decade-old single-stage finish that has been baking in the sun. Here is the exact procedure:
- Choose an inconspicuous area. A lower door jamb, the painted surface inside the fuel door, or the underside of a trunk lip all work well. You want real paint exposure without any visibility if something goes wrong.
- Apply a small amount to a clean microfiber cloth. Never pour or spray product directly onto the test area—applying it to the cloth first gives you precise control over how much solvent contacts the finish.
- Let it sit for 60 seconds. This simulates the dwell time you will use during actual removal. Shorter contact times can give a false sense of safety.
- Wipe away gently in one direction. Avoid circular motions, which can trap abrasive particles underneath the cloth.
- Inspect under direct light. Angle a bright LED flashlight or move the panel into sunlight and look for hazing, discoloration, surface softening, or any change in sheen compared to the surrounding paint.
If the test area looks identical to untreated paint, the product passes. If you spot even subtle cloudiness or texture change, set that product aside and try a milder alternative.
This test must be repeated for every new product you introduce—even if you just used a different adhesive remover on the same car five minutes ago. Automotive detailing communities broadly confirm that Goo Gone's original citrus formula is safe on standard clear coat, but individual results still vary based on paint age, previous repairs, and existing protection layers. A 60-second spot test is the cheapest insurance policy you will ever use.
With your supplies staged and every product verified as safe for your specific finish, the real work begins—and the most effective first move has nothing to do with chemicals. It starts with heat.
Step 2 – Soften the Adhesive Bond With Controlled Heat
Heat is not just a convenient trick—it is grounded in how adhesive polymers actually behave at the molecular level. Every pressure-sensitive adhesive on your car is built from long polymer chains that are tangled together and anchored to the paint surface through physical forces like van der Waals interactions. At room temperature, those chains are relatively stiff and locked in place, which is exactly why dried-on sticker residue resists your fingernail so stubbornly. Raise the temperature, though, and something measurable happens: the polymer chains gain kinetic energy, begin moving more freely, and lose their grip on the surface. Research on adhesive bond strength under thermal loading confirms that shear strength drops significantly as temperature increases—thermoplastic adhesives, the category most vehicle stickers and tapes fall into, are especially sensitive to heat. Understanding this principle means you are not blindly following a tip you read online; you can adapt the technique confidently with whatever heat source you have available.
Choose Your Heat Source and Set the Right Temperature
Two tools cover virtually every adhesive scenario you will encounter on a vehicle: a household hair dryer and a dedicated heat gun. They overlap in function but differ significantly in output, and choosing the right one depends on what you identified in Step 1.
- Hair dryer — Produces temperatures between roughly 100 °F and 140 °F at the surface when held 6–8 inches away. This range is sufficient for bumper-sticker residue, registration-sticker film, thin pinstripe tape, and most light pressure-sensitive adhesives. A hair dryer is also the safer default on dark-colored panels, where heat absorption is higher and paint discoloration risk increases.
- Heat gun — Capable of reaching 500 °F or more at the nozzle, a heat gun delivers the concentrated energy needed for thick foam-tape badges, double-sided trim tape, and vinyl-wrap adhesive. Because the output is far more intense, control matters. Always start on the lowest setting and increase only if the adhesive is not responding.
Regardless of which tool you pick, two rules keep you safe. First, hold the heat source 6–8 inches from the panel and keep it moving in slow, sweeping passes. Parking it in one spot creates a hotspot that can soften clear coat or cause visible discoloration—especially on black, dark blue, and deep red finishes that absorb infrared energy fastest. Second, work in 30-second intervals. Warm the area for half a minute, pause, test the adhesive with a fingertip or plastic scraper, and repeat only if needed. You are aiming for a surface temperature around 120 °F to 140 °F—warm enough that the adhesive feels tacky and pliable, but well below the threshold where clear coat starts to soften. If you do not own an infrared thermometer, a simple touch test works: the panel should feel very warm to the back of your hand but never too hot to hold your skin against comfortably.
Peel and Scrape While the Adhesive Is Warm
Timing is everything here. Adhesive that felt soft and cooperative five seconds ago can re-harden as the panel cools, so you want to work immediately after each heating interval. Start at the edge of the residue—wherever you can get underneath it—and position your plastic scraper at a shallow angle, roughly 20 degrees relative to the panel surface. This low angle lets the scraper glide beneath the adhesive layer rather than digging into the paint. Push forward in smooth, steady strokes, peeling the softened material away from the edge inward toward the center.
If the adhesive resists or begins to tear instead of lifting cleanly, stop scraping and reheat. Short bursts of warmth followed by gentle scraping are far safer than one prolonged blast of heat aimed at softening the entire patch at once. Prolonged high heat raises the panel temperature beyond the safe zone, while repeated short intervals keep the surface within a controlled range and give you multiple opportunities to check your progress.
Patience at this stage pays a direct dividend in the next step. Every bit of adhesive you lift mechanically with heat and a scraper is adhesive that will never need chemical contact with your paint. That means less solvent sitting on the finish, shorter dwell times, and a lower overall risk of hazing or discoloration from removal products.
Heat does the heavy lifting. The more adhesive you remove mechanically in this step, the less chemical contact your paint endures later.
Even with careful heating and scraping, most adhesive jobs leave behind a thin, stubborn film that refuses to budge with a plastic tool alone. That remaining layer is exactly where the right removal product earns its place—and choosing the wrong one can undo all the careful work you just finished.
Step 3 – Choose the Right Removal Product for Your Situation
That thin, stubborn adhesive film clinging to your paint after heat and scraping is exactly where chemical removers earn their keep. But reaching for the wrong bottle here is like filling your tank with the cheapest no-name fuel when your engine is tuned for top tier gas—you might get away with it, or you might create a problem that costs far more than the savings. The adhesive-remover market is crowded, and two products with nearly identical names can have radically different formulas and wildly different risk profiles on automotive paint. Understanding the chemistry behind each option is what separates a clean removal from a cloudy, hazed panel.
Citrus-Based vs. Solvent-Based Removers Explained
The most important distinction in this category comes down to active ingredients—and the difference can mean everything for your clear coat.
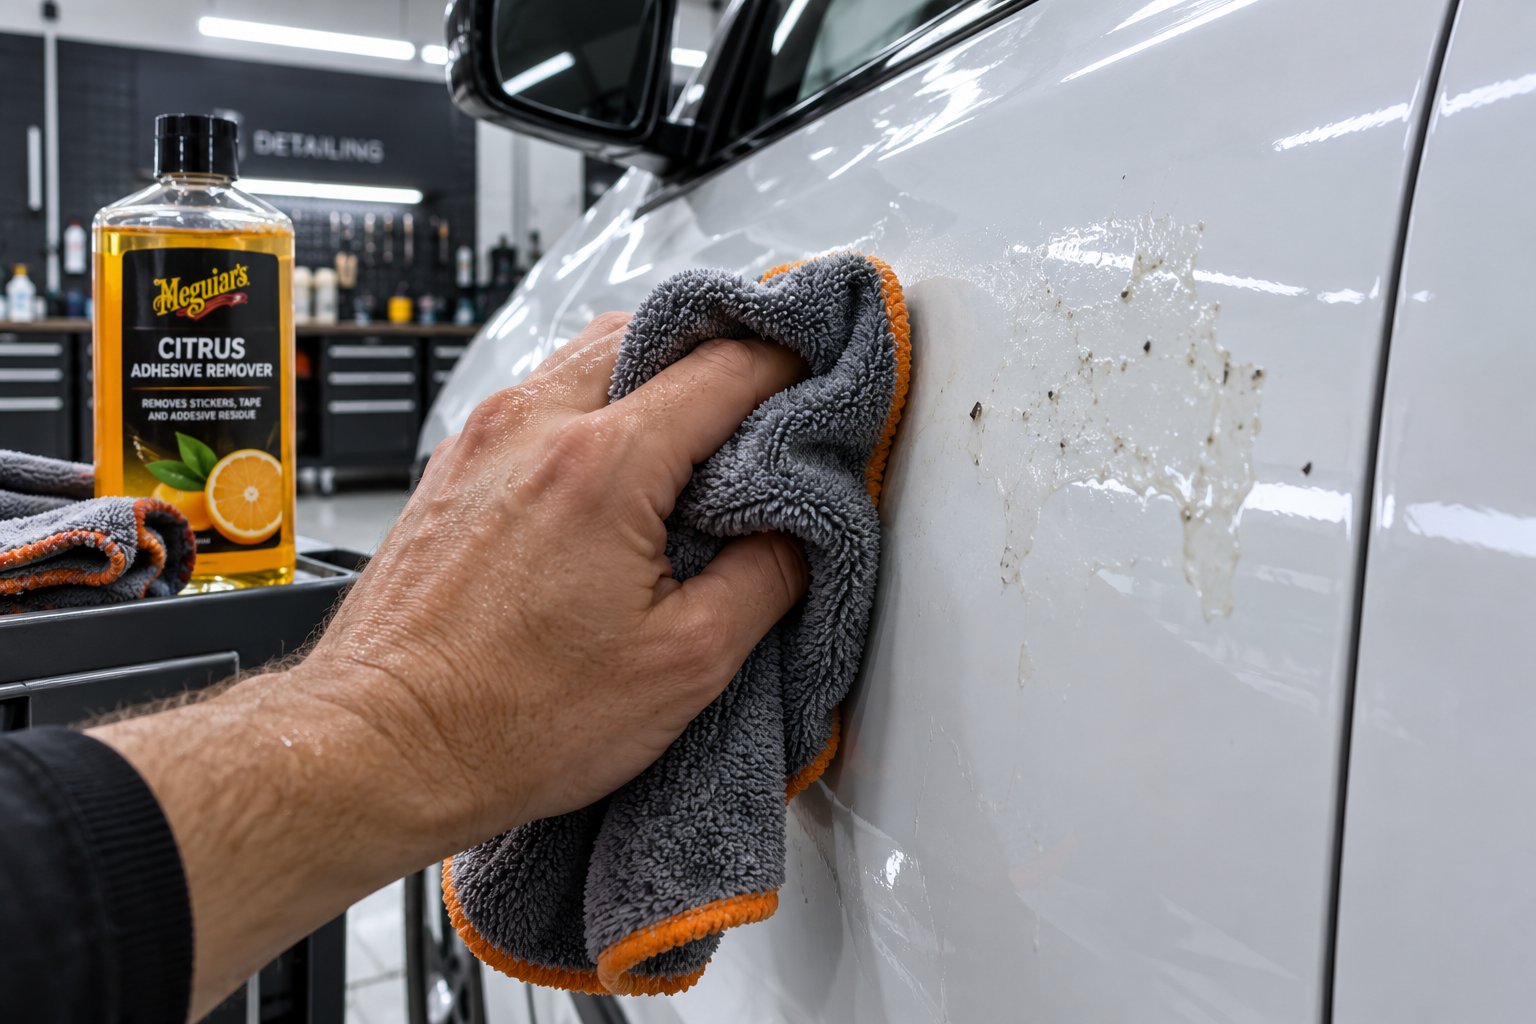
Goo Gone uses d-limonene, a citrus-derived solvent that dissolves pressure-sensitive adhesive residue at a relatively gentle pace. Adhesive-industry testing consistently classifies it as a mild citrus-based solution, and automotive detailing communities broadly regard it as safe on standard base coat/clear coat systems. It excels at sticker residue, light tape adhesive, and registration-sticker film—the everyday messes most car owners encounter. Its limitation is speed: thick foam-tape adhesive and cured vinyl-wrap residue often need something stronger or far longer dwell times.
Goof Off Professional Strength, by contrast, contains acetone (15–40 percent) and xylene (7–13 percent)—aggressive solvents designed for industrial-strength messes like dried paint and heavy-duty adhesive. On automotive clear coat, prolonged contact with acetone or xylene can soften, haze, or even dissolve the finish. This is not a product to use casually on painted panels. Reserve it strictly for situations where every milder option has failed and you are prepared to polish the area afterward.
Between those two extremes sit several other options worth knowing:
- Isopropyl alcohol (70 percent) — Effective on light residue and registration-sticker adhesive with very low risk to any modern finish. It evaporates quickly, leaves no oily film, and doubles as an excellent surface-prep wipe after using other products.
- WD-40 — A petroleum-based penetrant that loosens adhesive bonds and works surprisingly well on tar spots and thin residue layers. The trade-off: it leaves an oily film that must be washed off with car-wash soap immediately to prevent streaking and potential clear-coat softening from prolonged petroleum contact.
- 3M Adhesive Remover — Formulated specifically for automotive paint by a company whose expertise in adhesive technology extends across everything from badge-mounting tape to paint protection film. Real-world testing on forums confirms it handles double-sided foam tape and 3M trim-tape residue with high paint safety—exactly the kind of job where Goo Gone often falls short. If you have ever searched for a rockauto discount code to save on replacement trim parts, you already know how tenacious OEM mounting adhesive can be.
Product Comparison by Adhesive Type
Sorting through five different products and dozens of adhesive scenarios is easier with a structured reference. The table below matches each remover to the adhesive types it handles best, along with the paint-safety profile and precautions you need to keep in mind.
| Product Name | Best For | Paint-Safety Level | Contact Time | Key Precaution |
|---|---|---|---|---|
| Goo Gone (Original) | Sticker residue, light tape adhesive, registration-sticker film | High | 30–60 seconds | Leaves oily citrus residue; wash panel with soap and water after use |
| 3M Adhesive Remover | Badge foam tape, double-sided trim tape, vinyl-wrap residue | High | 60–90 seconds | Use in well-ventilated area; avoid pooling on horizontal surfaces |
| Isopropyl Alcohol (70%) | Light residue, registration stickers, surface prep after heavier removers | Very High | 15–30 seconds | Minimal risk; may need multiple applications on thicker residue |
| WD-40 | Tar spots, tree-sap edges, thin residue layers | Moderate | 30–60 seconds | Petroleum film requires immediate soap-and-water wash to prevent streaking |
| Goof Off (Professional Strength) | Last-resort industrial adhesive, dried paint splatter | Low | 15–30 seconds max | Contains acetone and xylene; can haze or soften clear coat with prolonged contact |
Notice the pattern: the more aggressive the solvent, the shorter the safe contact window. Goof Off can dissolve stubborn industrial adhesive in seconds, but those same seconds are eating into your clear coat. Goo Gone and 3M Adhesive Remover give you a much wider margin of safety—more dwell time, less risk—which is why they belong at the top of your decision tree for automotive work.
Application Technique for Best Results
Even the safest product can cause damage if applied carelessly. The saturate-and-dwell method keeps solvent contact controlled and effective:
- Apply product to a microfiber cloth, not directly to the paint. Pouring or spraying remover onto the panel lets it run into seams, pooling in areas you cannot see and dwelling far longer than intended. A saturated cloth gives you precise coverage.
- Press the cloth against the residue and let it dwell for 30–90 seconds, depending on adhesive thickness. Thin sticker film softens in about 30 seconds with Goo Gone; thick foam-tape residue may need a full 90 seconds with 3M Adhesive Remover. Resist the temptation to scrub during this window—let the chemistry do the work.
- Wipe in one direction only. Straight, overlapping passes lift dissolved adhesive off the surface cleanly. Circular scrubbing smears residue back into the clear coat and increases the chance of micro-scratches—the same reason detailers avoid swirl-inducing motions when polishing.
- Reapply rather than press harder. If residue remains after the first pass, add fresh product to a clean section of the cloth and repeat the dwell cycle. Additional chemical contact is almost always safer than additional mechanical force. Think of it like replacing a clogged pcv valve instead of forcing air through a restricted system—working with the process is more effective than fighting against it.
A final note on product residue: every chemical remover—citrus-based or otherwise—leaves something behind on the paint surface, whether it is an oily film, solvent traces, or loosened adhesive particles. That residue can bond to the finish if left in place, which is why the very next step in this process exists. Some of it washes away with soap and water, but the thin, embedded adhesive layer that stubbornly clings even after solvents have done their best? That is where a completely different tool takes over—one that works mechanically at the surface level without any chemical interaction at all.
Step 4 – Lift Stubborn Residue With a Detailing Clay Bar
Chemical removers dissolve the bulk of the adhesive, but run your fingertips across the treated panel and you will likely feel it—a faint, gummy texture that no amount of reapplication or wiping seems to eliminate. That thin residual film sits partially embedded in the microscopic texture of your clear coat, bonded just tightly enough that liquid solvents slide over it instead of lifting it away. This is exactly the gap a detailing clay bar fills, and it is the reason professional detailers treat clay decontamination as a non-negotiable step between chemical cleaning and paint correction.
Why a Clay Bar Succeeds Where Solvents Stop
A clay bar does not dissolve anything. Instead, it works through a mechanical shearing action—fine, uniformly pulverized abrasives blended into the synthetic clay physically abrade contaminants that protrude above the paint surface, snapping them free without cutting into the clear coat itself. Imagine dragging a soft eraser across a pencil mark on glass: the eraser catches and lifts the graphite while the glass stays perfectly intact. Detailing clay operates on the same principle, and the tacky nature of the clay traps the sheared-off particles so they are not redeposited onto the finish.
This makes clay ideal for the exact problem solvents leave behind. A citrus-based remover like Goo Gone can break down the bulk adhesive polymer, but the ultra-thin film that remains is often too shallow for a solvent to penetrate effectively and too bonded for a microfiber cloth to wipe away. Clay bridges that gap—mechanically removing what chemistry cannot reach. It is also why automotive detailing professionals routinely clay a vehicle before polishing, waxing, or applying a ceramic coating; contaminants like brake dust, tar, and—yes—residual adhesive all respond to the same shearing mechanism. Whether you are clearing leftover sticker gunk or prepping a panel after using a fuel injector cleaner that dripped onto the fender, clay handles surface-bonded contamination that washing alone will never touch.
Proper Clay Bar Technique for Adhesive Residue
Clay is forgiving, but it is not foolproof. Skipping the prep or using the wrong motion can introduce the very scratches you have spent four careful steps avoiding. Here is the method that keeps the process safe and effective:
- Wash and dry the panel first. Even a thin layer of loose grit sitting on the surface will get trapped between the clay and the paint, acting like sandpaper under pressure. Use pH-neutral car-wash soap, rinse thoroughly, and dry with a clean microfiber towel. This step is non-negotiable—think of it the same way you would never skip cleaning a throttle body cleaner's nozzle before spraying it into a sensitive engine component.
- Knead the clay into a flat patty. Tear off a section roughly the size of a golf ball, then flatten it between your palms until it is about four to five inches across. A thin, wide patty maximizes surface contact and makes contaminant pickup more efficient.
- Spray clay lubricant generously. Mist the panel section and the face of the clay patty. Lubricant is what allows the clay to glide—without it, the clay grabs the paint and drags, which creates marring. Dedicated clay lubricants from reputable detailing brands wipe off cleanly, but in a pinch, a quick-detailer spray works too. Car and Driver's clay-bar guide recommends keeping the surface well-lubricated throughout the entire process.
- Glide the clay in straight back-and-forth motions. Work in parallel passes across the residue area—never in circles. Circular motions concentrate pressure on the same spot repeatedly, increasing the risk of swirl marks. Straight-line passes distribute force evenly. Use light pressure and let the abrasives in the clay do the work; pressing hard does not speed up the process but does increase the chance of marring.
- Fold and re-knead when the clay surface looks dirty. After a couple of passes, flip the patty over and inspect it. You will likely see a brownish or yellowish film—that is the adhesive residue the clay just removed. Fold the contaminated surface into itself, twist the clay like taffy, and re-knead a fresh patty. Using a dirty clay face risks pressing captured contaminants back into the paint.
- Wipe the panel with a clean microfiber towel. Remove all lubricant residue and then run your fingertips across the treated area.
If the clay catches or drags, add more lubricant immediately—dragging dry clay across paint creates the scratches you are trying to avoid.
For readers who have never used a clay bar before, the result is unmistakable. A properly clayed panel feels glass-smooth under your fingertips—no drag, no grit, no subtle tackiness. If you still detect rough spots, spray more lubricant and make another pass over the area. When the clay glides effortlessly and your fingers confirm a perfectly slick surface, every trace of embedded adhesive residue is gone.
One critical safety note: if you drop the clay bar on the ground, throw it away immediately. The tacky surface will pick up grit, sand, and micro-debris that no amount of kneading can safely bury. Using a contaminated bar is a fast track to scratches that only machine polishing can remove—a far more expensive fix than a replacement bar of clay.
With the adhesive fully removed and the surface restored to a smooth, contaminant-free state, one question remains: does your specific paint finish need any special consideration before you move on to polishing and sealing? The answer depends entirely on whether you are working with standard clear coat, matte paint, a ceramic coating, or protective film—and getting it wrong at this stage can undo everything you just accomplished.
Step 5 – Adjust Your Method for Special Paint Finishes
Standard glossy clear coat tolerates the full sequence you have followed so far—heat, scraping, solvent, clay—with a comfortable margin of safety. Not every finish shares that resilience. A matte-wrapped Mercedes C43 AMG, a ceramic-coated daily driver, or a panel already shielded by paint protection film each reacts differently to the same tools and chemicals. Skipping this finish-specific check is where careful, methodical work can unravel in seconds.
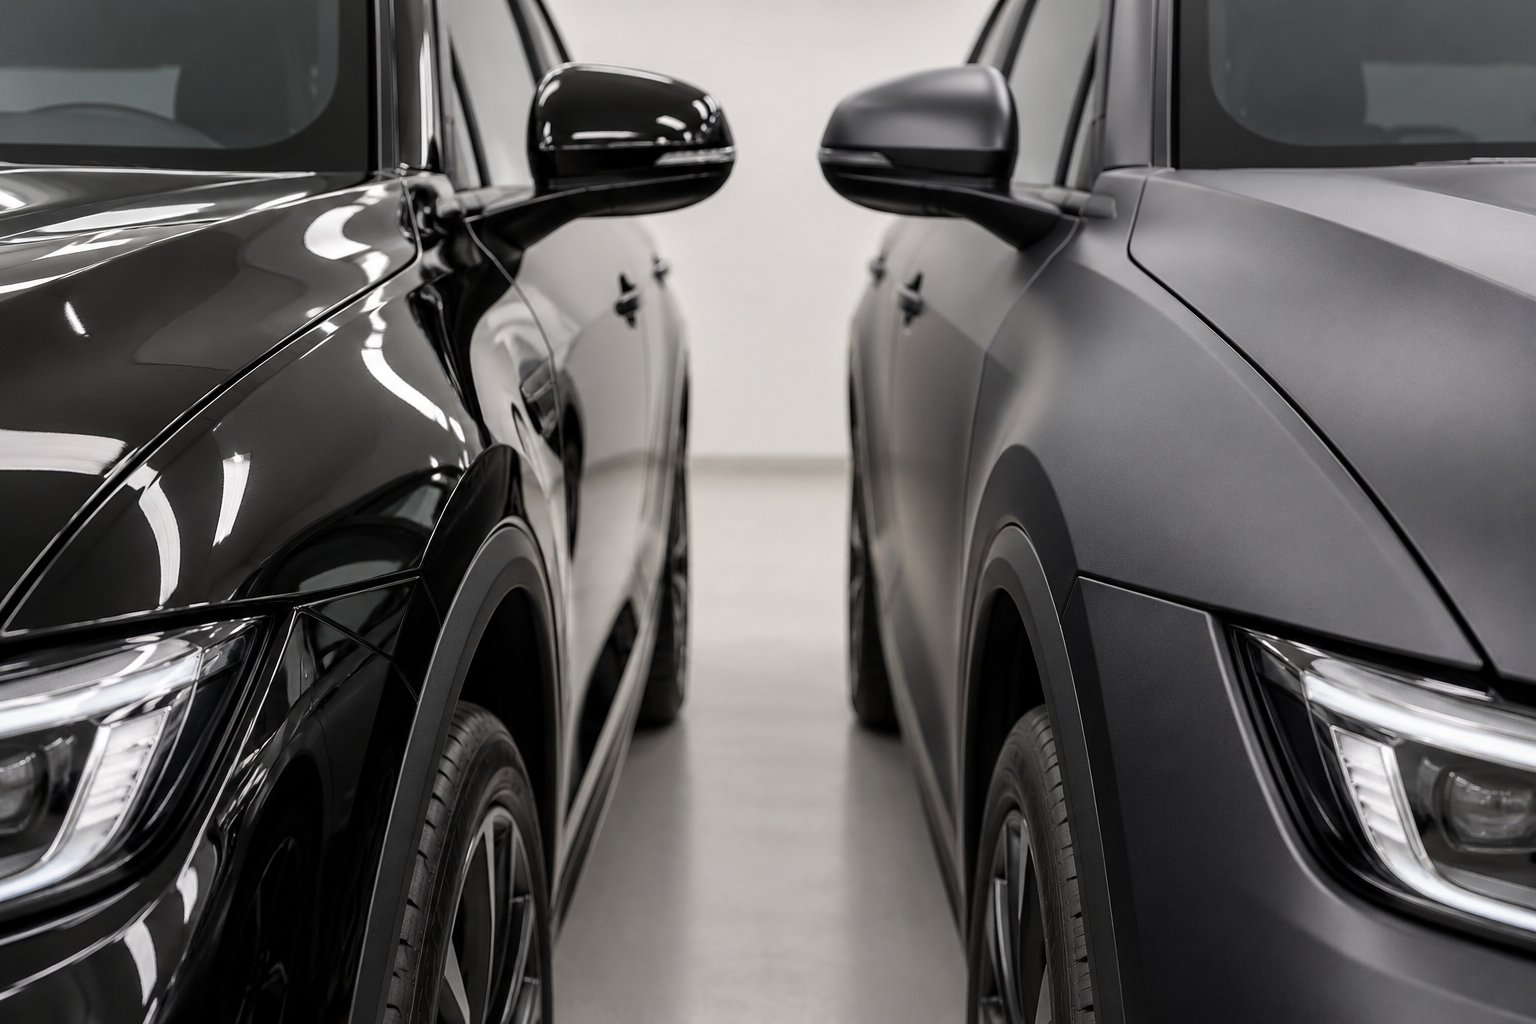
Matte and Satin Finishes Require Zero Abrasion
Matte and satin paints achieve their flat, non-reflective look by scattering light across a textured surface rather than bouncing it back in a uniform direction. That texture is extremely fragile. Unlike glossy clear coat, which can absorb a light polish and still look uniform, a matte finish has no thick protective layer to buffer against abrasion. Run a polishing compound, a cutting pad, or even an aggressive clay-bar pass over matte paint and you will create localized shiny spots that stand out like fingerprints on a chalkboard—and they do not buff out.
Your safest approach on matte or satin surfaces is isopropyl alcohol (70 percent) applied to a clean microfiber cloth with extremely light, straight-line pressure. Let the alcohol dwell for 15–30 seconds and wipe gently in one direction. Skip the clay bar entirely unless you are using a product specifically formulated for matte finishes, and never apply wax, glaze, or any product designed to enhance gloss. If the adhesive resists this conservative approach, the honest recommendation is to stop and consult a professional detailer rather than escalate to harsher methods that will permanently alter the sheen.
Ceramic-Coated and Film-Protected Surfaces
Ceramic coatings actually work in your favor during adhesive removal. The hydrophobic, chemical-resistant barrier they create above the clear coat prevents adhesive from migrating into the paint's pores the way it does on uncoated surfaces. In many cases, sticker residue on a ceramic-coated panel lifts off with nothing more than warm water, a microfiber cloth, and minimal effort.
The catch is the coating itself. Harsh solvents—acetone, xylene, even concentrated citrus removers left to dwell too long—can degrade or strip the ceramic layer you paid to have applied. Stick to the coating manufacturer's approved maintenance products or plain isopropyl alcohol, and keep dwell times short. If you recently invested in a professional ceramic application as part of a broader tune tune up of your vehicle's exterior protection, the last thing you want is an aggressive adhesive remover undoing that investment.
For panels already covered with paint protection film (PPF), the approach is even gentler. Most modern PPF features a self-healing top layer—a thermoplastic urethane surface that repairs minor scratches when exposed to warmth. Aggressive solvents can compromise that self-healing chemistry, and abrasive tools can create permanent marks that the film cannot recover from. The good news is that adhesive stuck to PPF rarely needs heavy intervention. Warm water and patient, gentle peeling usually handle the job, since the film's smooth surface prevents the deep bonding that makes adhesive so tenacious on bare clear coat.
When to Call a Professional Detailer
Transparency builds more trust than pretending every scenario is a weekend DIY project. Some adhesive situations genuinely call for professional equipment and experience. Consider handing the job off to a trained detailer if you are facing any of these conditions:
- Large-area vinyl wrap removal on older paint. Aged paint underneath a wrap that has been in place for years may have oxidized unevenly. Pulling the wrap can lift weakened clear coat—something a detailer can assess and manage with proper lighting and paint-depth gauges.
- Adhesive embedded in single-stage paint. Without a separate clear coat to act as a buffer, every solvent and scraping motion acts directly on the pigmented layer. A detailer experienced with classic cars and commercial fleet finishes knows how to dissolve the adhesive without stripping color. If you are buying an older vehicle and a free carfax report reveals previous bodywork or a respray, single-stage paint is a real possibility worth confirming before you start.
- Any situation where your spot test shows surface damage. Hazing, discoloration, or soft spots during the test you ran back in Step 1 are clear signals that your paint system is more vulnerable than average. Pushing forward with DIY removal at that point is a gamble with poor odds.
- Matte finishes with heavy adhesive deposits. The margin for error is simply too thin for trial and error on a surface that cannot be polished back to uniform appearance.
Knowing when to step back is not a failure—it is the same judgment call that keeps you from tackling a complex engine tune tune up without the right diagnostic tools. A professional detailer with proper lighting, paint-thickness meters, and finish-specific products can handle delicate removals for a fraction of what a respray costs.
Whether you completed the removal yourself on a forgiving glossy panel or handed it off to a professional for a tricky matte finish, the adhesive is now gone. The surface underneath, however, has been through a process—heat exposure, solvent contact, mechanical shearing—and it needs attention before you can consider the job truly finished.
Step 6 – Restore and Seal the Paint After Adhesive Removal
The adhesive is gone. The panel feels smooth. You might be tempted to close the hood and call it a day—but the area you just treated has been through a gauntlet of heat, solvent contact, and mechanical abrasion. Even when every step was executed carefully, the exposed paint is now in a vulnerable state: stripped of whatever incidental protection the old adhesive ironically provided, potentially carrying faint surface marks from scraping and clay work, and fully exposed to UV radiation, moisture, and airborne contaminants for the first time in months or years. Walking away without restoring and sealing the panel is like scrubbing a catalytic converter cleaner through an exhaust system and never reassembling the heat shields—you solved one problem and left a new one wide open.
Wash, Decontaminate, and Inspect the Panel
Every solvent, lubricant, and remover you used in the previous steps has left traces on the surface—citrus oil from Goo Gone, petroleum residue from WD-40, clay lubricant film, or loosened adhesive particles smeared into micro-crevices. A thorough contact wash removes all of it and gives you a genuinely clean surface to evaluate.
Use a pH-neutral car-wash soap, a clean wash mitt, and fresh water. Wash only the treated panel and the surrounding area, rinse completely, and dry with a dedicated microfiber drying towel. Avoid waterless wash sprays or rinseless products here—you want actual water volume to flush out any solvent residue trapped in panel gaps and body-line seams.
With the panel clean and dry, grab a bright LED work light or move the car into direct sunlight. Inspect the treated area at multiple angles—straight on, at a shallow 15-degree glancing angle, and from below looking upward across the reflection. You are looking for three things:
- Remaining adhesive film — Appears as a slightly tacky or hazy patch that catches light differently from the surrounding paint. If you spot any, repeat the clay-bar step from the previous section before proceeding.
- Micro-scratches — Fine, hair-thin lines visible under direct light, often introduced during scraping or clay work despite careful technique. These are almost always within the clear coat and correctable with polish.
- Hazing or cloudiness — A dull, milky appearance in the treated zone compared to the surrounding finish. This can result from brief solvent interaction with the clear coat or from residue that was not fully removed during washing.
This inspection step is not optional. Skipping it means you might seal contamination or damage underneath a layer of wax, locking in problems that become progressively harder to fix later. Think of it the same way you would never season a cast-iron pan without first confirming the surface is completely clean—what you seal over becomes part of the finish.
Polish Away Haze and Light Scratches
Here is the reality most adhesive-removal guides leave out: even a careful removal process frequently leaves behind light hazing or fine scratches visible under direct light. The scraping, the solvent dwell, the clay passes—each one introduces a small amount of surface stress. The good news is that these marks are almost always shallow enough to correct with a simple hand polish, no machine required.
Reach for a finishing polish, not a cutting compound. The distinction matters. Rubbing compounds use coarse abrasives designed to level deep scratches and heavy oxidation—far more aggression than post-adhesive hazing calls for. A finishing polish contains much finer abrasives that gently refine the surface, restoring clarity and gloss without removing unnecessary clear coat. If the only damage present is light haze from solvent contact or faint scratches from clay work, a finishing polish is all you need.
Apply a small amount of finishing polish to a foam applicator pad—about the size of a dime for each six-inch section. Work the polish into the paint using overlapping straight-line passes with moderate, even pressure. Avoid circular buffing motions; straight lines distribute abrasion evenly and prevent the swirl marks you just spent five steps avoiding. After working the polish until it turns hazy and nearly transparent, buff it off with a clean, dry microfiber towel. Flip the towel frequently to ensure you are always buffing with a fresh surface.
Inspect the area again under your LED light or in direct sunlight. If the haze is gone and the treated zone matches the gloss level of the surrounding paint, the correction is complete. If faint marks remain, a second pass with the same finishing polish typically handles them. Professional detailers emphasize starting with the least aggressive approach and increasing only when needed—a philosophy that applies perfectly here, where the goal is refinement rather than heavy correction.
Seal the Paint to Lock In Your Work
Polishing restores the surface, but it does not protect it. The area you just treated has been stripped bare—no wax, no sealant, no residual coating of any kind. It is now more susceptible to UV degradation, water spotting, bird-dropping etching, and environmental contamination than any other panel on the vehicle. Sealing the paint is what closes the loop and ensures your work lasts.
You have two main options, and either one works well:
- Carnauba wax — Delivers a warm, deep gloss with natural UV-filtering properties. Natural carnauba formulas lightly cleanse remaining surface marks while depositing a hydrophobic protective layer in a single wipe-on, wipe-off application. Ideal if you want a rich, wet-look finish and do not mind reapplying every six to eight weeks.
- Synthetic paint sealant — Uses polymer-based chemistry to bond to the clear coat and provide longer-lasting protection, often three to six months per application. The finish tends to be glassier and more reflective than carnauba, with stronger resistance to chemical exposure and environmental fallout.
Apply your chosen sealant with a clean foam applicator pad in thin, even layers. Work one panel section at a time, allow the product to haze per the manufacturer's instructions, and buff off with a fresh microfiber towel. Pay special attention to the exact area where the adhesive sat—this zone has been exposed and unprotected for the longest period and benefits most from a thorough, even coat.
The protective layer you are applying now replaces the unintentional barrier that the old adhesive provided. While a sticker or badge was covering your paint, it was also shielding it from UV rays, acid rain, and oxidation. The surrounding paint aged normally while the covered area stayed frozen in time. Sealing both zones brings them back to a uniform level of protection—is corn a vegetable or a grain may be endlessly debatable at the dinner table, but there is no debate here: exposed, freshly treated clear coat needs a protective barrier before you drive away.
To keep the full post-removal restoration sequence easy to reference, here is the complete process in order:
- Wash — Full contact wash with pH-neutral soap to remove every trace of solvent, lubricant, and loosened adhesive.
- Clay (if needed) — Re-clay any spots where inspection reveals remaining embedded residue or rough texture.
- Polish — Hand-apply a finishing polish to correct hazing, micro-scratches, and any dullness left by the removal process.
- Seal — Apply carnauba wax or synthetic sealant to protect the restored surface from UV, moisture, and future contamination.
Completing this four-step restoration sequence transforms the job from a quick adhesive scrape into a professional-grade result—a panel that not only looks clean but is genuinely protected against the elements going forward. The question that naturally follows is one most car owners ask only after finishing a difficult removal: how do I make sure I never have to do this again?
Step 7 – Prevent Future Adhesive Damage With Proactive Protection
You just spent six careful steps removing adhesive, restoring the surface, and sealing the finish. The panel looks flawless. But here is the uncomfortable truth: unless you change something about how adhesive interacts with your paint going forward, you will eventually repeat this entire process. The smartest long-term strategy is not a better remover or a faster technique—it is making sure adhesive never bonds directly to bare paint in the first place, especially on the high-impact zones where damage accumulates fastest: door edges, rocker panels, and side skirts.
These areas take the worst beating on any vehicle. Door corners catch shopping carts and careless swings in parking lots. Side skirts collect road debris, tar splatter, and the remnants of protective transport tape that dealerships sometimes forget to remove. Rocker panels sit low enough to absorb every stone chip the front tires kick backward. If you have ever replaced a worn power steering pump or swapped out degraded rubber hoses under the hood, you already understand the concept—components in high-stress locations wear out faster and benefit most from proactive shielding rather than reactive repair.
Protective Film as a Long-Term Adhesive Barrier
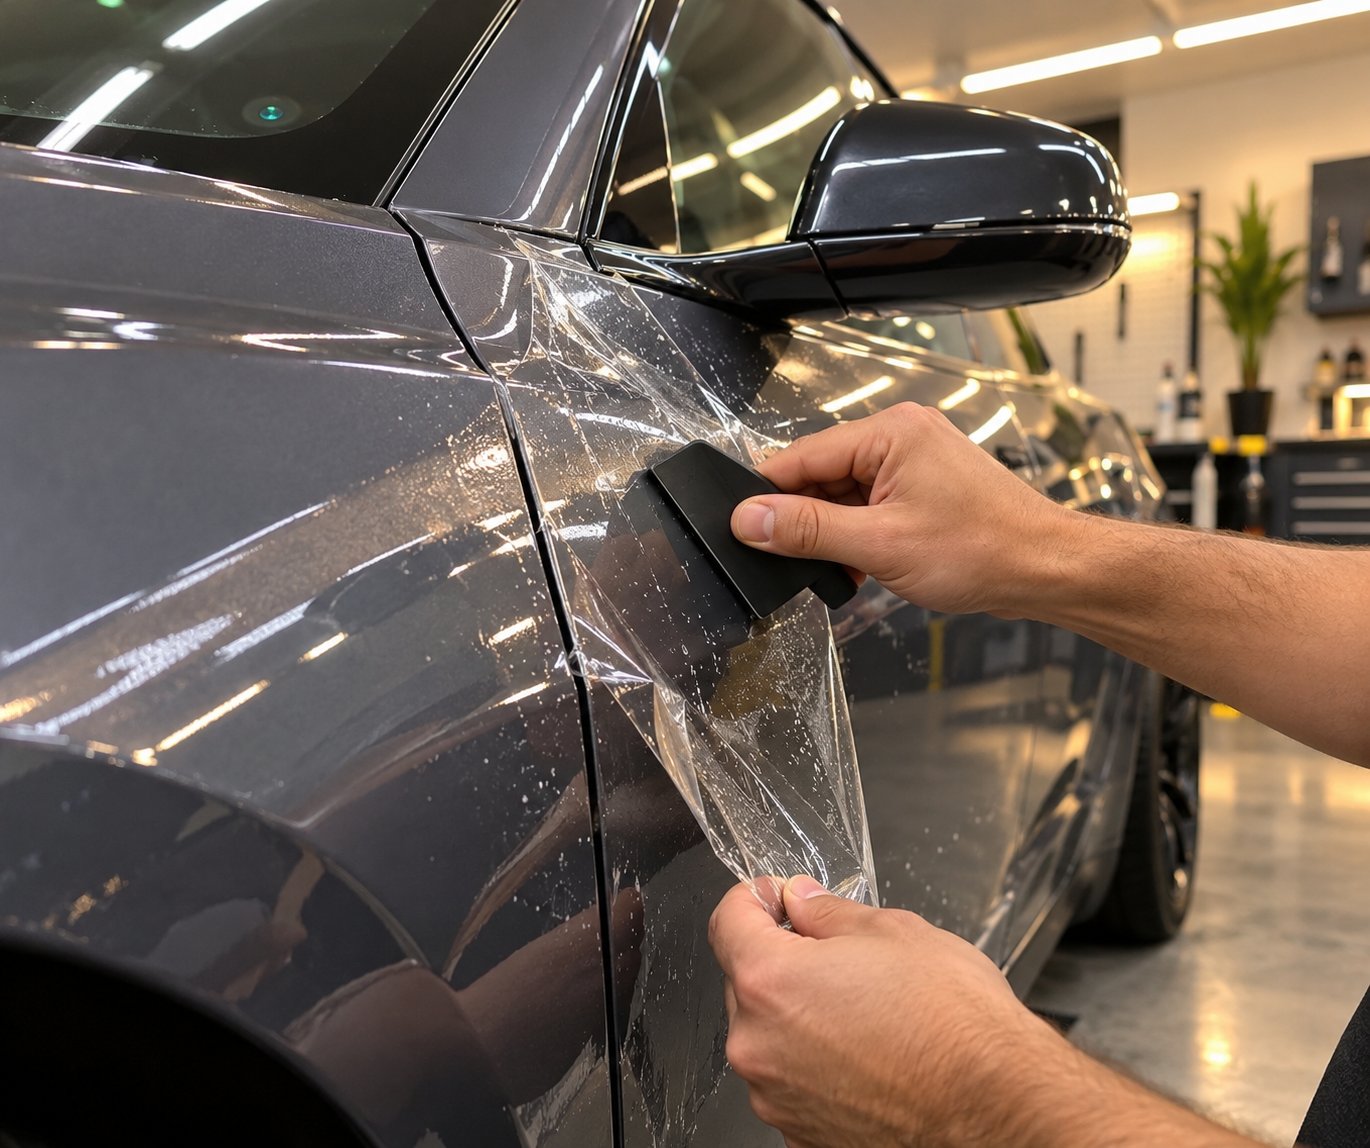
Paint protection film (PPF) works as a transparent, sacrificial layer between your clear coat and everything the road throws at it—including adhesive. When a sticker, badge, or piece of tape lands on a film-covered panel, the adhesive bonds to the PPF surface rather than migrating into your paint's pores. And when that film eventually needs replacing, the adhesive releases from the thermoplastic urethane—not from your finish. High-quality PPF is engineered with pressure-sensitive adhesives designed to bond securely to clear coat without chemically reacting with it, so removal is a controlled, paint-safe process when handled properly. The result is dramatically easier cleanup and zero risk to the underlying paint.
Full-body wraps offer maximum coverage, but they are not the only option—and for many owners, they are overkill. Targeted, partial-coverage kits protect the exact zones that take the most abuse while leaving the rest of the vehicle untouched. For Tesla Model 3 and Model Y owners, CUTIM's Door Corner & Side Skirt TPU Paint Protection Film is a practical example of this approach. The kit includes four door-corner pieces and two side-skirt pieces—transparent TPU film cut specifically for the areas most prone to adhesive contact, chip damage, and scuffing. It is a DIY-friendly application that addresses the exact problem you just solved, giving you a physical barrier so the next encounter with tape residue or parking-lot contact does not send you back through six steps of removal and restoration.
Think of it the way you would treat other vulnerable vehicle components. Applying dielectric grease to electrical connectors prevents corrosion from ever forming rather than forcing you to clean corroded terminals later. Choosing a quality synthetic lubricant like Royal Purple for your drivetrain reduces wear before damage accumulates. PPF follows the same logic—prevention costs less than correction, every time.
Other Everyday Prevention Habits
Film is the most effective barrier, but several simple habits reduce adhesive exposure across your entire vehicle without any installation at all:
- Place stickers on glass, not paint. Bumper stickers, parking permits, and registration decals adhere just as well to a rear window and peel off far more easily than they do from a clear-coated panel.
- Tell the dealer: no stickers or badges on painted surfaces. Many dealerships will honor this request if you make it before taking delivery. A quick conversation saves you from peeling off foam-tape badges and lot-identification stickers later. Some owners keep a small windshield repair kit and a microfiber cloth in the glovebox for quick maintenance—adding a "no dealer stickers" note to your purchase checklist is even simpler.
- Remove protective tape and transport film promptly. Manufacturers often apply temporary adhesive coverings to bumpers, door edges, and mirror caps during shipping. These are designed for short-term protection and should be removed within the manufacturer's recommended timeframe. Left in place for months, the adhesive cures and becomes exponentially harder to remove—turning a five-minute peel into a multi-step chemical job.
- Park away from trees. Sap drips are not technically adhesive, but they bond to paint through the same chemical mechanisms and require the same removal process. A shaded parking structure protects your finish from UV without the sap risk. On hot days you might crave a portable ac portable enough to cool you during outdoor detailing sessions—parking strategically means you will need far fewer of those sessions in the first place.
- Inspect vulnerable zones regularly. A quick walk-around every few weeks catches fresh sap spots, tar splatter, and forgotten tape before the bond has time to cure. Early removal is always easier than aged removal.
Prevention is not glamorous. It does not require specialized tools, expensive products, or a weekend blocked off in the garage. Much like keeping a smudge pot handy during a cold snap to protect what matters, these habits simply create a buffer between your paint and the sticky hazards that inevitably find their way onto every vehicle.
Removing adhesive from car paint is straightforward when you match the right method to the adhesive type and paint finish—but preventing the problem in the first place is always the easier path.
Frequently Asked Questions About Removing Adhesive From Car Paint
1. Will Goo Gone damage my car's clear coat?
Goo Gone's original formula uses d-limonene, a citrus-derived solvent broadly regarded as safe on standard base coat/clear coat paint systems. Automotive detailing communities consistently confirm its low risk profile when used with appropriate dwell times of 30 to 60 seconds. However, it can leave an oily citrus residue that must be washed off with soap and water immediately after use. Always perform a spot test on an inconspicuous area first, especially on older paint, single-stage finishes, matte surfaces, or ceramic-coated panels, since individual results vary based on paint age and condition.
2. What is the difference between Goo Gone and Goof Off on car paint?
The key difference is their active ingredients and aggressiveness. Goo Gone relies on d-limonene, a mild citrus solvent safe for most automotive clear coats. Goof Off Professional Strength contains 15 to 40 percent acetone and 7 to 13 percent xylene, which are industrial-grade solvents capable of softening, hazing, or dissolving clear coat with prolonged contact. For vehicle paint, Goo Gone should be your first choice for sticker residue and light tape adhesive. Reserve Goof Off strictly as a last resort for industrial-strength adhesive that has resisted every milder option, and be prepared to polish the treated area afterward.
3. How do I remove dealer badge adhesive from my car without scratching the paint?
Dealer badges are typically mounted with thick double-sided foam tape that requires a heat-first approach. Hold a hair dryer or heat gun 6 to 8 inches from the badge and warm it in 30-second intervals until the adhesive softens, keeping surface temperature below 140 degrees Fahrenheit. Use a plastic scraper at a shallow 20-degree angle to lift the badge and peel away as much foam tape as possible. Then apply an automotive-grade adhesive remover like 3M Adhesive Remover to a microfiber cloth, let it dwell for 60 to 90 seconds on the remaining residue, and wipe in one direction. Follow up with a clay bar to remove any embedded film the solvent missed.
4. Can I use a clay bar to remove adhesive residue from car paint?
Yes, a detailing clay bar is one of the most effective tools for removing the thin adhesive film that chemical removers leave behind. Clay works through mechanical shearing rather than chemical dissolution, physically lifting bonded contaminants off the clear coat without cutting into the paint. To use it safely, wash and dry the panel first, spray clay lubricant generously, then glide the clay in straight back-and-forth motions with light pressure. Never use circular motions or drag the clay without lubricant, as both can introduce scratches. When the panel feels glass-smooth under your fingertips, all embedded residue is gone.
5. How do I remove sticker residue from matte or satin car paint?
Matte and satin finishes require an extremely conservative approach because they lack the thick protective clear coat layer found on glossy paint. Polishing compounds, aggressive clay barring, and most wax products will create permanent shiny spots that cannot be buffed out. Your safest option is isopropyl alcohol at 70 percent concentration applied to a clean microfiber cloth with very light, straight-line pressure. Let it dwell for 15 to 30 seconds and wipe gently in one direction. Skip the clay bar entirely unless you have a product specifically formulated for matte finishes. If the adhesive resists this method, consult a professional detailer rather than escalating to harsher chemicals.