
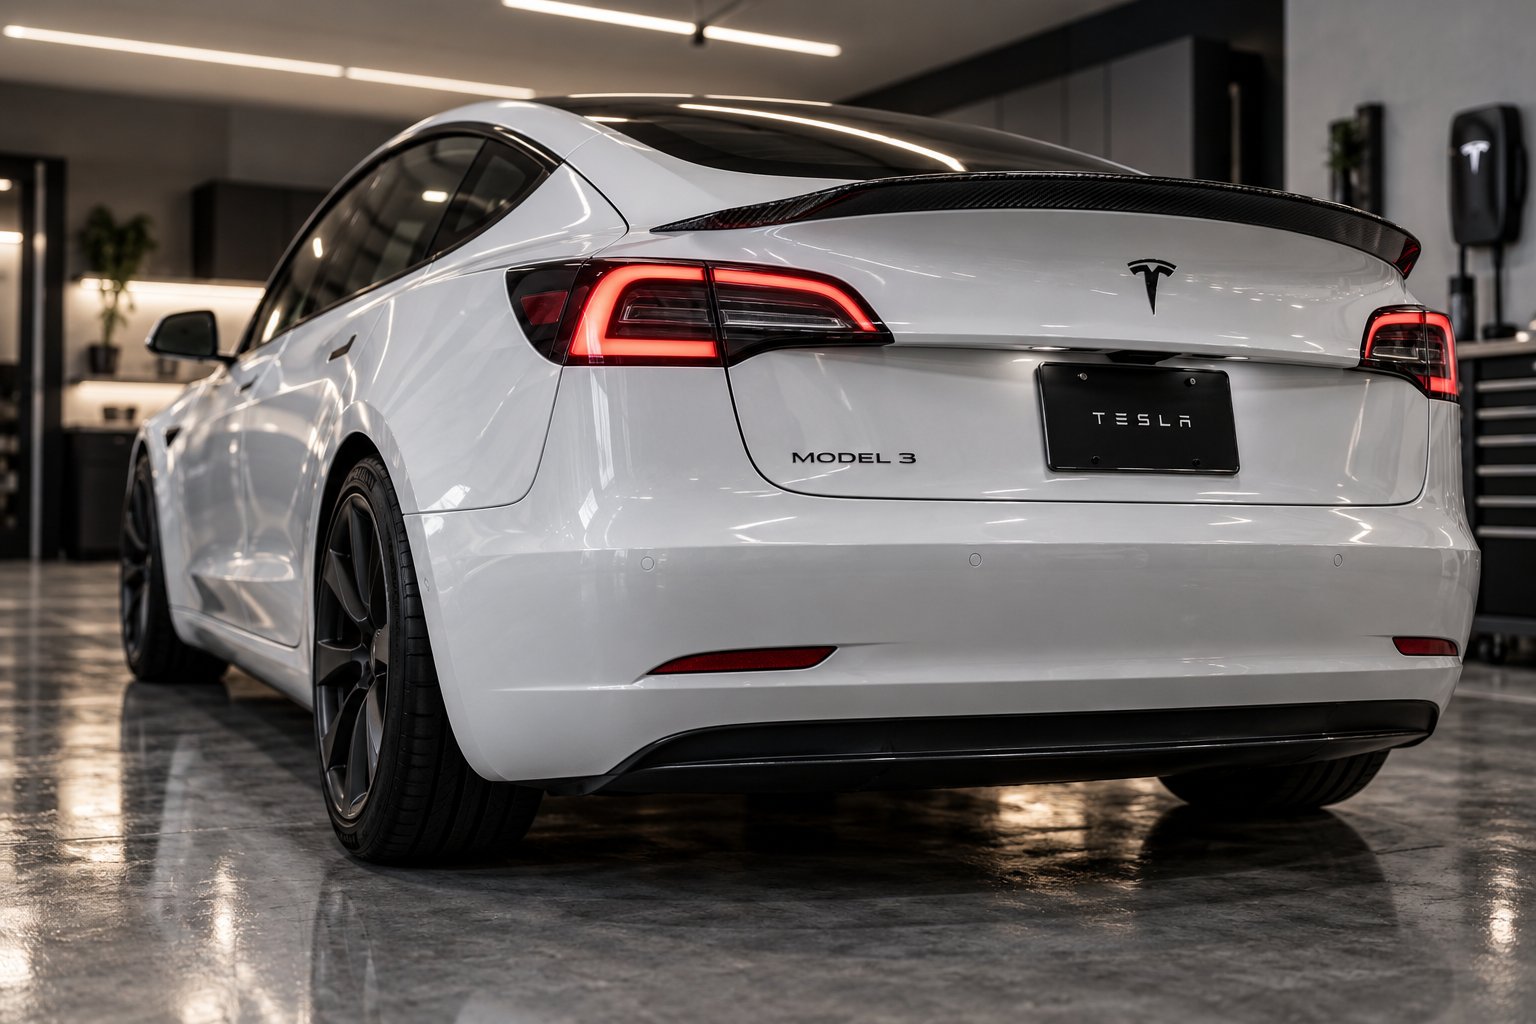
Everything You Need to Know Before Installing a Tesla Spoiler
Tesla spoiler installation involves mounting a rear spoiler to your vehicle's trunk lid or liftgate using one of three methods: adhesive tape bonding (the most common DIY approach), bolt-on or screw-mounted hardware (for larger or performance-oriented spoilers), or OEM-style replacement that follows factory mounting points. Most aftermarket spoilers use automotive-grade 3M VHB tape and can be installed in 30 minutes to an hour, while bolt-on designs may require up to two hours and intermediate mechanical skill. Regardless of method, success depends on proper surface preparation, precise alignment, and patience during the adhesive curing window.
Why Spoiler Installation Is One of the Most Popular Tesla Mods
Walk through any Tesla meet or scroll through an owner forum, and you'll notice one modification appears more than almost any other: a rear spoiler. The appeal is easy to understand. A well-chosen spoiler transforms the rear profile of a Model 3, Model Y, or Model S from understated to distinctly sporty, all without repainting, rewiring, or voiding a single warranty clause.
Beyond aesthetics, there's a functional angle. At highway speeds, a properly shaped spoiler generates mild downward pressure on the rear axle, which can subtly improve high-speed stability. The real-world aerodynamic gains on a daily driver are modest, but the visual impact is immediate. That combination of low complexity, high visual payoff, and minimal risk explains why a Tesla Model 3 spoiler install or a Tesla Model S spoiler install remains one of the first upgrades new owners tackle.
What This Guide Covers That Others Don't
Most installation guides online focus on a single model, a single spoiler brand, or a single mounting method. This resource takes a different approach. Whether you're planning a Tesla Model 3 rear spoiler install on a pre-Highland trunk lid, mounting a hatch spoiler on a Model Y liftgate, or navigating the powered trunk complications of a Model S, every critical variable is addressed in one place.
Here's what you'll find ahead:
- Spoiler type comparison — adhesive, bolt-on, and OEM replacement evaluated side by side
- Cross-model differences — trunk lid geometry, curvature, and fitment considerations for Model 3, Model Y, and Model S
- Surface preparation for every finish — bare paint, ceramic coatings, PPF, and vinyl wrap, with specific do's and don'ts for each
- Step-by-step adhesive installation walkthrough — aligned with Tesla's own service manual procedures and translated into DIY-friendly language
- Curing science explained — why the 24- to 72-hour wait time actually matters at a chemical level
- Troubleshooting — fixes for lifting edges, rattling, misalignment, and adhesive failure
- Cost analysis and DIY vs. professional decision framework — so you can budget accurately before you begin
Difficulty ratings range from easy to moderate for adhesive-based installs (ideal for first-timers with basic tools) up to moderate to advanced for bolt-on spoilers that involve drilling and sealing. Time commitment sits between 30 minutes and 2 hours depending on the method and your comfort level. Choosing the right spoiler type before you start is half the battle, and that's exactly where this guide picks up next.
Which Spoiler Type Is Right for Your Tesla
Picking a spoiler before understanding how it actually attaches to your car is like buying tires without checking your wheel size. The mounting method shapes everything that follows — the tools you'll need, the difficulty level, whether the mod is reversible, and how the bond holds up over thousands of miles. Three distinct categories dominate the Tesla aftermarket, and each one suits a different kind of owner.
Adhesive and Tape-Mounted Spoilers
The vast majority of aftermarket Tesla spoilers — especially those designed for Model 3 and Model Y — rely on 3M VHB (Very High Bond) double-sided tape or a similar automotive-grade adhesive. This is the same bonding method Tesla's own service technicians use when performing a factory spoiler replacement on the Model 3, which tells you a lot about its reliability when done correctly.
If you're tackling a Tesla Model Y spoiler install for the first time, this is almost certainly the method you'll use. The process requires no drilling, no special power tools, and no permanent modifications to the trunk lid. You'll clean the surface, dry-fit for alignment, peel the adhesive backing, and press the spoiler into place.
Pros
- No drilling or permanent modification to the vehicle
- Beginner-friendly — most owners complete installation in under an hour
- Reversible with proper removal technique (fishing line, heat, adhesive remover)
- Factory-trusted method used by Tesla service centers
Cons
- Bond longevity depends heavily on surface preparation and ambient temperature during installation
- Extreme heat or cold can stress adhesive over time, especially on edges
- Not ideal for oversized or heavy spoilers that create significant wind load at highway speeds
Bolt-On and Screw-Mounted Spoilers
Here's where most guides go silent. Bolt-on spoilers are less common in the Tesla world, but they serve a specific purpose: when the spoiler is large enough, heavy enough, or subjected to enough aerodynamic force that adhesive alone can't be trusted. Think aggressive GT-style wings, track-oriented setups, or carbon fiber spoilers with significant surface area that catch substantial wind at triple-digit speeds.
A bolt-on tesla spoiler installation requires drilling through the trunk lid — a step that's irreversible and raises the stakes considerably. You'll need to mark precise hole locations (often using a paper template supplied with the spoiler), drill pilot holes, apply sealant to prevent water intrusion, and torque the hardware to specification. Rubber gaskets or silicone sealant between the spoiler base and trunk surface are essential to keep moisture out of the trunk cavity.
This method delivers the strongest mechanical bond, but it's best reserved for owners comfortable with permanent modification. If you're not confident drilling into your Tesla's trunk lid, professional installation is the smarter call here.
OEM Replacement Spoilers
A third option exists for owners who want a factory-integrated look: OEM-style replacement spoilers that use Tesla's original mounting points or replicate the factory trunk lid profile. These are less of an "add-on" and more of a swap — you remove the existing spoiler (or install onto the same adhesive footprint the factory uses) and replace it with an aftermarket unit designed to match OEM dimensions.
Tesla's service manual specifies an alignment jig kit (part number 1479070-00-A for the Model 3) and a badge removal kit for clean spoiler removal, which hints at how precisely these components are designed to fit. OEM replacement spoilers follow this same precision philosophy, offering seamless integration at the expense of aftermarket variety.
| Criteria | Adhesive / Tape-Mounted | Bolt-On / Screw-Mounted | OEM Replacement |
|---|---|---|---|
| Installation Difficulty | Easy to Moderate | Moderate to Advanced | Moderate |
| Reversibility | Fully reversible with heat and adhesive remover | Not reversible — drill holes remain | Reversible if using adhesive mounting |
| Bond Strength | Strong (VHB rated for high shear loads) | Strongest (mechanical fastening) | Matches factory bond specification |
| Tools Required | IPA wipes, painter's tape, microfiber cloth, optional heat gun | Drill, drill bits, torque wrench, sealant, template | IPA wipes, alignment jig or template, painter's tape |
| Recommended Skill Level | Beginner to Intermediate | Intermediate to Advanced | Intermediate |
| Best For | Lip spoilers, small to mid-size wings, daily drivers | Large wings, track cars, high-speed applications | Owners wanting a factory-finished appearance |
Most Tesla owners completing a Tesla Y spoiler install or a Model 3 project will land squarely in the adhesive category — and for good reason. It's the method Tesla itself endorses. But knowing all three options exist ensures you're choosing the right path rather than defaulting to the only one you've heard of. The real variable that trips people up, though, isn't the mounting method — it's the differences between Tesla models that change how any of these methods actually play out on your specific car.
Cross-Model Installation Differences for Every Tesla
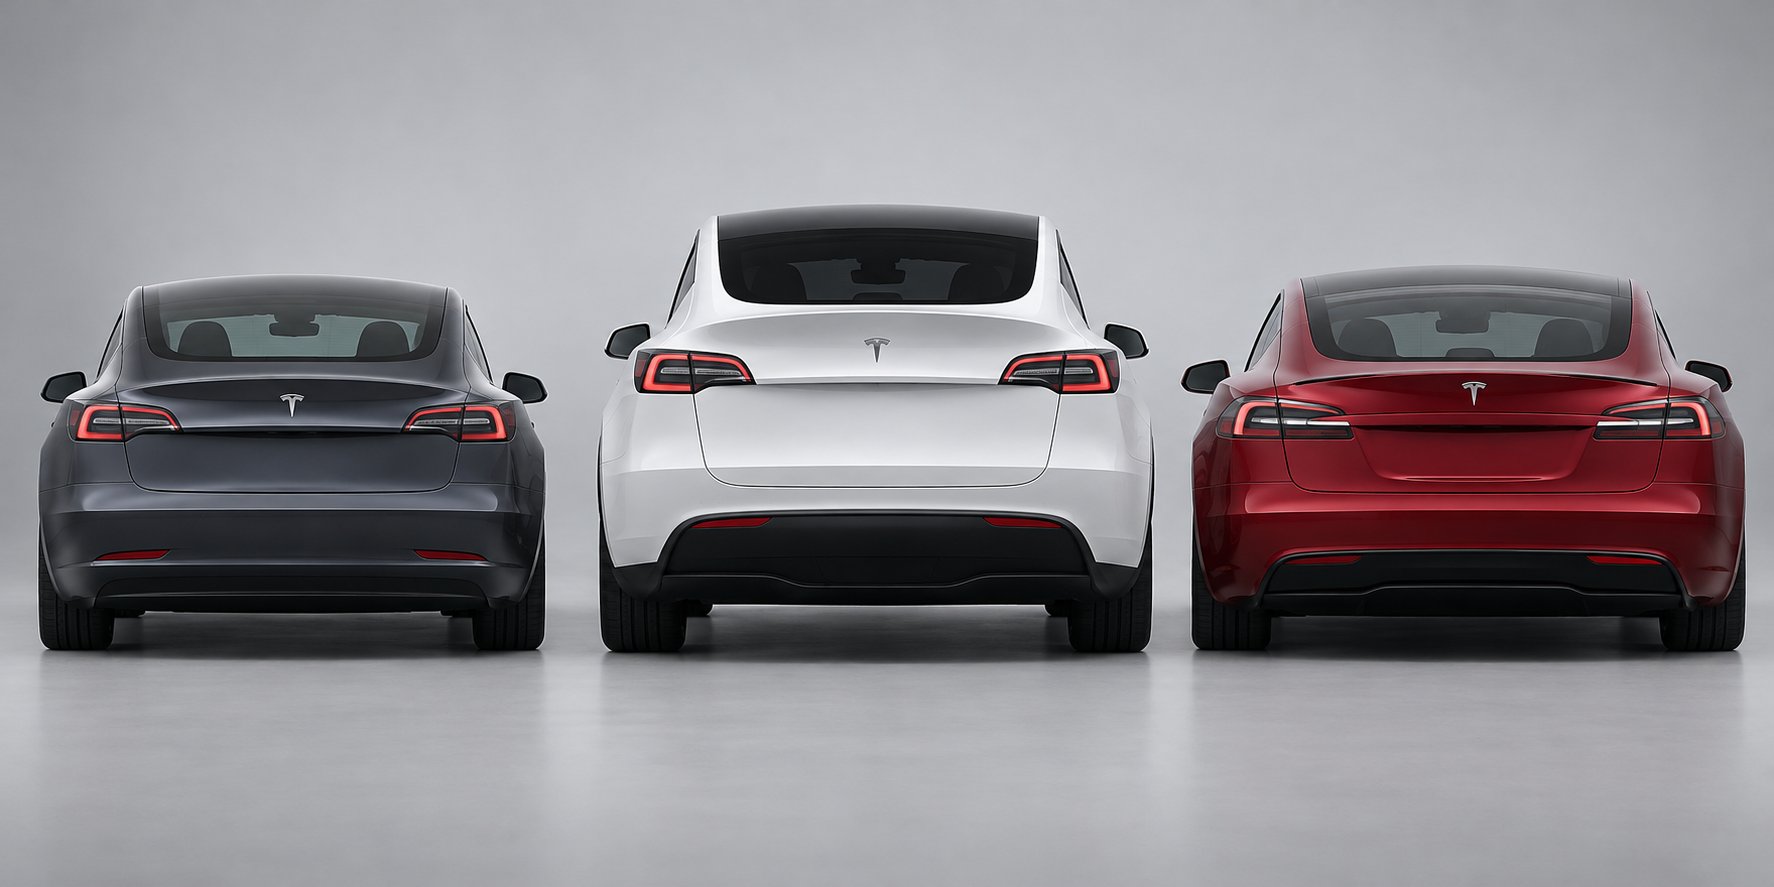
A spoiler that fits your neighbor's Model 3 perfectly might sit unevenly on your Model Y — or refuse to clear the motorized trunk mechanism on a Model S. Yet almost every installation guide online treats all Teslas as if they share the same trunk lid. They don't. Trunk geometry, surface curvature, hinge type, and even the material underneath the paint vary from model to model, and these differences directly affect how to install a tesla spoiler correctly. Understanding your specific vehicle before peeling any adhesive backing is the difference between a flush, lasting fit and a spoiler that lifts at the edges within weeks.
Model 3 and Model 3 Highland Trunk Lid Differences
The pre-Highland Model 3 (2017–2023) features a relatively flat trunk lid with a gentle convex curvature that runs from the rear glass to the trailing edge. This shape gives adhesive-mounted spoilers a generous, predictable contact area — one reason the Model 3 became the most popular Tesla for aftermarket spoiler upgrades in the first place. Most lip-style and performance-style spoilers designed for the Model 3 assume this trunk profile, and alignment is straightforward with painter's tape and a careful dry fit.
The 2024 Highland refresh changed the equation. Tesla redesigned the rear end significantly: the taillights moved into the trunk lid itself, the trailing edge geometry shifted, and the overall curvature radius became subtly different. These aren't cosmetic tweaks — they alter where a spoiler's adhesive strip makes contact, how much bonding surface area is available, and whether a pre-Highland spoiler can even sit flush on a Highland trunk.
Tesla's own service documentation reflects this split. The part numbers, jig kits, and alignment procedures differ between pre-Highland and Highland variants. If you're installing a spoiler on a Model 3, the very first step is confirming which generation you own. The simplest way to tell: pre-Highland models have wraparound C-shaped taillights and a rounded front fascia with fog light housings, while Highland models feature slimmer headlights, no fog lights, and taillights integrated into the trunk lid. Order a spoiler designed for the wrong generation, and no amount of careful surface prep will overcome the fitment mismatch.
Model Y Spoiler Mounting Considerations
Imagine taking the Model 3's trunk lid concept and scaling it up into a full liftgate hatch — that's roughly what you're working with on the Model Y, but the differences go deeper than size alone. The Model Y uses a rear hatch that opens upward from the bottom, creating a fundamentally different stress profile on any mounted spoiler compared to the Model 3's traditional trunk lid.
Every time a Model Y liftgate swings open, the spoiler travels through a larger arc and experiences more gravitational pull at full extension. This repeated stress can fatigue adhesive bonds faster, particularly along the outer edges where peel forces are strongest. The Model Y's hatchback-style rear end also features a different curvature radius than the Model 3's sedan-style trunk — wider, flatter across the center, and more sharply curved at the lateral edges.
What does this mean practically? When installing a spoiler on a Model Y, you'll want to pay extra attention to adhesive coverage at the outer ends of the spoiler, where lift forces are greatest during liftgate operation. Some experienced installers add supplemental adhesive promoter at these stress points. Also worth noting: Model 3 spoilers are not interchangeable with Model Y spoilers. The mounting point placement, overall dimensions, and rear profile contours differ enough that a Model 3 spoiler will look visibly misaligned on a Model Y — or worse, fail to bond securely because the curvature doesn't match.
Model S Spoiler Installation Nuances
The Model S presents a completely different challenge from either the Model 3 or Model Y. Its powered trunk lid — standard across all current trims — uses motorized struts that automatically open and close the trunk at the press of a button. Any aftermarket spoiler adds weight to this system, and if that additional weight is significant enough (as with larger carbon fiber wings), it can affect the trunk motor's calibration, causing the lid to open more slowly or fail to latch properly.
Complicating things further, certain Model S trims came equipped with a factory motorized spoiler that automatically deploys at highway speeds and retracts when the car slows down. If your Model S has this active spoiler system, adding a fixed aftermarket spoiler on top of it isn't just an aesthetic conflict — it can physically interfere with the deployment mechanism. Before purchasing any aftermarket option for the Model S, confirm whether your specific trim includes the active spoiler and plan accordingly.
Positioning precision matters more on the Model S than on any other Tesla. Because the trunk lid is longer and flatter, even a few millimeters of misalignment becomes visually obvious from a distance. This is why a paper template to install a Tesla Model S rear spoiler is practically essential. Tesla dealer templates exist for factory spoiler placement, and many reputable aftermarket manufacturers — including brands popular for RPM Tesla spoiler install kits — include their own positioning guides. If your spoiler doesn't come with a template, you can create one using painter's tape and careful measurements from the trunk lid edges, but a manufacturer-supplied template always produces more consistent results.
| Specification | Model 3 (Pre-Highland) | Model 3 (Highland 2024+) | Model Y | Model S |
|---|---|---|---|---|
| Trunk / Hatch Type | Traditional trunk lid | Traditional trunk lid (redesigned) | Full liftgate hatch | Powered trunk lid |
| Curvature Profile | Gentle convex, consistent across width | Subtly revised radius with integrated taillight recesses | Flatter center, sharper lateral curves | Long, low-profile flat surface |
| Adhesive Contact Area | Moderate — good VHB tape contact | Moderate — verify spoiler matches revised geometry | Larger footprint, but edges experience higher peel stress | Large — long trailing edge allows extended tape runs |
| Model-Specific Consideration | Most universal aftermarket spoilers designed for this generation | Must use Highland-specific spoilers; pre-Highland parts do not fit | Liftgate hinge stress requires strong edge bonding; Model 3 spoilers are not compatible | Check for active motorized spoiler; additional weight may affect powered trunk calibration |
| Recommended Positioning Tool | Painter's tape alignment marks | Painter's tape alignment marks | Painter's tape plus dry-fit verification at hatch edges | Manufacturer paper template or Tesla dealer template strongly recommended |
Each model demands a slightly different approach, and knowing these distinctions upfront prevents the most common fitting mistakes Tesla owners make. But even a perfectly matched spoiler on the right model can fail spectacularly if the trunk surface underneath it isn't prepared correctly — especially when paint protection film, ceramic coatings, or vinyl wraps enter the picture.
Surface Preparation for Paint, Wrap, PPF, and Ceramic Coatings
Here's the uncomfortable truth about tesla spoiler installation: the spoiler itself is rarely the reason things fail. The surface underneath it is. You could buy the most precisely engineered carbon fiber spoiler on the market, align it perfectly, and press it down with textbook pressure — and still watch it peel away two weeks later because the trunk lid surface wasn't ready to hold a bond. Surface preparation is the invisible foundation of every successful install, yet it's the step most guides reduce to a single sentence: "clean the surface with alcohol." That's dangerously incomplete, especially when your Tesla's trunk may be covered in ceramic coating, paint protection film, or vinyl wrap — each of which interacts with adhesive in fundamentally different ways.
Preparing Bare Paint and Clear Coat Surfaces
If your Tesla still wears its factory paint with no additional coatings or films, you're working with the most adhesive-friendly scenario. But "factory paint" doesn't mean "ready to bond." Even a trunk lid that looks spotless carries invisible contaminants — road film, wax residue, silicone from detailing sprays, and natural oils from every hand that's touched it. These contaminants form a microscopic barrier between the adhesive tape and the clear coat, dramatically reducing bond strength.
The standard protocol for how to install a spoiler on a Tesla Model 3 — or any Tesla — starts with a thorough wipe-down using isopropyl alcohol (IPA) at a concentration of at least 70%. Pour it onto a clean lint-free microfiber cloth (not a paper towel, which can leave fibers behind) and wipe the entire mounting zone in one direction. Flip the cloth and repeat. Let the surface air-dry completely — typically 30 to 60 seconds — before placing any adhesive.
Two critical details most guides skip: first, use a silicone-free cleaner. Many popular spray detailers and quick-wax products leave a silicone film behind that actively repels adhesive bonding. If you've used any detailing products on your trunk recently, an IPA wipe alone may not be enough — consider a dedicated surface prep solution like 3M General Purpose Adhesive Cleaner or a similar silicone-stripping product. Second, don't touch the cleaned surface with bare fingers after wiping. Even a single fingerprint reintroduces oils that compromise adhesion at that contact point.
Installing Over Vinyl Wrap, PPF, and Ceramic Coatings
This is where most tesla carbon fiber spoiler installation projects go wrong — and where no other guide provides adequate guidance. If your Tesla has any aftermarket surface treatment on the trunk lid, you're no longer bonding spoiler adhesive to paint. You're bonding it to a secondary layer that has its own adhesion characteristics, and in some cases, that layer is specifically engineered to reject the very bond you're trying to create.
Ceramic coatings represent the worst-case scenario for adhesive spoiler mounting. Products like Ceramic Pro, Gtechniq Crystal Serum, and similar SiO2-based coatings work by creating an ultra-hydrophobic, chemically inert surface layer. That's fantastic for repelling water, dirt, and bird droppings. It's terrible for holding VHB tape. The entire purpose of a ceramic coating is to prevent things from sticking to your paint — and adhesive tape is no exception. If you try to bond a spoiler directly over a ceramic-coated trunk, expect significantly reduced adhesion and a high probability of lifting within days or weeks.
The solution? Remove the ceramic coating in the spoiler mounting zone before installation. This typically requires a light polish with a cutting compound on a dual-action polisher to strip the coating layer from just the area where the spoiler will sit. Yes, this means you'll need to reapply ceramic coating around the spoiler later if you want full protection. It's an extra step, but it's the only reliable approach.
Paint protection film (PPF) introduces a different problem. PPF layers like XPEL Ultimate Plus or SunTek Ultra are designed to adhere strongly to paint — but your spoiler's adhesive is bonding to the top surface of the film, not to the paint itself. In theory, this can work if the PPF is well-adhered and the adhesive is compatible. In practice, the risk is delamination: the spoiler tape may hold firmly to the PPF, but the PPF itself can begin to peel away from the paint underneath, taking the spoiler with it. The generally recommended approach is to cut and remove the PPF in the spoiler mounting footprint, clean the exposed paint with IPA, and bond directly to the clear coat.
Vinyl wrap sits somewhere between PPF and ceramic coating in terms of risk. Wrap adhesive bonds are typically weaker than PPF adhesive bonds, and vinyl wrap films are thicker, which means your spoiler tape is sitting further from the rigid surface it needs to anchor against. Thin wraps (2 mil or less) can sometimes support a lightweight lip spoiler, but thicker color-change wraps (4–6 mil) introduce enough flex and compliance that the bond can shift over time, especially in heat. If your Tesla wears a full vinyl wrap, the safest path mirrors the PPF recommendation: section out the wrap in the mounting zone and bond directly to paint.
Temperature and Weather Considerations for Installation
Even perfect surface preparation can be undermined by the wrong ambient conditions. Adhesive tapes are temperature-sensitive materials, and their bonding behavior changes significantly across the thermometer. According to 3M's published specifications for VHB tape, the ideal application range is 70 to 100 degrees Fahrenheit (21–38°C), with minimum application temperatures varying by tape family — some rated down to 50°F (10°C) and specialized low-surface-energy formulations functional at 32°F (0°C). However, the standard VHB tapes included with most aftermarket Tesla spoilers typically require a minimum of 60°F (15°C) to form a reliable initial bond.
Why does cold weather kill adhesive installations? It comes down to viscous flow — the process by which pressure-sensitive adhesives wet out across a surface and create molecular-level contact. At low temperatures, the adhesive stiffens, its viscous flow slows dramatically, and it can't conform to the microscopic texture of the paint surface. The result looks bonded but isn't — the tape may sit on top of the surface rather than flowing into it, producing a weak joint that fails under the first stress event. A cold-weather install might feel firm for the first day, then lift at the edges after a highway drive or a warm afternoon that allows the spoiler to shift before full cure is achieved.
If you live in a colder climate or you're installing during fall or winter, move the entire process indoors. A heated garage is ideal. If indoor installation isn't possible, you can pre-warm the trunk lid surface using a hair dryer or heat gun on low — holding it eight to ten inches away from the surface and sweeping evenly. The goal is to bring the metal and paint surface into the 70–90°F range, not to make it hot to the touch.
- Do wipe the mounting area with 70%+ isopropyl alcohol on a lint-free microfiber cloth
- Do let the IPA fully evaporate before applying any adhesive
- Do remove ceramic coating from the bonding zone with a light polish before installation
- Do cut away PPF or vinyl wrap in the spoiler footprint and bond directly to paint when possible
- Do install in a temperature-controlled environment between 60°F and 90°F (15–32°C)
- Do pre-warm the trunk surface with a hair dryer if ambient temperatures are near the lower threshold
- Don't use silicone-based detailing sprays or quick-wax products on the mounting area before installation
- Don't touch the cleaned surface with bare hands after wiping — even fingerprints reintroduce oils
- Don't attempt an adhesive install on a wet trunk lid or in high humidity without thorough drying
- Don't install outdoors in direct sunlight on a hot day — surface temperatures above 120°F can cause adhesive to activate prematurely before alignment is finalized
- Don't assume a "clean-looking" surface is a "bond-ready" surface — invisible contaminants are the leading cause of adhesive failure
Getting the surface right is the single highest-leverage step in the entire process. A properly prepped trunk lid gives your adhesive the foundation it needs to achieve full bond strength during the curing window. And that curing process — what's actually happening at the chemical level when your spoiler bonds over the first 72 hours — is the next critical piece most installers don't fully understand.
Step-by-Step Adhesive Spoiler Installation Walkthrough
Your surface is prepped, your workspace is temperature-controlled, and the mounting zone is free of contaminants. This is the moment most DIY Tesla trunk spoiler installation steps actually begin — and where rushing through alignment or adhesive application creates problems that are difficult (sometimes impossible) to undo without starting over. The process itself is straightforward, but each phase has a narrow margin for error. Here's exactly how to install an adhesive spoiler on a Tesla, broken into three distinct phases that mirror the sequence professional body shops follow.
Positioning and Alignment Before Bonding
The biggest mistake first-timers make? Peeling the adhesive backing too early. Before any tape is exposed, you need to know exactly where the spoiler sits — down to the millimeter. This is where dry-fitting becomes your best friend.
Place the spoiler on the trunk lid with all adhesive backing still intact. Slide it into position where it looks visually centered, then step back — not two feet, but ten feet or more. Walk to each rear quarter panel and check symmetry from both sides. A spoiler that looks perfectly centered while you're leaning over the trunk can reveal itself as slightly cocked to one side when viewed from a distance.
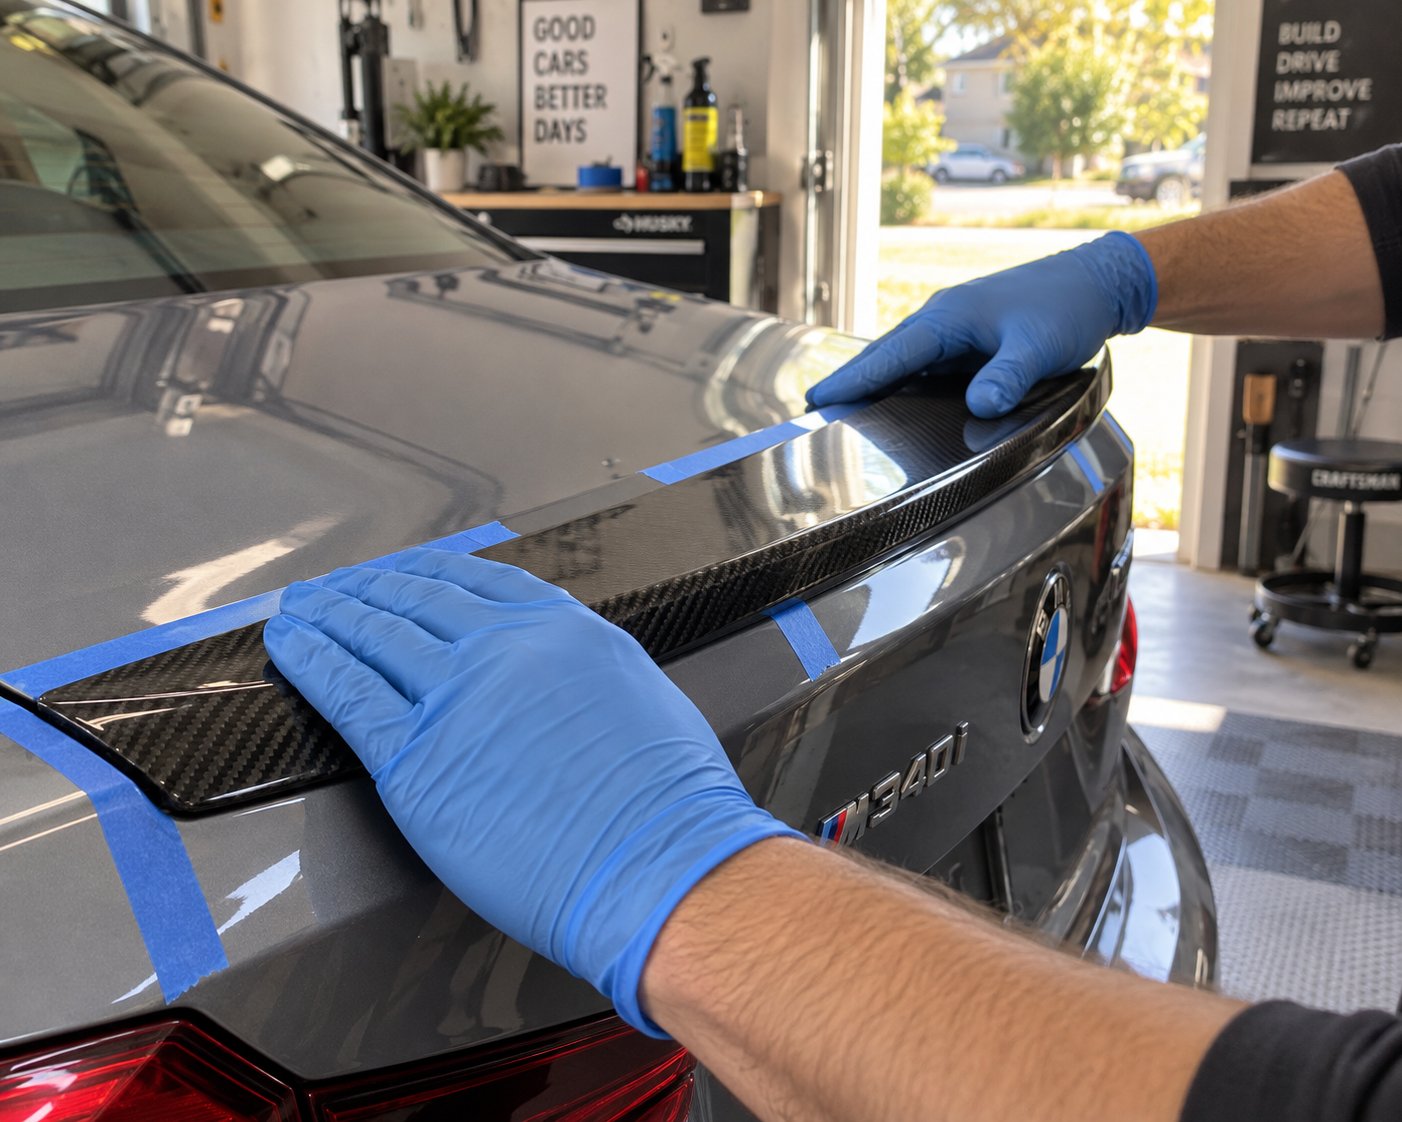
Once you're satisfied with placement, use painter's tape to mark the edges. Run short strips along the bottom edge and both lateral ends of the spoiler, creating a tape outline that stays on the trunk after you lift the spoiler away. This tape border becomes your alignment guide during the actual bonding step, eliminating guesswork when you're working with exposed adhesive and limited repositioning time. For Tesla Model 3 spoiler alignment tips specifically, pay attention to equal spacing between the spoiler's outer edges and the trunk lid's lateral body lines — those parallel gaps should be visually identical on both sides.
Some aftermarket spoilers include a paper alignment template or positioning guide in the box. If yours has one, use it. These templates are designed around the specific trunk geometry of your model and take the visual estimation out of the equation entirely.
Adhesive Application and Mounting Steps
With your painter's tape alignment marks in place, it's time to commit. This tesla spoiler 3M tape install guide follows the same center-outward methodology that Tesla's own service procedures specify for factory spoiler replacement — and for good reason. It produces the most even bond with the fewest trapped air pockets.
Follow these steps in order:
- Pre-warm the adhesive tape — Use a hair dryer or heat gun on low setting, held eight to ten inches away, to gently warm the VHB tape strips already attached to the spoiler's underside. Ten to fifteen seconds of even heat makes the adhesive more pliable and improves initial tack. Do not overheat — the tape should feel slightly warm, not hot.
- Peel the adhesive backing — Remove all protective backing strips from the spoiler's adhesive. Work carefully to avoid touching the exposed tape with your fingers, as skin oils reduce bond quality.
- Align to your tape marks — Hold the spoiler above the trunk and lower it into position using your painter's tape border as a visual guide. Hover it just above the surface until you're confident the alignment matches your dry-fit marks.
- Make center contact first — Press the center of the spoiler down onto the trunk lid gently but firmly. This anchors your midpoint and prevents the spoiler from shifting laterally during the remaining bonding steps.
- Work outward toward both ends — From the center contact point, apply firm, even downward pressure moving toward each outer edge. Use your palms rather than fingertips to distribute force across a wider area. This technique pushes any trapped air outward toward the edges rather than locking it under the center of the spoiler.
- Apply sustained pressure along the full length — Once the spoiler is fully seated, go back over the entire contact surface with firm, consistent palm pressure for 60 to 90 seconds. Press especially hard along the outer edges and ends, where peel forces from wind and trunk operation are strongest.
- Remove alignment tape — Carefully peel away the painter's tape marks from around the spoiler. Pull the tape slowly and at a low angle to avoid disturbing the freshly bonded spoiler.
A common question during this phase: what if the spoiler lands slightly off-center? If you catch the misalignment within the first few seconds — before full adhesive contact is made — you can gently lift and reposition. But once VHB tape has been pressed firmly against paint, attempting to peel and reapply significantly weakens the bond. In that scenario, you're better off removing the spoiler completely, cleaning the residual adhesive, and applying fresh tape before trying again. This is precisely why the dry-fit and tape-marking steps are so critical. They're not optional — they're insurance.
Securing the Bond and Initial Curing Period
You've got the spoiler on the car. It looks great. The temptation to close the trunk and go for a drive is real — but resist it. What you do in the next few hours determines whether that bond holds for years or fails within weeks.
Immediately after mounting, apply additional sustained pressure to the spoiler. Some installers use spring clamps padded with microfiber cloths along the spoiler's contact edges. Others set small sandbags or weighted bags (five to ten pounds) along the top surface for 30 to 60 minutes. The goal is consistent downward force that helps the adhesive flow into the microscopic texture of the clear coat — a process called wet-out that dramatically increases bond surface area at the molecular level.
During this initial set period, keep the trunk closed. Every time the trunk lid opens and closes, it flexes — and that flex creates peel stress on an adhesive bond that hasn't yet developed its full strength. The same logic applies to driving: highway speeds generate aerodynamic load on the spoiler, and vibrations from road surface imperfections create micro-stresses that a partially cured bond can't absorb as effectively as a fully cured one.
Do not slam, forcefully close, or repeatedly open the trunk for the first 24 to 72 hours after installation — the adhesive needs this window to transition from initial tack to full chemical bond strength, and mechanical stress during this period is the leading cause of early adhesive failure.
If possible, park in a garage or covered area during the curing window. Stable, moderate temperatures (ideally 70°F and above) accelerate the curing process, while cold overnight temperatures slow it. Some owners leave their Tesla parked with the trunk undisturbed for a full weekend after installation — and that patience pays off with a bond that lasts for the life of the spoiler.
But what's actually happening inside that adhesive during those 72 hours? The chemistry behind the shift from "sticky tape" to "permanent structural bond" explains why these wait times aren't arbitrary manufacturer recommendations — they're tied to a specific molecular process that can't be rushed.
Adhesive Curing Science, Spoiler Removal, and Warranty Facts
Every spoiler manufacturer prints the same instruction: "Allow 24 to 72 hours before normal use." Almost none of them explain why. That missing context leads Tesla owners to either test the bond too early — peeling up an edge to "check if it's holding" — or assume the spoiler is fully secure the moment it feels firmly stuck. Both assumptions misunderstand what's actually happening at the molecular level inside that strip of VHB tape. The tesla spoiler adhesive curing time isn't a suggestion built on caution. It's a chemical requirement.
How Adhesive Curing Works and Why Wait Times Matter
When you first press a spoiler onto a prepared trunk lid, the bond you feel is called initial tack. It's the immediate stickiness of the pressure-sensitive adhesive — the same property that makes tape feel sticky when you touch it with your finger. Initial tack is a surface-level phenomenon. The adhesive is physically contacting the paint's clear coat, but it hasn't yet formed the deeper molecular connections that create lasting bond strength.
Over the next 24 to 72 hours, a process called viscous flow takes over. The acrylic adhesive in 3M VHB tape slowly migrates into the microscopic valleys and textures of the clear coat surface — features invisible to the naked eye but critical for mechanical interlocking. Simultaneously, chemical cross-linking begins. The adhesive's polymer chains form covalent bonds with each other and interact with the substrate surface, transitioning from a soft, pressure-sensitive material into a semi-structural bond that resists shear, peel, and tensile forces at dramatically higher thresholds than the initial tack alone.
The tesla spoiler 3M VHB bond strength at the moment of installation is a fraction of what it becomes at 72 hours. 3M's own engineering data shows that VHB tapes typically reach approximately 50% of ultimate bond strength within the first 20 minutes, but the remaining 50% develops gradually over the full three-day window. That second half is where the real structural integrity lives — the resistance to highway wind loads, trunk vibration, and thermal cycling that a spoiler endures every single day.
Temperature and humidity play direct roles in this timeline. Warmer ambient conditions (70–85°F) accelerate viscous flow, allowing the adhesive to wet out faster and reach full cure closer to the 48-hour mark. Cold environments slow the process considerably — at 50°F, full cure may take well beyond 72 hours, and the bond may never reach its rated strength if the adhesive can't achieve proper wet-out during the critical initial phase. High humidity doesn't significantly affect acrylic-based VHB adhesives, but moisture trapped between the tape and the surface during installation creates voids that permanently reduce contact area.
The practical takeaway is simple: testing the bond before 72 hours is counterproductive. Pulling on the spoiler's edge to see if it's "really stuck" applies peel force to an adhesive that hasn't finished cross-linking, potentially creating a micro-failure point that propagates over time. Trust the chemistry. Leave it alone.
Removing an Existing Spoiler Before a New Installation
Knowing how to remove a tesla aftermarket spoiler matters more than most owners expect. Maybe you're upgrading from a basic ABS lip spoiler to a carbon fiber unit. Maybe a previous owner installed something you don't love. Or maybe your first installation attempt went sideways and you need a clean surface for round two. Whatever the reason, the removal process requires patience and the right technique to avoid damaging your Tesla's paint.
The safest method for adhesive-mounted spoilers follows this sequence:
- Soften the adhesive with heat — Use a heat gun on low or a hair dryer held four to six inches from the spoiler's edge. Work slowly along the full length, heating each section for 30 to 45 seconds. The goal is to warm the VHB tape enough to soften its cross-linked bonds without overheating the paint underneath. Keep the surface temperature below 140°F — hot enough to make the adhesive pliable, cool enough to protect the clear coat.
- Cut through the tape layer — Slide a length of unflavored dental floss or braided fishing line (15–20 lb test) behind the spoiler's edge, sawing it back and forth in a slow, steady motion. The floss slices through the softened adhesive layer without scratching the paint the way a plastic pry tool or razor blade might. Work from one end of the spoiler to the other, reheating sections as needed when the adhesive stiffens.
- Lift the spoiler away — Once the floss has cut through the full adhesive strip, gently lift the spoiler off the trunk. Pull upward at a low angle rather than prying — sharp upward force can chip clear coat if any adhesive sections remain bonded.
- Remove residual adhesive — You'll almost certainly have adhesive residue left on the trunk lid. Apply a dedicated automotive adhesive remover (such as 3M Adhesive Remover or Goo Gone Automotive) to a microfiber cloth and work the residue in small circular motions. Avoid using household solvents like acetone or mineral spirits, which can damage Tesla's water-based clear coat.
- Clay bar the surface — After removing the bulk residue, run a fine-grade detailing clay bar over the mounting zone with clay lubricant. This pulls out any remaining adhesive film embedded in the clear coat's texture and restores a smooth, bond-ready surface for your new spoiler.
- Final IPA wipe — Finish with a clean isopropyl alcohol wipe to remove any remaining solvent or clay residue, bringing the surface back to the contaminant-free state needed for fresh adhesive application.
The entire removal process typically takes 20 to 40 minutes. Rushing it — especially the heat-softening phase — is what causes paint damage. A cold VHB tape strip that's ripped off without warming can pull clear coat with it, turning a simple spoiler swap into an expensive paint correction job.
Warranty Implications of Aftermarket Spoiler Installation
"Does a tesla spoiler void warranty?" is one of the most frequently asked questions in every Tesla owner forum — and the answer is more nuanced than a simple yes or no, though it leans heavily toward no.
In the United States, the Magnuson-Moss Warranty Act of 1975 provides clear legal protection for vehicle owners who install aftermarket modifications. Under this federal law, a manufacturer cannot void your vehicle's warranty simply because you installed an aftermarket part. The burden of proof falls on the manufacturer: they must demonstrate that the aftermarket modification caused the specific failure being claimed before denying warranty coverage.
Under the Magnuson-Moss Warranty Act, a dealer or manufacturer cannot deny a warranty claim solely because an aftermarket part is installed — they must prove that the aftermarket part directly caused the failure in question.
What does this mean for your spoiler? If you install an adhesive-mounted lip spoiler on your Model 3 and your drive unit develops a fault six months later, Tesla cannot refuse the drivetrain warranty claim by pointing to the spoiler. The two are unrelated. However, if your bolt-on spoiler installation involved drilling through the trunk lid, and water intrusion through those drill holes causes corrosion or electrical damage to trunk wiring, that specific damage likely falls outside warranty coverage — because the modification directly caused the problem.
Paint warranty considerations add another layer. Tesla's New Vehicle Limited Warranty covers defects in materials and workmanship, including paint. But damage to paint caused by aftermarket installation — adhesive pulling clear coat during removal, drill holes in the trunk lid, or scratches from improper positioning — is owner-inflicted damage, not a manufacturing defect. Tesla's paint warranty would not cover these scenarios regardless of whether a spoiler is involved.
The practical advice? Adhesive-mounted spoilers carry virtually zero warranty risk when installed and removed properly. Bolt-on spoilers carry slightly more risk due to the permanent modification involved, but even these don't void the overall vehicle warranty — only damage directly traceable to the drilled holes or added hardware could be excluded. Document your installation with photos, keep receipts for your spoiler and any sealing materials, and you'll have a clear record if any warranty question ever arises.
Warranty concerns, curing patience, and proper removal technique all share a common thread: they're the knowledge gaps that separate a spoiler that lasts for years from one that becomes an ongoing headache. And when problems do surface — a lifting edge, an unexplained rattle, a bond that's slowly failing — knowing exactly how to diagnose and fix the issue is the final skill most Tesla owners never learn until it's too late.
Troubleshooting Common Post-Installation Problems
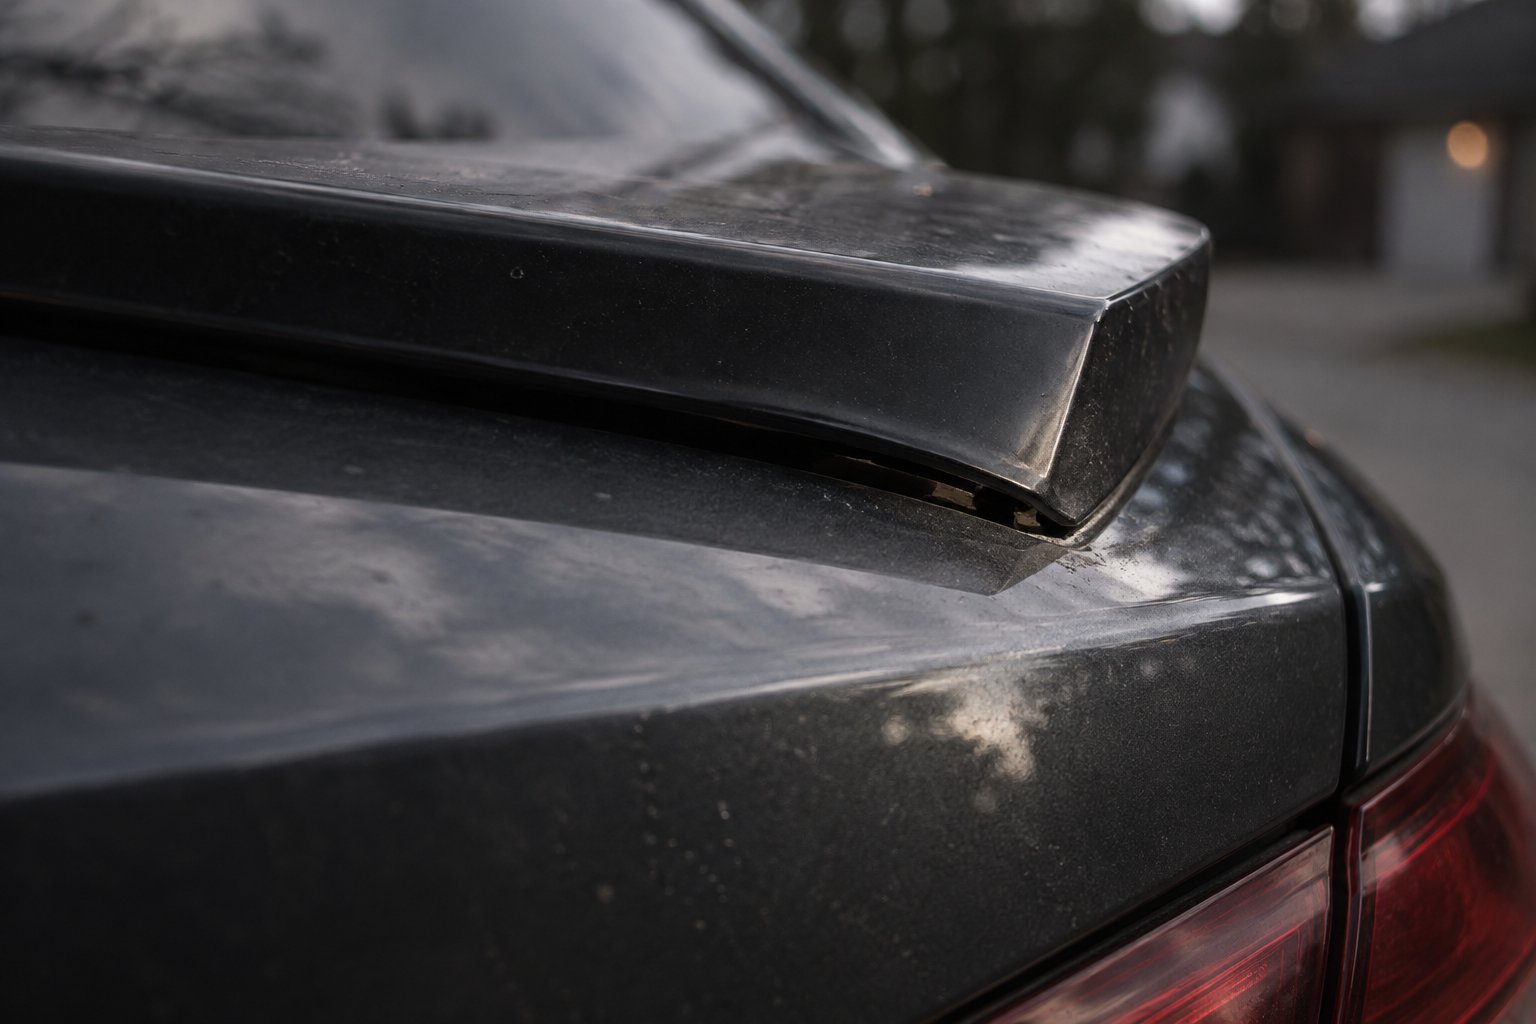
A spoiler that looked perfect at installation doesn't always stay that way. Maybe a corner started peeling up after your first highway drive. Maybe a faint rattling crept in during cold mornings. Or maybe you stepped back three days post-install and realized the whole thing is sitting a quarter-inch off-center — bonded firmly in the wrong spot. These problems are frustratingly common, yet finding concrete solutions online is nearly impossible. Most guides end the moment the spoiler is pressed into place, as if nothing could possibly go wrong afterward. In reality, post-installation issues are where most Tesla owners need help the most. Here's how to diagnose and fix every common problem without making things worse.
Fixing Spoiler Lifting and Adhesive Failure
Edges lift first. Always the edges. This isn't random — it's physics. The outer ends of a spoiler experience the highest peel forces from wind at highway speeds and from trunk lid flex during opening and closing. If the initial installation involved uneven pressure (more force in the center, less at the tips), those edges never achieved full adhesive contact in the first place. Insufficient surface prep compounds the issue: a microscopic film of wax, silicone, or ceramic coating residue at one end of the mounting zone means the tape bonded to a contaminant layer instead of the clear coat. Temperature extremes deliver the final blow — summer heat softens the adhesive while winter cold stiffens it, creating a seasonal expansion-contraction cycle that gradually walks a poorly bonded edge away from the surface.
If the lifting is limited to a small section — say, one corner peeling up less than half an inch — you can often re-bond without removing the entire spoiler. Clean the exposed area beneath the lifted edge with isopropyl alcohol on a cotton swab, let it dry fully, then apply a thin strip of fresh 3M VHB tape or a bead of 3M Super Weatherstrip Adhesive along the gap. Press the edge firmly back down and hold steady pressure for two to three minutes. Secure it with a padded clamp or a strip of painter's tape pulling the edge tight against the trunk surface, and leave it undisturbed for 24 hours.
When does a tesla spoiler adhesive failure repair require full reinstallation? Two scenarios demand it: when lifting has progressed across more than a third of the spoiler's contact length, or when the lifted section reveals that the original adhesive never fully bonded (the tape surface looks clean and un-transferred rather than showing the torn, fibrous texture of a properly cured VHB bond). In these cases, partial re-bonding will only delay the inevitable. Remove the spoiler completely using the heat-and-floss method covered earlier, strip and reapply fresh adhesive, re-prep the surface, and install again from scratch.
Resolving Rattling, Trunk Alignment, and Water Intrusion Issues
A tesla spoiler rattling noise after install is one of the most annoying outcomes — and one of the easiest to misdiagnose. The instinct is to blame the spoiler itself, but the source is usually one of three things: incomplete adhesive contact leaving a small unsupported section that vibrates against the trunk lid, loose bolt-on hardware that wasn't torqued to spec, or a spoiler design with integrated fins or lips that catch turbulent air at specific speeds.
For adhesive-mounted spoilers, the fix starts with identifying the rattle point. Press your hand firmly along different sections of the spoiler while someone else taps the trunk lid from below. When you press down on the section that eliminates the noise, you've found your gap. Apply pressure and supplemental adhesive to that zone following the same partial re-bond technique described above. For bolt-on spoilers, check every fastener with the appropriate socket or wrench — vibration from road surfaces loosens hardware over time, especially if thread-locking compound wasn't applied during the original installation. A drop of medium-strength Loctite (blue, not red) on each bolt prevents future loosening without making removal impossible.
Trunk latch alignment is a subtler problem, particularly on the Model 3. The trunk lid on a Model 3 is relatively lightweight, and adding a spoiler — especially a solid carbon fiber unit — shifts the center of gravity slightly. In some cases, this added weight is enough to change how the trunk latch engages, causing the lid to sit slightly higher on one side or requiring more force to close. If your trunk no longer closes with the same satisfying click it had before installation, check the latch striker position. Tesla's trunk latch striker is adjustable — loosening the two mounting bolts allows you to shift the striker plate up, down, or laterally by a few millimeters until the latch engagement feels clean again.
Water intrusion is exclusively a bolt-on spoiler concern. Every hole drilled through the trunk lid is a potential leak path, and sealant that seemed adequate during a dry installation may fail after months of rain, car washes, and temperature cycling. To check for leaks, open the trunk and inspect the interior surface directly beneath each bolt location. Water staining, dampness, or early corrosion around the bolt holes signals a seal failure. The fix involves removing the affected bolt, cleaning both the bolt shaft and the hole with IPA, applying a fresh bead of marine-grade silicone sealant or butyl tape around the bolt shaft, and re-torquing. Check again after the next heavy rain to confirm the seal holds.
How to Safely Remove and Reinstall a Misaligned Spoiler
You followed every step. You dry-fit, marked your alignment tape, pressed carefully from center outward — and somehow the spoiler still bonded a few millimeters off-center. You can see it every time you walk behind the car, and it's driving you mad. Knowing how to fix a misaligned tesla spoiler without destroying your paint is a skill worth learning, because this scenario happens to experienced installers too, not just first-timers.
Do not attempt to slide or shift a bonded spoiler into the correct position. VHB tape is designed to resist shear forces, and dragging a bonded spoiler sideways across your trunk lid will scratch the clear coat underneath the adhesive layer. The only safe correction is a full removal and reinstallation.
Start by softening the adhesive with controlled heat. A hair dryer on high or a heat gun on low, held five to six inches from the spoiler surface, works well. Heat one six-inch section at a time for 30 to 45 seconds, then use dental floss or fishing line to cut through that heated section before moving on to the next. Work from one end to the other in a slow, methodical progression — patience here is what protects your paint. When lifting the freed spoiler, pull upward at the shallowest angle possible. A near-vertical pull concentrates force on a small paint area and risks pulling clear coat. A 15- to 20-degree pull angle distributes the force across a wider zone.
After removal, clean all residual adhesive from both the trunk lid and the spoiler's underside. The trunk surface gets the full treatment: adhesive remover, clay bar, and a final IPA wipe. The spoiler needs fresh VHB tape — never reuse old adhesive strips, even if they still feel sticky. The cross-linked bond structure is compromised once broken, and reused tape delivers a fraction of the original bond strength. Apply new 3M VHB strips to the spoiler, re-mark your alignment using painter's tape with corrected positioning, and install again as if it were the first time. Two attempts is not a failure — it's precision.
| Problem | Likely Cause | Recommended Fix |
|---|---|---|
| Edges lifting within days | Uneven pressure during install; surface contaminants at edges; insufficient adhesive coverage | Re-bond with fresh VHB tape or adhesive at affected edge; if lifting exceeds one-third of contact area, fully remove and reinstall |
| Gradual adhesive failure across full bond | Installation over ceramic coating, PPF, or wrap without surface prep; cold-weather install preventing proper wet-out | Remove spoiler completely, strip coating from bonding zone, re-prep bare paint, and reinstall with fresh adhesive |
| Rattling or buzzing at speed | Gap between spoiler and trunk lid from incomplete adhesive contact; loose bolt-on fasteners | Identify rattle point by pressing along spoiler; fill gap with supplemental adhesive or tighten hardware with thread-locking compound |
| Trunk lid not latching properly | Added spoiler weight shifting trunk center of gravity, altering latch engagement (most common on Model 3) | Adjust trunk latch striker position by loosening its two mounting bolts and shifting the striker until latch engagement is clean |
| Water leaking into trunk (bolt-on only) | Sealant around drill holes has degraded or was insufficiently applied during installation | Remove affected bolts, clean holes with IPA, reapply marine-grade silicone sealant or butyl tape, and re-torque |
| Spoiler bonded off-center | Adhesive backing removed before final alignment check; alignment tape marks shifted during bonding | Heat-soften adhesive, cut through with dental floss at shallow angle, remove spoiler, clean surface, apply fresh tape, and reinstall with corrected positioning |
| Adhesive residue on paint after removal | Normal result of removing cured VHB tape — adhesive is designed to be permanent | Apply automotive adhesive remover to microfiber cloth, work in small circles, follow with clay bar and IPA wipe |
Most of these problems are preventable with careful installation technique — but even experienced hands encounter the occasional misalignment or stubborn rattle. Having a clear repair path for each scenario keeps a minor setback from becoming an expensive body shop visit. The remaining question for many owners isn't whether they can handle the installation and troubleshooting themselves, but whether the total investment — in both time and money — makes DIY the right choice compared to professional installation.
Spoiler Costs and DIY vs Professional Tesla Spoiler Install
Knowing how to install a spoiler is only half the equation. The other half — how much does this actually cost? — is the question most guides conveniently skip. Yet it's the question that determines whether you tackle the project in your garage on a Saturday morning or hand it off to a professional. The tesla spoiler installation cost varies dramatically depending on three factors: the spoiler material, the mounting method, and who actually does the work. Breaking down each factor gives you a realistic budget before a single piece of adhesive backing gets peeled.
Spoiler Cost Ranges by Material and Type
Not all spoilers are created equal — and the price gap between the cheapest and most premium options is wider than most owners expect. Material choice drives the majority of the cost difference, and understanding the tier structure helps you match your budget to your goals.
ABS plastic sits at the entry level. These spoilers are injection-molded from thermoplastic, then typically finished in gloss black or a carbon-fiber-look pattern (which, as covered earlier, is a printed or hydro-dipped cosmetic layer — not actual carbon fiber). ABS spoilers generally fall in the most affordable range and serve well for owners who want the visual effect of a rear lip without a significant financial commitment. They're also the least painful to replace if damaged.
Wet-lay carbon fiber occupies the mid-tier. These spoilers use real carbon fiber reinforcement combined with resin applied during the manufacturing process. The result is a genuine carbon weave visible under the clear coat — authentic material at a more accessible price point than premium alternatives. Quality varies considerably between manufacturers, so evaluating edge finishing, weave consistency, and clear coat quality matters more in this tier than in any other.
Dry carbon fiber (prepreg) represents the premium end of the tesla carbon fiber spoiler price range. Prepreg construction uses carbon fiber sheets pre-impregnated with precisely controlled resin content, then cured under heat and pressure. The result is a lighter, stiffer, and more dimensionally consistent product — but also a significantly more expensive one. Dry carbon spoilers can cost several times more than their ABS equivalents, and pricing varies further depending on brand reputation, fitment precision, and whether the spoiler is designed for a specific Tesla model or sold as a more universal fit.
Fitment precision is worth emphasizing here. A spoiler engineered specifically for a Model 3 Highland trunk lid or a Model Y liftgate will typically align better and require less improvisation during installation than a universal-fit product designed to work across multiple vehicle platforms. That model-specific engineering often costs a bit more upfront — but it can save significant time and frustration during the mounting process. Retailers like CUTIM specialize in carbon fiber spoilers designed specifically for Tesla Model 3 and Model Y, offering options that pair premium carbon fiber material with model-specific fitment to deliver a sportier rear profile without the alignment headaches that generic alternatives sometimes introduce.
One more variable that affects pricing: finish. Gloss-coated carbon fiber spoilers typically cost slightly more than matte or satin alternatives due to the additional clear coat application and polishing steps involved in manufacturing. Neither finish is inherently better — it's an aesthetic preference — but it does influence the final number on the receipt.
DIY Installation vs Professional Labor Costs
Here's where the real decision lives. You've chosen your spoiler, you understand your Tesla's trunk geometry, and you've read through the surface prep and installation steps. The question is: should you do this yourself, or pay someone else to handle it?
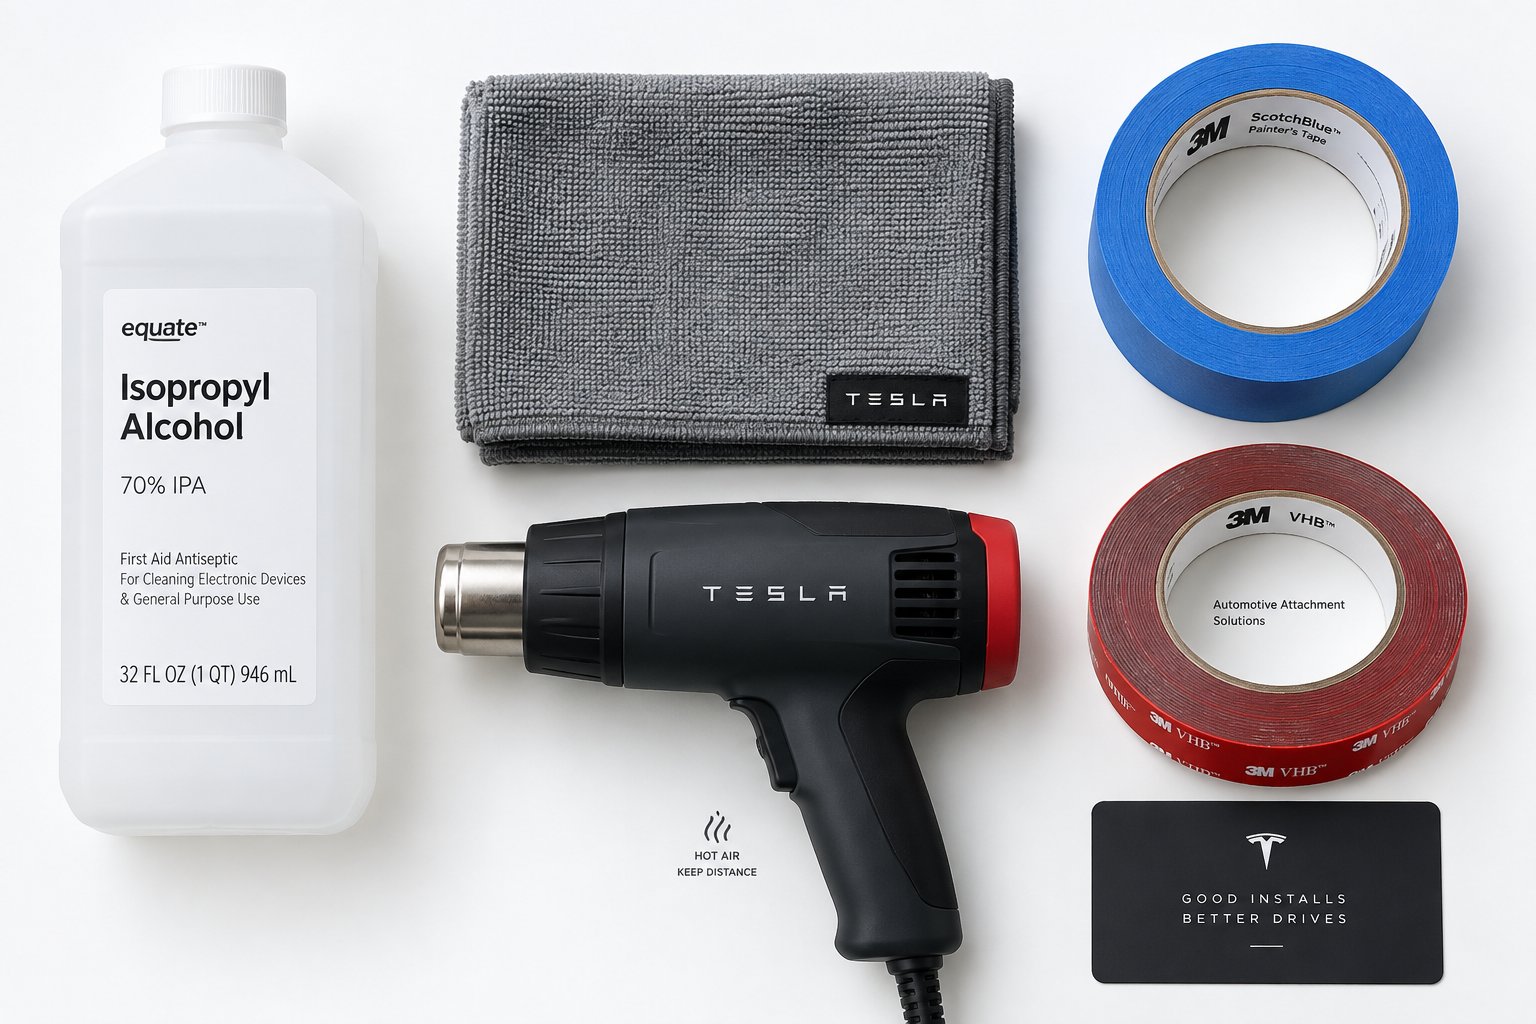
A DIY adhesive spoiler install requires remarkably few tools — most of which you probably already own or can pick up for minimal cost:
- Isopropyl alcohol (70% or higher)
- Lint-free microfiber cloths
- Painter's tape for alignment marking
- A hair dryer or heat gun (optional but recommended)
- Patience and a temperature-controlled workspace
That's it. No specialized equipment, no lifts, no pneumatic tools. The consumable cost is negligible, which means your total project cost is essentially the price of the spoiler itself. For a straightforward adhesive-mounted lip spoiler on a Model 3 or Model Y, most owners complete the process in 30 to 60 minutes — including dry-fitting and alignment.
Professional installation through an auto detailer, body shop, or Tesla-specialist installer typically adds labor cost on top of the spoiler price. Rates vary by region and shop, but you're generally looking at a meaningful addition to your total project budget for what amounts to 30 to 90 minutes of shop time. Some detailers include installation as a complimentary service when you purchase the spoiler through them, which can offset the labor premium.
So when does paying a professional actually make sense? The decision hinges on which irreversible steps your project involves — and your honest comfort level with each one.
For adhesive-mounted spoilers, the irreversible moment is adhesive commitment. Once VHB tape meets paint with firm pressure, repositioning is difficult and re-bonding requires fresh tape. If you've read through the alignment and mounting steps in this guide and feel confident executing them, DIY is the logical choice. The risk profile is low, the tools are minimal, and the financial savings are real.
For bolt-on spoilers, the calculus shifts. Drilling through your Tesla's trunk lid is a permanent modification. A misplaced hole can't be un-drilled, and improper sealing creates water intrusion problems that may not surface until months later. If you don't own a drill press or haven't drilled into automotive sheet metal before, professional installation isn't an unnecessary expense — it's risk management.
| Factor | DIY Installation | Professional Installation |
|---|---|---|
| Added Labor Cost | None — your time only | Varies by shop and region; adds meaningfully to total project cost |
| Time Investment | 30–60 minutes (adhesive); 1–2 hours (bolt-on) | Usually same-day; drop-off and pick-up |
| Risk Level | Low for adhesive; moderate to high for bolt-on | Low — experienced hands reduce alignment and drilling errors |
| Best Spoiler Types | Adhesive lip spoilers, small to mid-size wings, OEM replacements with templates | Bolt-on spoilers, large carbon fiber wings, any install requiring drilling or bumper modification |
| Tools Required | IPA, microfiber cloths, painter's tape, optional heat gun | Provided by the shop |
| Primary Advantage | Significant cost savings; full control over pace and precision | Professional accountability; reduced risk of paint damage or misalignment |
| Primary Drawback | Mistakes are yours to own; no warranty on workmanship | Higher total project cost; scheduling required |
The honest answer for most Tesla owners considering a standard adhesive spoiler? DIY is the smarter play. The process is genuinely straightforward when you follow proper surface preparation and alignment technique, and the money saved on labor can be redirected toward a higher-quality spoiler — stepping up from ABS to real carbon fiber, for instance, without increasing total spend. The professional route earns its premium when drill bits, sealant, and irreversible modifications enter the picture.
Whichever path you choose, the final step before starting any installation isn't gathering tools or prepping surfaces — it's confirming that the spoiler you purchased actually fits your exact Tesla model, generation, and trim. A consolidated pre-installation checklist makes that verification foolproof, and it's the last piece that ties every element of this guide together.
Your Pre-Installation Checklist and Final Recommendations
You've absorbed the surface science, studied the curing chemistry, reviewed the cross-model differences, and mapped out your budget. Everything covered in this tesla aftermarket spoiler fitment guide distills down to a single practical question: am I actually ready to start? Skipping even one preparatory step — verifying model-year fitment, checking the surface condition of your trunk lid, or confirming your workspace temperature — can unravel an otherwise flawless installation. The checklist below consolidates every critical action into one scannable reference you can pull up on your phone right before you begin.
Pre-Installation Checklist
- Confirm exact model and generation fitment — Verify that your spoiler is designed for your specific Tesla (Model 3 pre-Highland, Model 3 Highland, Model Y, or Model S). A spoiler labeled "Model 3" may not fit a 2024+ Highland variant, and Model 3 spoilers are never interchangeable with Model Y.
- Inspect the trunk lid surface — Identify whether your trunk wears bare paint, ceramic coating, PPF, or vinyl wrap. If any coating or film is present in the mounting zone, plan to remove it before bonding.
- Gather your tools — Isopropyl alcohol (70%+), lint-free microfiber cloths, painter's tape, and optionally a hair dryer or heat gun. For bolt-on spoilers, add a drill, appropriately sized bits, torque wrench, sealant, and the manufacturer's template.
- Check ambient temperature — Confirm your workspace is between 60°F and 90°F (15–32°C). If you're below that range, move indoors or pre-warm the trunk surface before applying adhesive.
- Clean the mounting zone thoroughly — Wipe down with IPA, let it fully evaporate, and avoid touching the cleaned area with bare hands afterward.
- Dry-fit before committing — Place the spoiler on the trunk with adhesive backing intact. Check alignment from ten feet away, from both rear quarter panels, and mark edges with painter's tape.
- Review the manufacturer's instructions — Even if you've installed spoilers before, every product has slight differences in adhesive placement, tape width, and recommended pressure duration. Read them.
- Plan your curing window — Block out 48 to 72 hours where the trunk won't be opened, slammed, or subjected to highway speeds. A weekend installation with a parked Monday works well.
- Have backup adhesive on hand — Keep a roll of 3M VHB tape in the same width as your spoiler's original strips. If you need to reposition after a misalignment, fresh tape is mandatory — never reuse peeled adhesive.
Print this tesla spoiler install checklist or screenshot it. Walking through each point before you pick up a single tool eliminates the most common installation mistakes covered throughout this guide — the ones that send owners back to forums looking for fixes they could have avoided entirely.
Selecting a Quality Spoiler for Long-Term Results
Here's a pattern that emerges across every troubleshooting scenario, every adhesive failure, and every misalignment complaint in the Tesla community: the installation process gets blamed, but the spoiler itself was the original problem. A poorly manufactured spoiler with inconsistent curvature, uneven adhesive strips, or dimensions that don't quite match the trunk lid profile will fight you at every step — during dry-fit, during alignment, and especially during the curing window when micro-gaps between the spoiler base and trunk surface prevent full adhesive contact.
Carbon fiber spoilers from manufacturers that engineer specifically for Tesla fitment tend to produce dramatically better results than universal-fit alternatives. Model-specific tooling means the spoiler's underside curvature matches your trunk lid geometry precisely, the adhesive tape lands exactly where contact pressure is highest, and the outer edges sit flush without requiring improvised shimming or extra adhesive. That engineering difference is subtle in product photos but unmistakable during installation.
For Model 3 and Model Y owners looking for the best spoiler for tesla model 3 and model y applications, CUTIM's Carbon Fiber Spoiler collection offers options built around these exact principles — real carbon fiber material paired with model-specific design that delivers the sportier rear profile most owners are after, without the fitment guesswork that generic spoilers introduce. When your spoiler is engineered to match the trunk geometry discussed throughout this guide, every subsequent step — surface prep, alignment, bonding, curing — becomes significantly easier and more reliable.
Whether you choose ABS, wet carbon, or dry carbon fiber, whether you go adhesive or bolt-on, whether you DIY or hand it to a professional — the single principle that determines long-term success never changes:
Proper surface preparation and precise fitment matter more than any other variable in tesla spoiler installation — a well-prepped surface with a model-specific spoiler will outperform an expensive spoiler rushed onto a contaminated trunk lid every single time.
Take your time. Trust the curing process. And enjoy the view every time you walk away from your car.
Frequently Asked Questions About Tesla Spoiler Installation
1. How long does it take to install a spoiler on a Tesla?
An adhesive-mounted spoiler typically takes 30 to 60 minutes for a complete DIY installation, including surface cleaning, dry-fitting, alignment marking, and bonding. Bolt-on spoilers requiring drilling and sealing can take one to two hours. Keep in mind that you should also factor in a 48- to 72-hour curing window afterward where the trunk should remain closed and undisturbed for the adhesive to reach full bond strength.
2. Does installing an aftermarket spoiler void a Tesla warranty?
No. Under the Magnuson-Moss Warranty Act, Tesla cannot void your vehicle warranty simply because you added an aftermarket spoiler. The manufacturer must prove the modification directly caused a specific failure before denying coverage. However, any damage you cause during installation — such as paint chips from improper removal or water intrusion through improperly sealed drill holes on bolt-on spoilers — would not be covered, as that constitutes owner-inflicted damage rather than a manufacturing defect.
3. Can I install a Tesla spoiler over ceramic coating or paint protection film?
Installing directly over ceramic coating is not recommended because these coatings are chemically designed to repel adhesion, which severely weakens VHB tape bonds. You should lightly polish the ceramic layer off within the spoiler mounting zone before bonding. For PPF, the safest approach is to cut and remove the film in the spoiler footprint and bond directly to bare clear coat. Vinyl wrap carries similar risks — thicker wraps introduce flex that can cause the bond to shift over time, so removing the wrap in the bonding area is the most reliable path.
4. Will a Tesla Model 3 spoiler fit a Model Y?
No. Model 3 and Model Y spoilers are not interchangeable. The Model Y uses a full liftgate hatch with a different curvature radius, wider surface area, and sharper lateral curves compared to the Model 3's traditional sedan-style trunk lid. A Model 3 spoiler mounted on a Model Y will look visibly misaligned and may fail to bond securely because the underside curvature won't match the liftgate surface. Always purchase a spoiler engineered for your specific model — retailers like CUTIM offer carbon fiber spoilers designed with model-specific fitment for both the Model 3 and Model Y.
5. What should I do if my Tesla spoiler starts lifting at the edges after installation?
Edge lifting usually results from uneven pressure during installation, surface contaminants beneath the adhesive, or temperature extremes stressing the bond. If the lifting is limited to a small section — less than one-third of the contact length — you can clean the exposed area with isopropyl alcohol, apply a fresh strip of 3M VHB tape or weatherstrip adhesive, press firmly for two to three minutes, and clamp for 24 hours. If lifting has progressed across a larger area or the original tape never fully bonded, a complete removal and reinstallation with fresh adhesive and thorough surface preparation is necessary.